


mini idea board inspiration & giveaway
I love to repurpose all kinds of things, and frames are one of my favorite items to alter. When I spotted a cute collection of bright miniatures I had to grab a few. I love mood boards and idea books. I would have them everywhere, but am limited, on what I call, Display Space.
Thinking about this I thought it would be fun to create a miniature version. My frame is only 4.25 x 4.25 inches square, with an opening of 2.75 x 2.75 square. Super tiny and super sweet! I think I will use these as party favors at our next birthday bash! Want to make one? or Twenty?
Here is what I did ------------->
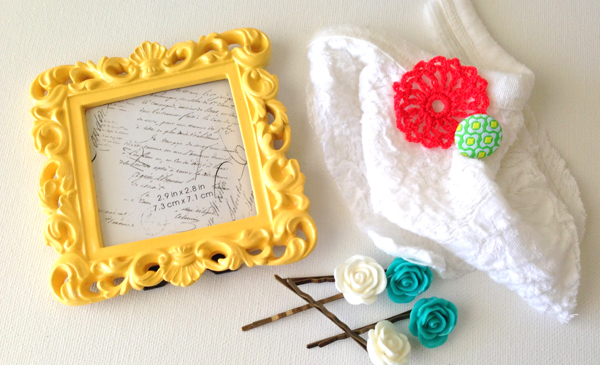
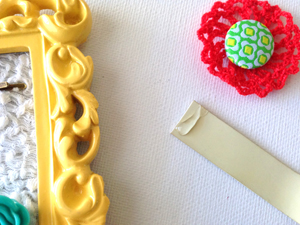
1. Gather your supplies -----> a frame, scrap of fabric, decorative bobby pins, assorted embellishments, wide elastic band, glue gun or permanent adhesive, my favorite scissors and ruler, a silicone mat and an exacto knife.
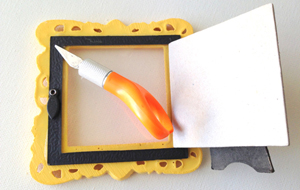
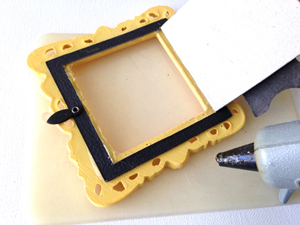
2. Open back of frame and take the glass or plastic out of your frame. Mine was fashioned with plastic so I carefully cut the plastic out of the frame using an exacto knife. -----> These knives are sharp. Please use extreme caution when cutting with them.
3. Measure the window opening of your frame. Cut fabric to a slightly larger size than this and set aside.

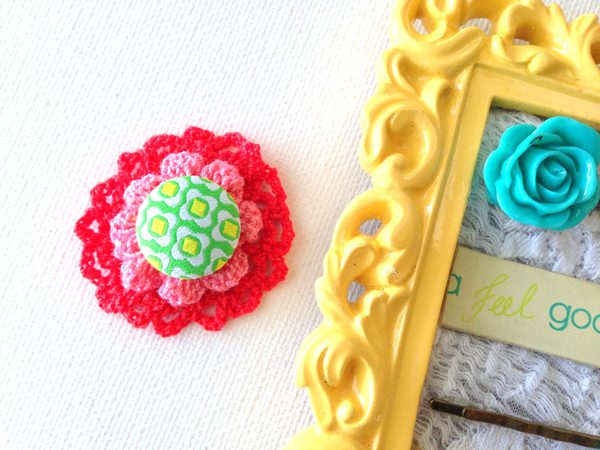
4. Line one edge of window opening with a thin bead line of glue. Attach fabric, press into place and let dry. Repeat with other three edges of window opening, stretching the fabric taut as you go. Let dry. Close back of frame and trim excess fabric as needed.
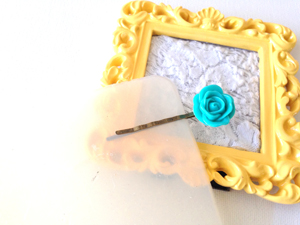
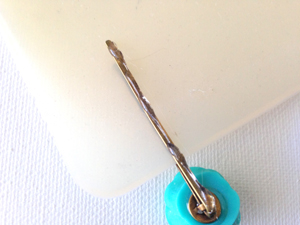
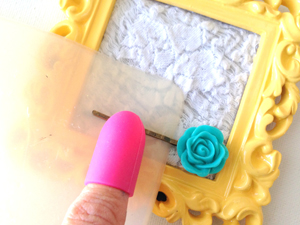
5. Open first bobby pin and slide over the silicone mat, making sure mat is firmly between both sides of pin. Turn mat over and apply a thin bead line of glue to back side of pin. Adhere in place on fabric. Let dry, carefully remove mat. Repeat with second pin.
6. Cut your elastic band. Position on fabric and trim as needed. Place a thin bead line of glue on one end of band and attach to fabric. Hold in place for a few seconds. Let dry. Repeat with second side of band.

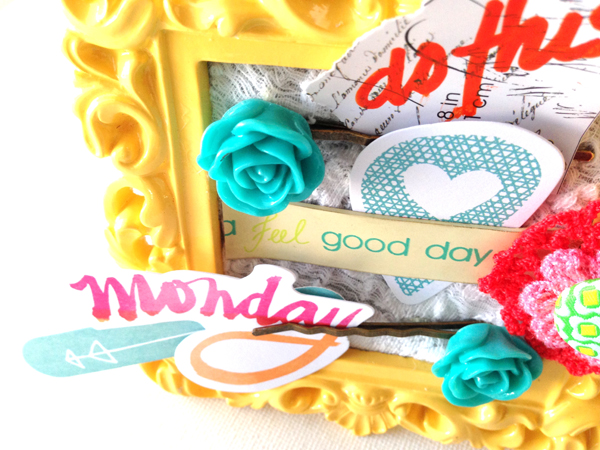
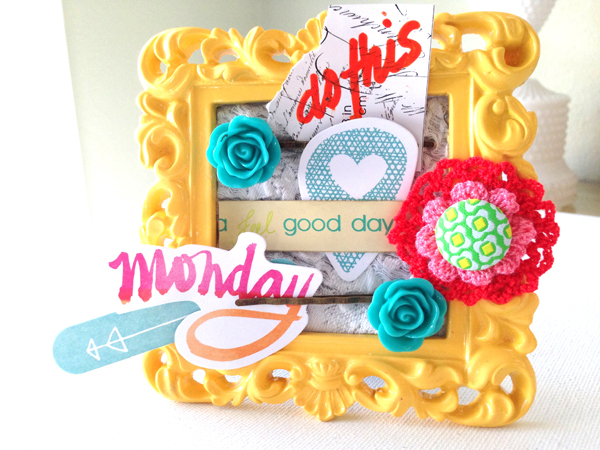
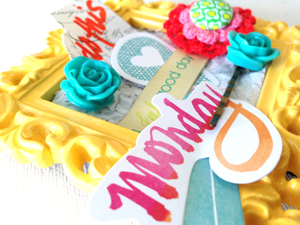
7. Select and position your embellishments and adhere in place. I chose to layer up a few varying sizes of crocheted flowers and a pretty fabric brad.
There you have it! A pretty little repurposed frame! Tack on a pretty word, a photograph, or reminder - now be inspired!
-------------> WOULD YOU RATHER WIN THIS ONE? I am giving it away on the ART TO THE 5TH BLOG. Head on over to read the post and enter for your chance to win!
UPDATE ! WE HAVE A WINNER ! CONGRATULATIONS ---> TERRI TURNER!

Enjoy the process!
*as an amazon affiliate, I receive a small incentive if you purchase a product through these links*
 Rae Missigman
Reader Comments (16)
Super cute ! Awesome idea for a birthday party as a favor for everyone to take !! :)
What a great little gift idea! I have five granddaughters that I craft with regularly. Wouldn't these be cute to do as a make and take if the plastic windows were removed prior to fun time? All but one of the girls is over 11 and even the little one could help with some of it. Thanks for a wonderful idea.
Thanks Cim! I love that idea too and plan on doing it for my own daughter's birthday ! Hopefully I will find frames with glass panes so I can remove them before the party - super easy and super cute! Enjoy and thank you for stopping by and reading! xx
This sounds so lovely Lynn! I can't wait until my granddaughter is old enough to craft with me - for now she just tries to eat everything - haha! xo
Love it - even a great little hostess gift!!! Thanks for all the inspiration!!!
Great idea, could be used as table decorations at a reception using the colors or the bride & groom…
So cute, love this, I just happen to have a few of these little black frames, now I know what to do with them,
I saw some of these frames in the dollar bins at the local craft store, I think they were supposed to be refrigerator magnets. They were pretty but my mind couldn't think outside the box like yours did!! Definitely will be going back and picking some up. I'm thinking of having Make and Create days with my two kids this summer, so we can get a head start on Christmas presents!! Thanks for the wonderful idea Rae!!
XoXo
OMG how cute!!! I love all the little bits and bobs and the riot of color! Thanks for sharing this with us. I see a few of these being made as Christmas gifts!!!
This is beautiful Awesome Job and so very creative
I would love to win it
As I just started a new job and and am looking for items for my desk
and this is perfect sooooooooooooo
Pick ME Pick ME Pick ME
Beautiful!! Thank you for sharing your talents!!
How adorable and such a great idea for so many occasions...Easy, quick, creative and fun! Love it!
This is cool. I am excited about making one of these. I like the fact it's compact in size. You could make a series of these. Love it! Thanks for the inspiration.
Great Idea Rae
How cute, I would love to create one for my daughter.
Thank you all for stopping by and commenting on this fun little project! It was one of my favorite! I appreciate all of your enthusiasm and kind words! Check back soon for another quick tutorial!