Roben-Marie Smith

Roben-Marie Smith


THIS AND OTHER  PRODUCTS AVAILABLE AT

       IS A REGISTERED TRADEMARK


 sandi-keene

Roben-Marie Smith

Blog Index
The journal that this archive was targeting has been deleted. Please update your configuration.

Entries in gelliart (7)

Tuesday
Jan212014

15 minutes of mixed media

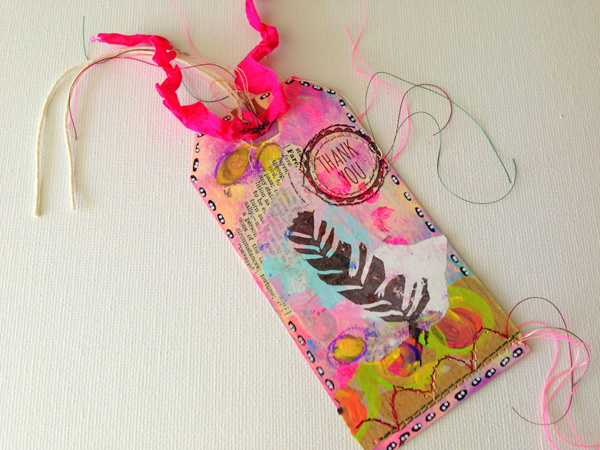
This week's 15 minutes of mixed media challenge turned out even better than I had hoped. I love the colors.

This week I started with a ghost print of a gelli print. This was a print that was already in my art journal. It gave me a slight edge, as starting with a back ground will do. I like it. Sometimes it is a great springboard for color and definition on a page.

Having backgrounds at the ready in your journal is a simple way to add layers to your 15 minute challenge as well as perserve supplies. I never wipe my gelli plate to clean it. I always keep printing until all the paint is depleted. This makes beautiful ghost (or light) prints. I also like to take extra paint off of the palette and swipe it on the page, smearing it out from the center as I go. To do this I like to use an old credit card or a scraper.

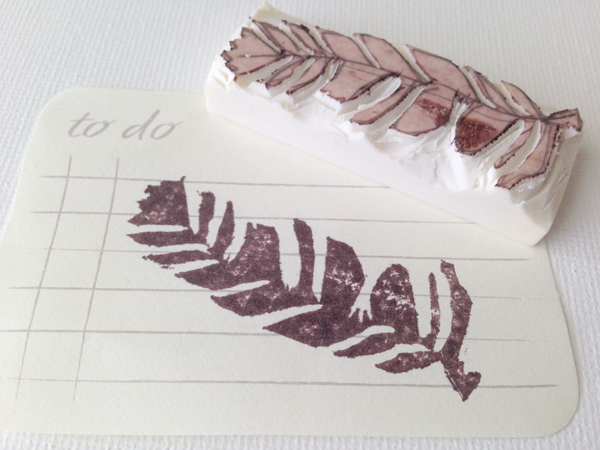
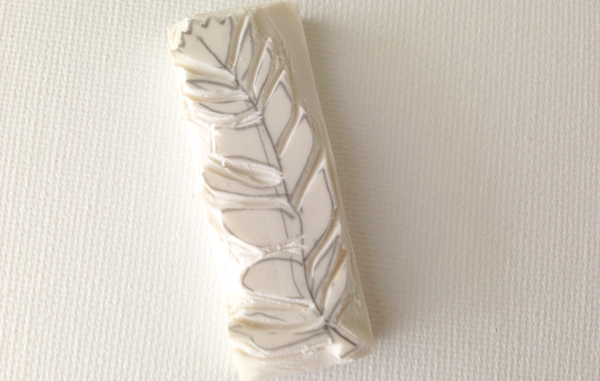
Here is the short list of supplies that I had on hand before I started the timer. Remember, having just a few supplies at the ready saves valuable time when the clock is ticking! *5 paint colors (just run of the mill cheap craft paints. I would list the colors, but most of them are so old the labels are worn off) *sticky note tabs *permanent marker *black and white paint pens *glue stick *scraps of painted deli paper *stamp *stamp pad *embosser (to speed up the drying process in between layers) *dylusions blue spray ink

Setting the timer is certainly a challenge on most days, but it gets my creative mind racing. I usually begin a bit harried, but by the time the buzzer rings I am in a flow. Remember- if you are joining in on this challenge and setting the timer- THIS IS YOUR ART JOURNAL. Depending on your schedule and what goals you have set for yourself, YOU DON'T HAVE TO STOP THERE. Keep creating. If nothing else, you will have spent 15 minutes setting up a base for your layout. I choose to stick to the 15 minutes so that I can post honest to goodness 15 MINUTES OF MIXED MEDIA ART JOURNAL PAGES.

If you have started playing along I would love to hear about it. Love how your art is turning out when you set the timer? Send me a few photos via the contact page- I would love to see them! Enjoy!

Thursday
Jan162014

i wanted to carve a feather stamp

Sometimes we don't always get what we want, but we might get lucky and like what we end up with.

So I wanted to carve a feather stamp. Feathers are my favorite thing right now, but...but it turns out that if you don't use your stamp carving tools for months you lose your touch. What I ended up with looks more like a leaf or branch of some kind, but I like it. I like the imperfections in each feather/leaf - not unlike in nature. If you want to have your own little imperfect feather leaf here is what I did ----->

1. Grab an eraser. I like the cheap ones from The Dollar Tree if you are just starting out. They aren't the best quality, but they come in a 3 or 4 pack for a dollar and are great for beginners.  I also like how they stay rigid when you go to stamp with them. You will also need a stamp carving tool. I use this SPEEDBALL set and love it. And you will need a pencil to draw your word or design on the eraser.

2. Draw your design. Don't forget to use tracing paper if you are writing a word or special design that will need to be drawn in reverse.

3. Start carving. Slow is key for me. This particular tool came with several cutting heads in the base of the handle. I used the smallest one for outlining my design first, then went back and carved out more with a larger, deeper cutting tool.

4. Finish off with the flat blade to smooth things out. My homemade stamps don't always look pretty when I am finished, but they stamp great!

Obviously I need to brush up on my stamp carving skills some more, but I think I will keep it. I like it's quirky shape and style. Here is what it looks like on a tag card project I did. Enjoy!

TAG CARD: gelli printed tag. painted deli paper scraps. book paper scraps. oil pastels. paint pens. machine stitching. thank you stamp from dollar bin at Target. my hand carved feather leaf stamp. recycled seam binding.

Tuesday
Dec242013

15 minutes of mixed media

New to the blog? This has turned my time in the studio around.

For this layout I started with a gelliprint background and had the following supplies at the ready before I started the timer---> *3 paint colors *black & white paint pens *permanent marker *a few scraps of painted deli paper *scissors *glue stick *number stamp set

Want to see some of my other creative exercises like this? Here you go! --->


Enjoy!

Wednesday
Dec042013

art stuff: something pretty to remind us

We use A LOT of magnets around our house, especially considering the size of our magnetic family wall calendar, but most of them aren't pretty. They're functional, heavy duty - meaning they can hold up a stack of papers three inches thick for the next Junior National Honor Society Meeting.

Adding just a pop of color and ART to this board makes it so much easier to view - overloaded schedules and all. This is our family calendar- not pretty, but useful.

Now this is is pretty. And fun. A little painted canvas turned into workable magnet. We have started using these on our family calendar to remind us of something important.

( Plus we reserve these ART magnets for special tidbits - like love notes and free tickets! No tacking up a yucky dentist appointment with these - fun stuff only! )

Sometimes all we need to feel better about our crazy schedules and hectic lives, is just a little bit of ART. Everyday life can be so routine that we dread it. That's why anything unexpected makes it so much better- like a secret note, or a child's drawing-  things that are visually pleasing. I don't like to LOOK at my family calendar. It is almost always overwhelming, but by adding a little bit of pretty, I get an unexpected smile from myself. I am reminded that eveyday life can be beautiful- I just have to help make it that way.

December is not so bad, but most of the time our calendar is overflowing with stuff to do, places to be, people to meet. Having something pretty to remind us to slow down, have fun, and LOVE YOUR LIFE - well that's worth looking at.

Thursday
Oct172013

art stuff: revisiting a favorite

Is it weird that looking at favorite art journaling pages makes me happy?

Wednesday
Sep112013

art stuff: more fun with gelli plate prints

I tell you people - I am addicted to this, so here are a few more!

I can't promise you that you won't see more of these.

Sunday
May052013

on the worktable: art journal

I had some fun recently experimenting with Gelli Arts, gel printing plates. This thing is SO cool! Once you get started you can't stop - it is totally addicting and super fun! Just squeeze some acrylic paints on the plate, roll with a brayer like this one, lay your paper over the top and press. Don't make the mistake I did in thinking you could only use the gelli plate a handful of times- you can use it forever! Silly me!

My favorite part of this was experimenting with all of the colors. Acrylic paints work best and that means getting to use budget friendly supplies, a bonus in my book. I experimented with book paper, deli paper, journal paper and even tissue paper. Each sheet turned out beautifully. I can't wait to journal on some of these papers. Thank you to my great teacher and friend, Roben-Marie for the tips and mini lesson.