Roben-Marie Smith

Roben-Marie Smith


THIS AND OTHER  PRODUCTS AVAILABLE AT

       IS A REGISTERED TRADEMARK


 sandi-keene

Roben-Marie Smith

Blog Index
The journal that this archive was targeting has been deleted. Please update your configuration.

Entries in stamped (14)

Tuesday
Jan212014

15 minutes of mixed media

This week's 15 minutes of mixed media challenge turned out even better than I had hoped. I love the colors.

This week I started with a ghost print of a gelli print. This was a print that was already in my art journal. It gave me a slight edge, as starting with a back ground will do. I like it. Sometimes it is a great springboard for color and definition on a page.

Having backgrounds at the ready in your journal is a simple way to add layers to your 15 minute challenge as well as perserve supplies. I never wipe my gelli plate to clean it. I always keep printing until all the paint is depleted. This makes beautiful ghost (or light) prints. I also like to take extra paint off of the palette and swipe it on the page, smearing it out from the center as I go. To do this I like to use an old credit card or a scraper.

Here is the short list of supplies that I had on hand before I started the timer. Remember, having just a few supplies at the ready saves valuable time when the clock is ticking! *5 paint colors (just run of the mill cheap craft paints. I would list the colors, but most of them are so old the labels are worn off) *sticky note tabs *permanent marker *black and white paint pens *glue stick *scraps of painted deli paper *stamp *stamp pad *embosser (to speed up the drying process in between layers) *dylusions blue spray ink

Setting the timer is certainly a challenge on most days, but it gets my creative mind racing. I usually begin a bit harried, but by the time the buzzer rings I am in a flow. Remember- if you are joining in on this challenge and setting the timer- THIS IS YOUR ART JOURNAL. Depending on your schedule and what goals you have set for yourself, YOU DON'T HAVE TO STOP THERE. Keep creating. If nothing else, you will have spent 15 minutes setting up a base for your layout. I choose to stick to the 15 minutes so that I can post honest to goodness 15 MINUTES OF MIXED MEDIA ART JOURNAL PAGES.

If you have started playing along I would love to hear about it. Love how your art is turning out when you set the timer? Send me a few photos via the contact page- I would love to see them! Enjoy!

Thursday
Jan162014

i wanted to carve a feather stamp

Sometimes we don't always get what we want, but we might get lucky and like what we end up with.

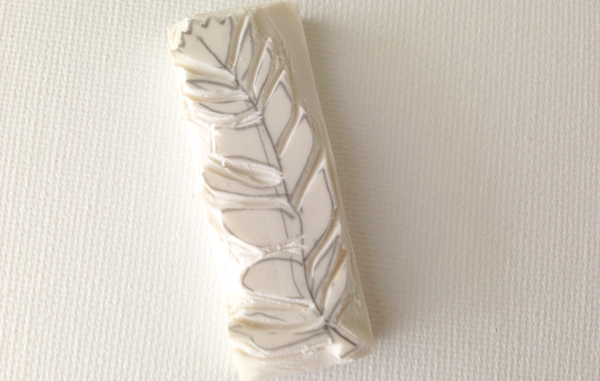
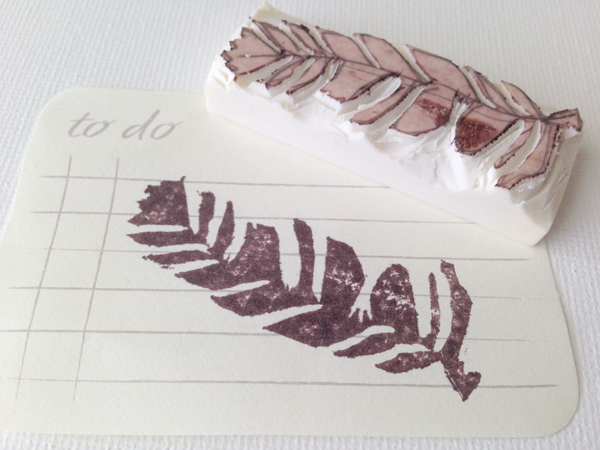
So I wanted to carve a feather stamp. Feathers are my favorite thing right now, but...but it turns out that if you don't use your stamp carving tools for months you lose your touch. What I ended up with looks more like a leaf or branch of some kind, but I like it. I like the imperfections in each feather/leaf - not unlike in nature. If you want to have your own little imperfect feather leaf here is what I did ----->

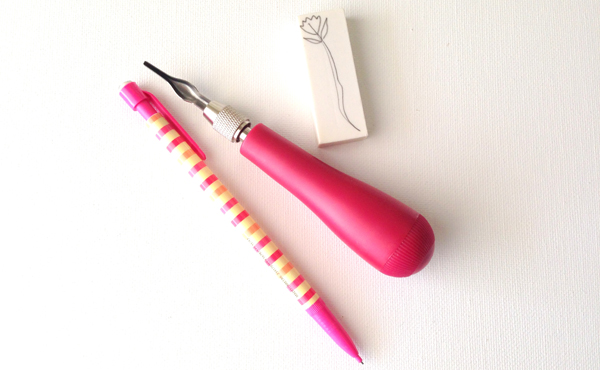
1. Grab an eraser. I like the cheap ones from The Dollar Tree if you are just starting out. They aren't the best quality, but they come in a 3 or 4 pack for a dollar and are great for beginners.  I also like how they stay rigid when you go to stamp with them. You will also need a stamp carving tool. I use this SPEEDBALL set and love it. And you will need a pencil to draw your word or design on the eraser.

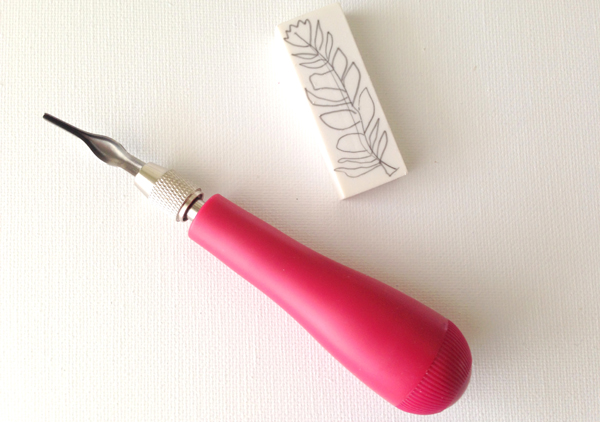
2. Draw your design. Don't forget to use tracing paper if you are writing a word or special design that will need to be drawn in reverse.

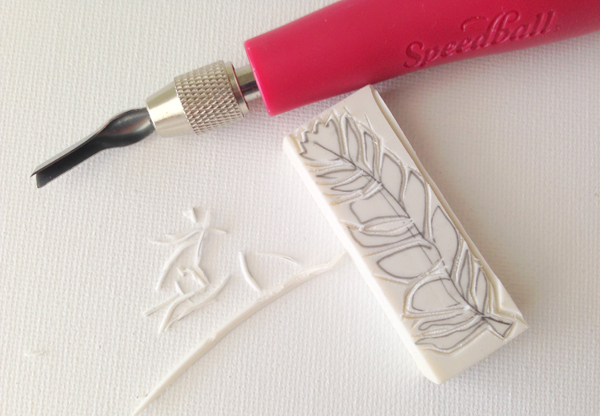
3. Start carving. Slow is key for me. This particular tool came with several cutting heads in the base of the handle. I used the smallest one for outlining my design first, then went back and carved out more with a larger, deeper cutting tool.

4. Finish off with the flat blade to smooth things out. My homemade stamps don't always look pretty when I am finished, but they stamp great!

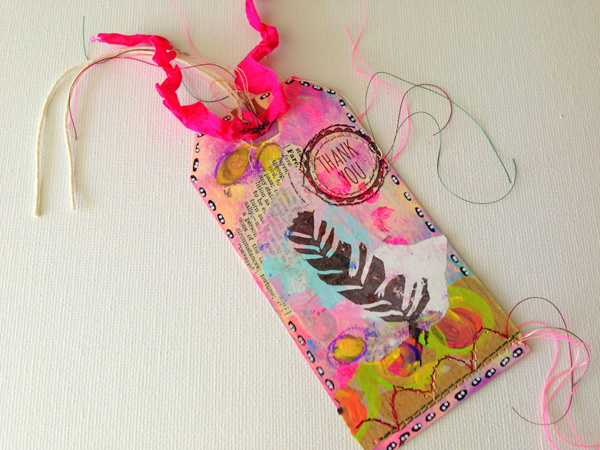
Obviously I need to brush up on my stamp carving skills some more, but I think I will keep it. I like it's quirky shape and style. Here is what it looks like on a tag card project I did. Enjoy!

TAG CARD: gelli printed tag. painted deli paper scraps. book paper scraps. oil pastels. paint pens. machine stitching. thank you stamp from dollar bin at Target. my hand carved feather leaf stamp. recycled seam binding.

Tuesday
Jan072014

15 minutes of mixed media

So this week my 15 MINUTES OF MIXED MEDIA challenge resembles a carnival ride. Not what I intended, but bright and colorful all the same.

I struggled this week. My base had no background, which always proves harder when the clock is ticking. I hurried and ended up with a bit muddier collection of colors than I wanted, so I overcompensated with bold stamps and bright colors in my second layer. Definitely a week I needed the embosser.

I did, however, remind myself to add some journaling this week. This is my weak spot. I like to keep the words inside, so writing them on a page of art is tough for me, and something I am working on.

I took a leap of faith on this page. I wanted to TURN the page on this one and I didn't. I let the clock tick and I kept working. I like the happy colors and bold shapes.

Here is my supply list for the week- things that were on the table when I started the timer. *yellow and pink dylusions spray inks *4 paint colors (the little acrylic craft paints) *black and white paint pens *permanent marker *scraps of deli paper *glue stick *scraper *embosser (to dry the layers) *paintbrush *stamp *stamp pad.

Sometimes we find in a challenge that even though it is not what we wanted or expected, we like it. Kind of like going to a carnival and getting on that scary ride. Sometimes it was worth the leap of faith.

Here are some more 15 minutes of mixed media art journal pages--->


Monday
Dec022013

art stuff: 15 minutes of mixed media

- wait, make that 10. Ten minutes of mixed media. Today I chose to make the challenge a bit harder. I set the timer for ten minutes instead of 15. I am still working in my small Dylusion Creative Journal.

I began today on an un-prepped page. I did have a few supplies laid out.

My supplies for this shorter challenge included some paint, inks, pastels,  and a permanent pen. I dried layers with a heat embosser and finished the layout off with a sealer. Start to finish - ten minutes. This just keeps getting better and better!

This all started here! You can see a few other examples of 15 minutes of mixed media here.

Monday
Nov252013

art stuff: 15 minutes of mixed media

I started this a few weeks ago and it has really made a difference at how I look at a few minutes of art time.

Just choose a medium, set the timer and go to work!

I am more inspired than ever to take that time and make it mine! Today I am working in the small (5" x 8") Dylusions Creative Journal.

I created this page from start to finish with the timer set to 15 minutes. I had a few supplies laid out and ready to use, but nothing precut. I also used a heat embosser to help speed up the drying time in between layers.

Not only am I working on a journal layout, I am finishing it. This is the best idea I ever came up with! Enjoy!

Tuesday
Nov192013

15 minutes of mixed media: an exercise in art and time management

You might remember reading here that I have to sometimes give myself small amounts of time in the studio, as opposed to none. I'll take it.

Some days are great and I get in there for hours on end. Others, not so much. I have been debating on how I could make those few moments more productive. This is what I came up with. - set a timer. That's it. Nothing monumental, nothing life altering. Just simple time management.

It works for violin practice. It works for silent reading. It works for time out. Why couldn't it work for art journaling? painting? project planning?

And so I bought a cute timer and I set it. This is what I got on day one. A beautiful art journal page. I worked quickly and diligently, but with no pressure to finish. After all, I get to set the timer again tomorrow.

For those inquiring minds- I set the timer for 15 minutes for this layout and I completed it in that time frame. I worked on foundation page that already had a base print that I created using the gelli plate. (my favorite tool of all time) Sorta like beat the clock only better, and prettier.

Monday
Nov182013

art stuff: tag love

I love tags and I use them for everything. They are cheap and you can buy them in bulk. Most recently this is my favorite.

A little art paper, dylusions inks, some stitching and this stamp set (my favorite). Add a little ribbon and and you have a pretty card for that special someone.

Tuesday
Nov122013

art stuff: pretty stuff & a chance to win

This is on the worktable this week - pretty zipper pouches...

These two bold and bright babies are sold, but look for more in my etsy shoppe next week! If you like this you could try to win THIS ONE in an auction over at this talented girls blog! But hurry - you only have until Friday!

Friday
Nov082013

newsworthy: win this pretty painted pouch

I gave a little peek of this here, when I talked about Roben-Marie's awesome Mixed Media Essentials stamps and what I did with them, but...

...I wanted to give you a few more shots of what this pretty painted pouch looked like.

You can win this in an auction over at Roben-Marie's blog next week, so be sure to stop over and read all about it!
Good Luck! ...But don't worry if you don't win this one - more coming to the etsy shoppe here soon!

Sunday
Nov032013

sneak peek: more stamp love

Did I mention I am in LOVE with these new Mixed Media Essentials Stamps by Roben-Marie Smith?

Want to see all the awesome projects I created using this stamp set? Click here for loads of inspiration!