Roben-Marie Smith

Roben-Marie Smith


THIS AND OTHER  PRODUCTS AVAILABLE AT

       IS A REGISTERED TRADEMARK


 sandi-keene

Roben-Marie Smith

Blog Index
The journal that this archive was targeting has been deleted. Please update your configuration.

Entries in stamp carving (3)

Tuesday
Jan282014

15 minutes of mixed media

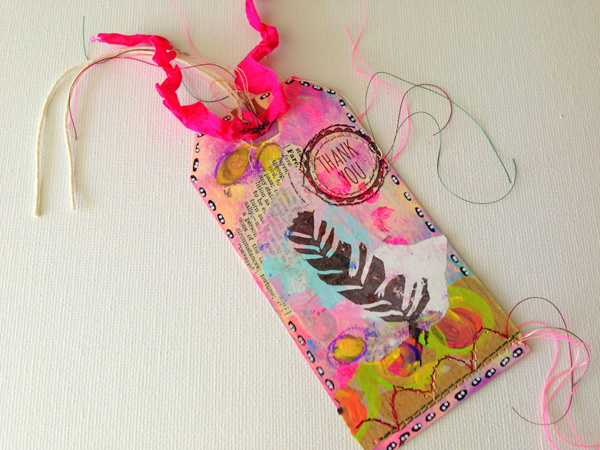
This week for my 15 minutes of mixed media I took a cue from a challenge in another project I am working on - The Documented Life Project. I wrote an entire two pages of journaling, then painted over all but what I felt like sharing.

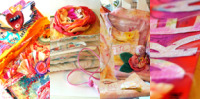
Before I set the timer this week I chose a two page layout that had been prepped with a simple background- just a few swipes of bright paint.

Once the clock was ticking I started writing. I wrote in pencil and paint. I had my embosser handy, as always, to dry layers more quickly, saving me lots of time. Once I finished journaling I started layering. First I painted over most of my writing with large circles of yellow and blue paint. I like to use glossy craft paints for these little pops of color.

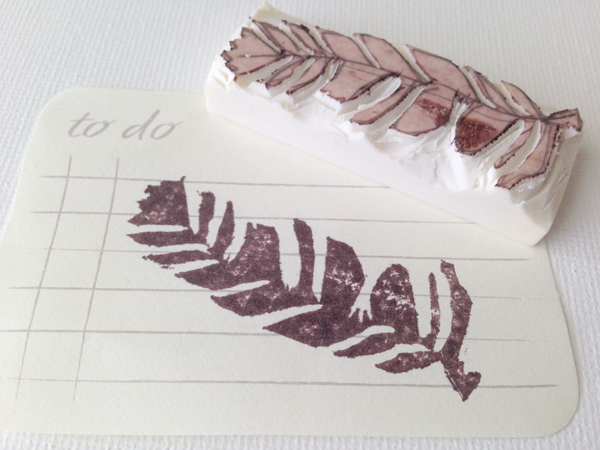
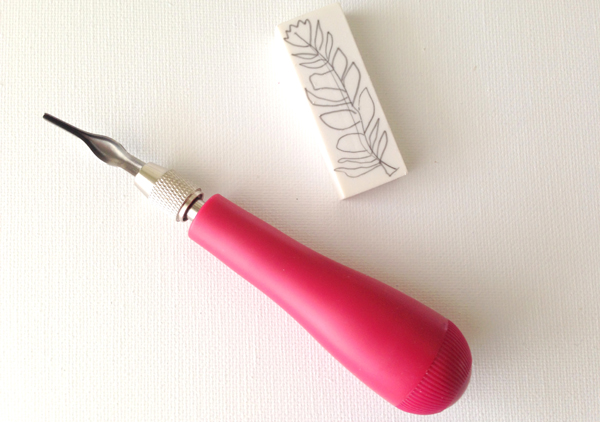
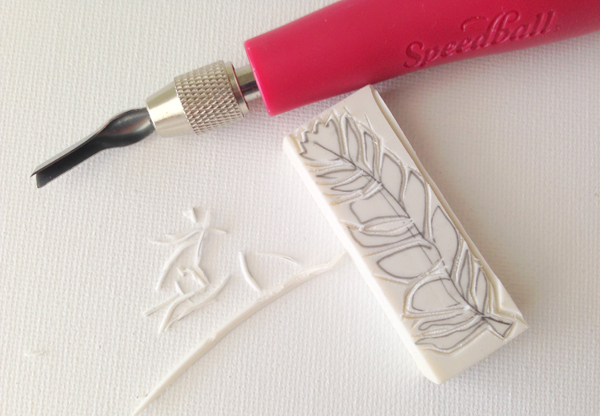
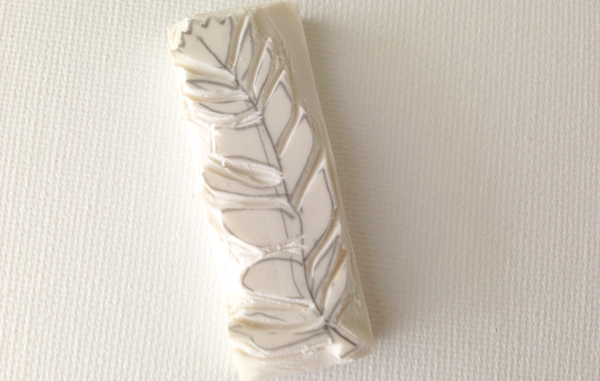
The scalloped border was created using a handcut cardstock stencil. Lots of little black and white details were added using my favorite thing ever- paints pens. Another recycled stencil, a scrap of laser cut lace paper, was used with spray inks to create lots of tiny colorful squares all over my page. I used a hand carved stamp to create feather leaves.

My journal layout this week is bold and bright. I am learning to be brave and let go and let the colors choose themselves. Sometimes, like this week, they are pretty wild, and not what I would usually choose- but I like it!

Supplies at the ready when the clock started ticking this week: 4 colors of craft paint, black and white paint pens, two recycled cardstock stencils, hand carved feather stamp, sunshine dylusions spray ink, brown staz on ink pad, pencil.

Want to see more simple background ideas for your art journal pages created using 15 minutes of mixed media? Read here----->

Thursday
Jan162014

i wanted to carve a feather stamp

Sometimes we don't always get what we want, but we might get lucky and like what we end up with.

So I wanted to carve a feather stamp. Feathers are my favorite thing right now, but...but it turns out that if you don't use your stamp carving tools for months you lose your touch. What I ended up with looks more like a leaf or branch of some kind, but I like it. I like the imperfections in each feather/leaf - not unlike in nature. If you want to have your own little imperfect feather leaf here is what I did ----->

1. Grab an eraser. I like the cheap ones from The Dollar Tree if you are just starting out. They aren't the best quality, but they come in a 3 or 4 pack for a dollar and are great for beginners.  I also like how they stay rigid when you go to stamp with them. You will also need a stamp carving tool. I use this SPEEDBALL set and love it. And you will need a pencil to draw your word or design on the eraser.

2. Draw your design. Don't forget to use tracing paper if you are writing a word or special design that will need to be drawn in reverse.

3. Start carving. Slow is key for me. This particular tool came with several cutting heads in the base of the handle. I used the smallest one for outlining my design first, then went back and carved out more with a larger, deeper cutting tool.

4. Finish off with the flat blade to smooth things out. My homemade stamps don't always look pretty when I am finished, but they stamp great!

Obviously I need to brush up on my stamp carving skills some more, but I think I will keep it. I like it's quirky shape and style. Here is what it looks like on a tag card project I did. Enjoy!

TAG CARD: gelli printed tag. painted deli paper scraps. book paper scraps. oil pastels. paint pens. machine stitching. thank you stamp from dollar bin at Target. my hand carved feather leaf stamp. recycled seam binding.

Sunday
Aug182013

art stuff: carving some stamps

A talented and sweet friend of mine showed me how to do this at her lovely retreat a few years ago and I have been hooked ever since. Have I perfected it? Hek no! But I love them and their bold imperfections.


I think it's time for a new ink pad, but you get the idea. NOT perfect, but perfectly chunky.

I love using them in my art journal and on pretty mail art. Like this ----->

Funky and chunky. I love it!