Roben-Marie Smith

Roben-Marie Smith


THIS AND OTHER  PRODUCTS AVAILABLE AT

       IS A REGISTERED TRADEMARK


 sandi-keene

Roben-Marie Smith

Blog Index
The journal that this archive was targeting has been deleted. Please update your configuration.

Entries in christmas decor (6)

Thursday
Dec052013

art stuff: recycled sweater ornaments

one beautiful vintage sweater + one super duty front loader dryer = wooly heart ornaments

Please tell me someone else has done this - accidentally dried their favorite sweater! Well, I did it this week, and after I cried for three days I chalked it up to some yummy felted wool and a handful of awesome vintage buttons.

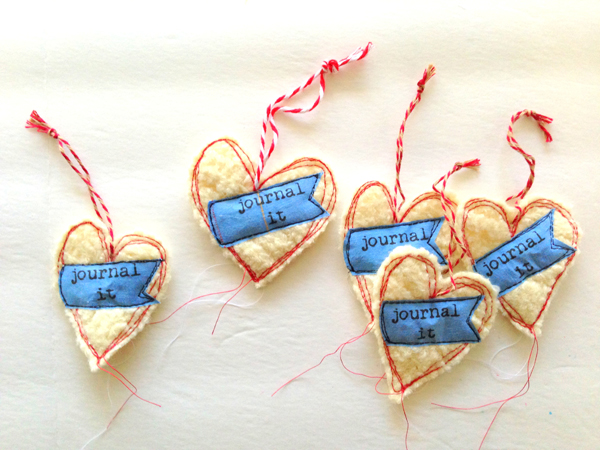
With Christmas just around the corner I decided to use some of the salvaged wool for pretty little ornaments. Let me tell you- I LOVE them! And they were so super easy that I thought I would share. (Just don't go shrink a sweater to make 'em! )

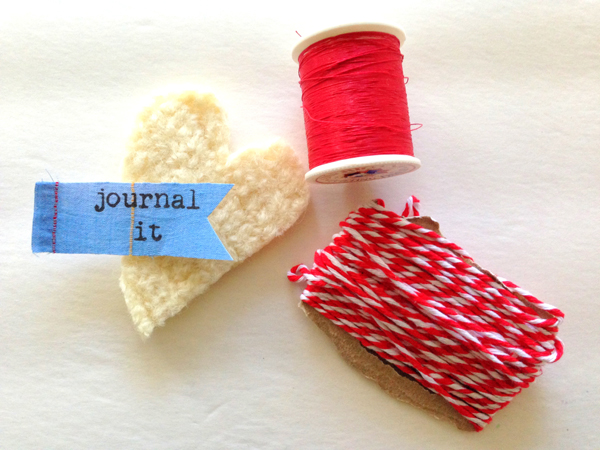
1. Grab some wool or felt or whatever else you have on hand that is nice and chunky and cut it into the shape of a heart.

2. Stamp or print a word or two on fabric and cut out.

3. Stitch all around the edges of your heart. Doodle style stitching is my favorite, so no need to be perfect here.

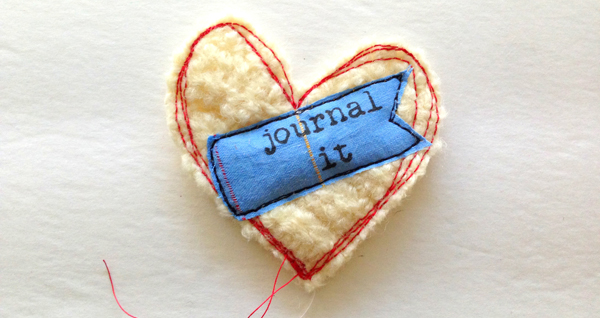
4. Lay your tag out on heart and stitch around that too. A contrasting color is always my favorite.

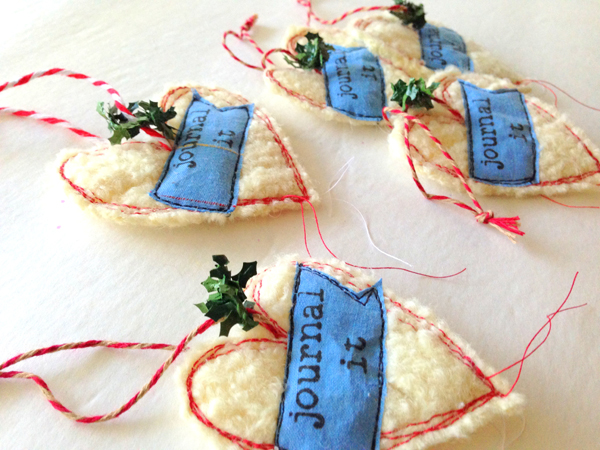
5. Using a needle with a large eye, thread some bakers twine or ribbon through the top of the heart and tie a knot.

You could be done here, but I decided to add a tiny ring of faux greenery on the twine. I love them!

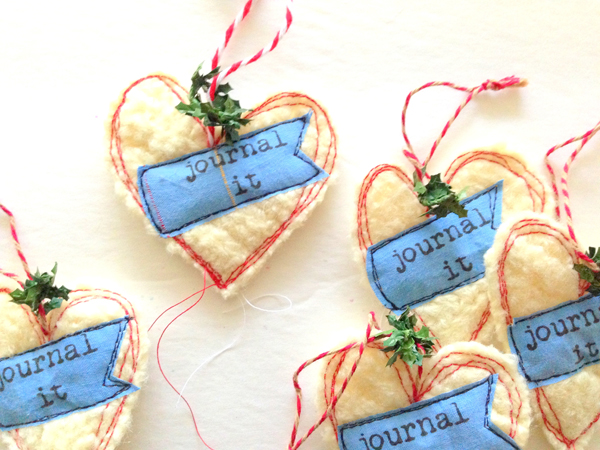
Super sweet. Super easy. AND I can share my favorite sweater with my besties!

Friday
Dec212012

Christmas Decor: Ice Skate Stocking

Here is a simple project to make using a tea towel and all of your favorite scraps of fabric, lace and trim. It makes the cutest "ice skate" stocking! 

I used a burlap base for my stocking because I like to use what I have on hand, but you could easily substitute this for another fabric of your choice. I also reinforced for my burlap with a vinyl lining giving it added durability!

Super easy and another way to repurposed and recycle your old materials!

Wednesday
Dec192012

Christmas Decor: Twig Jars

Vintage meets Cabin in these super easy TWIG JARS

I love to have candles burning all of the time - it isn't so much the scent that pulls me in as the homey feeling I get from seeing them glitter all about the house.

During the Holidays I thought it would be nice to have a few pretty jars to hold some of my staple and long burning basic pillar candles - and of course I wanted them to be re-purposed, so I used some old washed out candle jars.


While gathering supplies for this project I decided I did not want a very modern look, and yet I didn't want "country Christmas" either...something more like "vintage meets cabin" is what I was hoping for.


GATHERING SUPPLIES:

  • recycled glass jars
  • collected twigs & pine cones
  • vintage binding or ribbon & tape measure
  • Holiday berry picks
  • Assorted embellishments
  • Pretty trims
  • Number brads & plaques
  • Silky flower petals
  • Gesso, glitter & stain
  • Hot glue/ glue gun

THIS IS WHAT I DID:

  • Measure height of jar and cut or break several twigs to this size.
  • Begin gluing twigs around the jar, alternating thick & thin pieces.
  • Continue gluing until outside of jar is fully covered with twigs.
  • Twist & glue thin pliable twig or vine to top edge of jar.
  • Measure around jar and cut binding or ribbon one inch longer.
  • Glue binding or ribbon around center of jar.
  • Twist and glue tape measure into desired shape & glue to binding.
  • Brush gesso onto tips of pine cones and berries and dust with glitter. Let dry.
  • Once dry glue cones and berries to binding near tape measure.
  • Add embellishments as desired.

I used rhinestones, holiday stars, paper leaves, petals and number plaques to dress up my jars.

Worried about burning a candle in your pretty new jar? Just drop a battery operated tea light in the bottom and watch it sparkle!

Need a gift for a teacher, neighbor, co-worker or secret pal? Fill your pretty twig jars with wrapped holiday candies,bath salts, potpourri or a bag of tea lights and pop in a pretty bag! (Stay tuned for an easy how to on gift bags!) Now you are ready for any Holiday Gift Exchange!

Monday
Dec102012

Christmas Decor: Thirty Second Project

THIRTY SECOND PROJECT - for real!

Make this adorable vase in thirty seconds - ! Easy to change when the mood strikes you!

I love Goodwill! I love perusing the isles -  Looking at old discarded items makes me see them in a new light. I often leave the store with an armload, asking myself - now how am I going to re-purpose this?

This is not the first time I have picked up a belt and carried it home with little known purpose. They just always seem to come in handy. This pretty striped one was a great find because it was BRAND NEW! Yep - the $14.99 tag was still on her when I paid .69 cents at the counter! I love it when that happens.


As I have mentioned about a thousand times, I have a truckload of glass jars saved up. I have willed myself to start using them and this pretty little belt gave me a great idea. I just wrapped it around the jar a few times and cinched it up tight. Drop in a few twigs of holly and DONE! Now I have a pretty piece to dress up my laundry room for the Holidays and I can change it up when I get the urge! Super cheap - Super easy - AND RE-PURPOSED too! I love it!

Thursday
Dec062012

Christmas Decor: Simple Wrapped Candles

I love these little $1 candles from Wal-Mart. They burn nicely and have a pretty hardy scent so in my book that makes a great "party" candle. Something I can set out and let burn the entire night or hand out as a parting gift! Plus I love that when these candles have burned themselves out I can re-purpose them! They make wonderful storage containers. I use them in my studio for all sorts of bits and pieces.


For the Holidays this year, I knew I wanted to dress up the jars a bit and use them for little gifts.In keeping with my goal for the year -  to re-purpose as much as I can and spend as little as I can - I started brainstorming. I had tons of scrapbook paper that I could use up - and I love the little wraps that I have made in the past for jars, but I had been there, done that. I finally decided on TWINE! I love twine. I love, love, love it - for all things! So I dug out my jute twine.I had even picked up a roll that looked like baker's twine at IKEA recently for gift wrapping...so I dug that out too!

THIS IS WHAT I GATHERED FOR SUPPLIES:

  • $1 jar candles (you could use any size for this project)
  • strips of torn natural colored muslin
  • jute twine from the hardware store
  • baker's style twine from IKEA
  • hot glue/glue gun
  • ribbon
  • holly twigs/berries
  • assorted embellishments

THIS IS WHAT I DID:

  • cut a length of twine or muslin ( I used apprx. 4 yards for each jar).
  • removed jar lid and set aside.
  • starting at the mouth of the jar place a bead of glue and start twine here.
  • wrap two or three times, keeping a tight fit.
  • add a thin line of glue and wrap a few more times.
  • repeat until you reach the bottom of the jar.
  • trim excess twine and glue end well.
  • repeat on jar lid, starting at base of lid and working your way up.
  • repeat with other jars.
  • add ribbon, holly, jewels, flowers and more!

These make great party favors, as well as gifts for family and friends! Have fun!

Sunday
Dec112011

{ in the Christmas Spirit }


No matter how many dips and curves { LIFE } sends our way, the { JOY } of Christmas spirit has a way of making itself known.


It has been a long and bumpy road these past few months but Christmas has arrived and with it, feelings of happiness and blessings.

...take a peek at the the festive decorations that surround us and make us smile...

...a collection of ornaments, old and new, adorn the tree...

 ...a beautiful, vintage, multi-layered tulle skirt...
 ...hundreds of white lights twinkle away...