


Wednesday
Dec252013
merry merry christmas

I am thankful for each reader I have, and I wish you all a very Merry Christmas. I will be sending well wishes your way and hoping your New Year is a blessed one. Enjoy!

I am thankful for each reader I have, and I wish you all a very Merry Christmas. I will be sending well wishes your way and hoping your New Year is a blessed one. Enjoy!
December Daily, with Ali Edwards. I decided to play along this year thanks to the friendly nudging of my pal Sandi. She has been playing for years and has the most awesome collection of memory books to prove it. There are a million different way artists, scrapbookers and journalers are interpreting this project. I chose to keep it real. No buying new pretty stuff. No staging photos. Just good ole' daily life in December and a whole lotta leftover papers and trims from projects past.
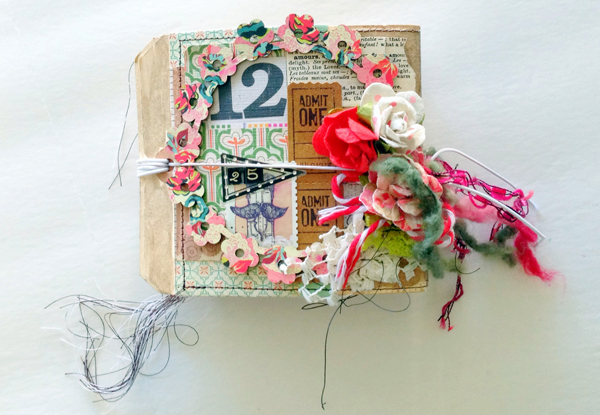
I didn't want anything too big either. In my mind I was thinking coffee table book. SMALL coffee table book. MINI coffee table book. Short, squat and chunky. I love the way this book feels so much I decided to create a quick mini workshop on how to make one. It will be available sometime after the New Year.

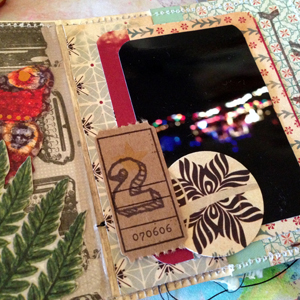
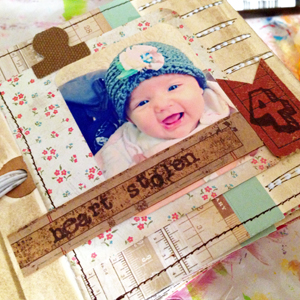
I stitched vintage style papers the base of each page of my book and added nature cut outs, stamped tags, fabric tabs and punched words. A little bit of doodling and paint plus some sparkle made it more "me" and less "scrapbooky."

I have to admit. I jumped on board for this project with more than a little skepticism. I just wasn't sure I would stick with it. What I should have been more worried about was actually STARTING the project. In all honesty I didn't start it on the 1st, but I DID start it and am now playing catch up.
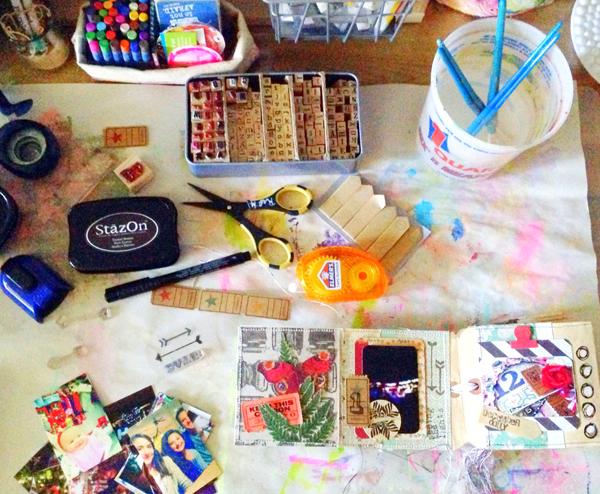
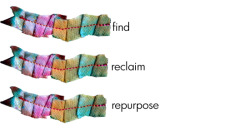
I have enjoyed working in a small format, with everyday photos of "us" AND re-purposing the art supplies I had in the studio. As far as catching up- well I will be there soon! But the very best part of this project of all is the VIEW!

I will post more page peeks soon. Hopefully in December, wink wink! Have a very Happy Christmas and a Merry Merry New Year! Enjoy!

Time was not on my side this year when it came to creating ten tons of christmas crafts. Luckily for me I had whipped up a few quick and easy ones last year that I could revisit. If you need a few last minute homemade holiday gifts just click on the images to find quick and easy tutorials!

Enjoy and happy holidays to you all!

one beautiful vintage sweater + one super duty front loader dryer = wooly heart ornaments
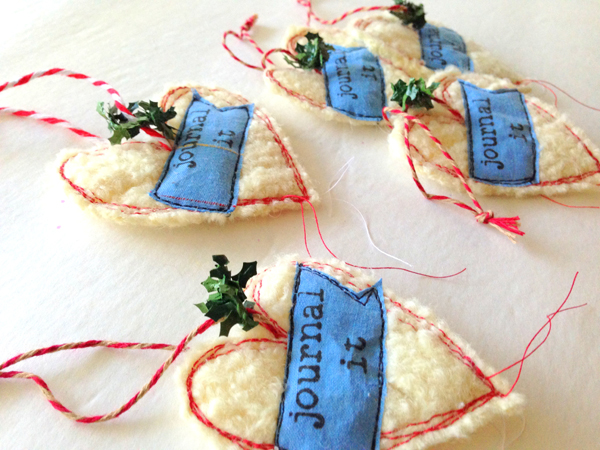
Please tell me someone else has done this - accidentally dried their favorite sweater! Well, I did it this week, and after I cried for three days I chalked it up to some yummy felted wool and a handful of awesome vintage buttons.
With Christmas just around the corner I decided to use some of the salvaged wool for pretty little ornaments. Let me tell you- I LOVE them! And they were so super easy that I thought I would share. (Just don't go shrink a sweater to make 'em! )
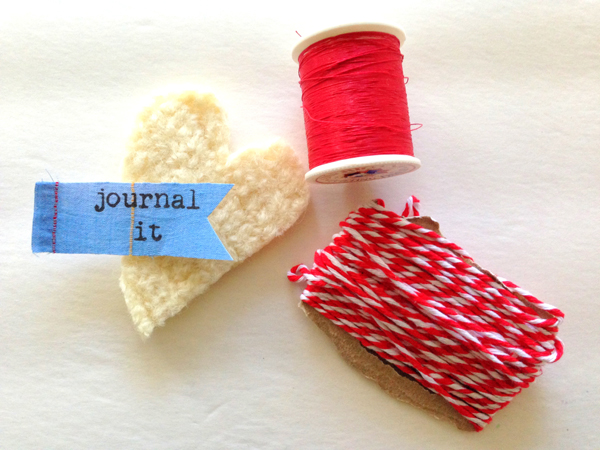
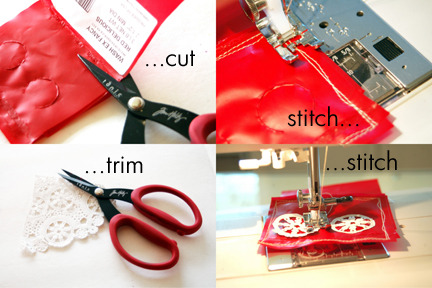
1. Grab some wool or felt or whatever else you have on hand that is nice and chunky and cut it into the shape of a heart.
2. Stamp or print a word or two on fabric and cut out.
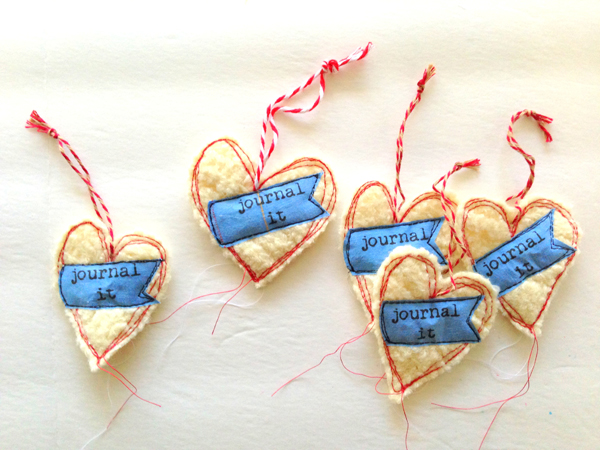
3. Stitch all around the edges of your heart. Doodle style stitching is my favorite, so no need to be perfect here.

4. Lay your tag out on heart and stitch around that too. A contrasting color is always my favorite.

5. Using a needle with a large eye, thread some bakers twine or ribbon through the top of the heart and tie a knot.
You could be done here, but I decided to add a tiny ring of faux greenery on the twine. I love them!
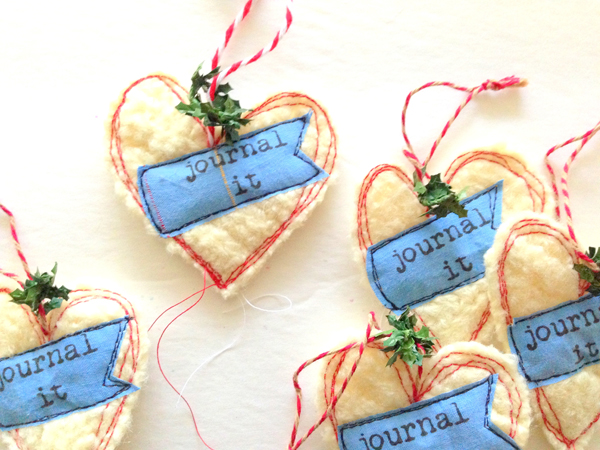 Super sweet. Super easy. AND I can share my favorite sweater with my besties!

 Christmas, Christmas Decor, Christmas Wrap, On The Worktable, Recycled, art stuff, live the repurposed life, sewing stuff, studio stuff, the process, tutorials | Email Article | Permalink
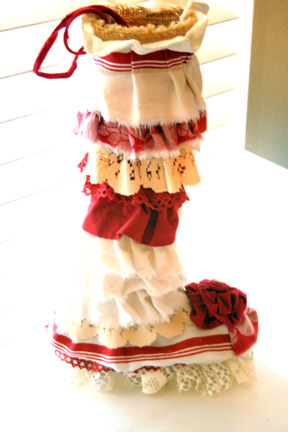
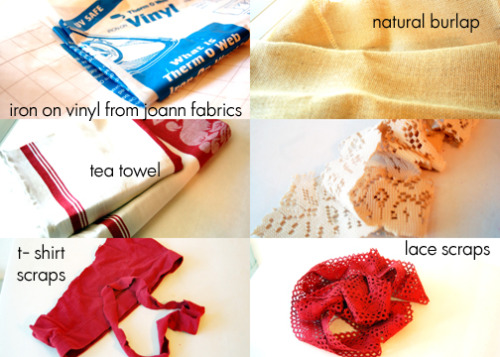
Here is a simple project to make using a tea towel and all of your favorite scraps of fabric, lace and trim. It makes the cutest "ice skate" stocking!
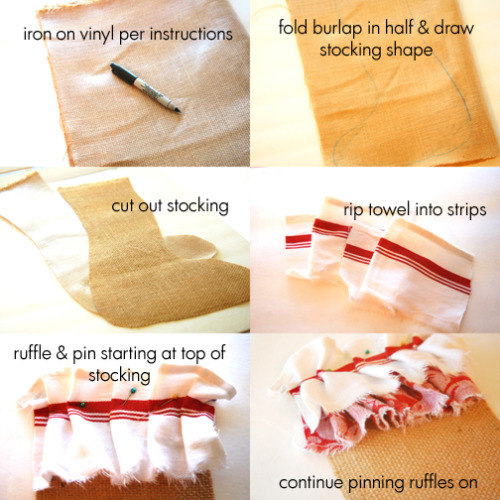 I used a burlap base for my stocking because I like to use what I have on hand, but you could easily substitute this for another fabric of your choice. I also reinforced for my burlap with a vinyl lining giving it added durability!
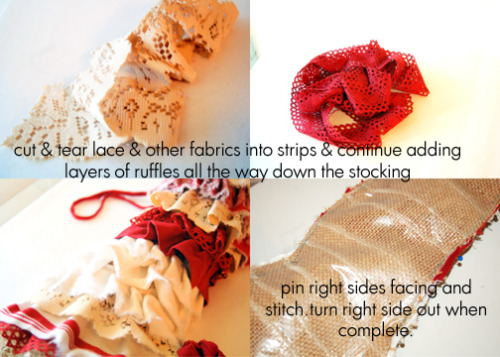
Super easy and another way to repurposed and recycle your old materials!

Christmas, Christmas Decor | Email Article | Permalink 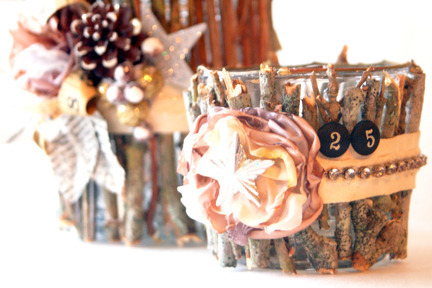
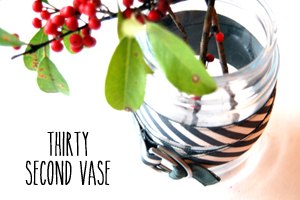
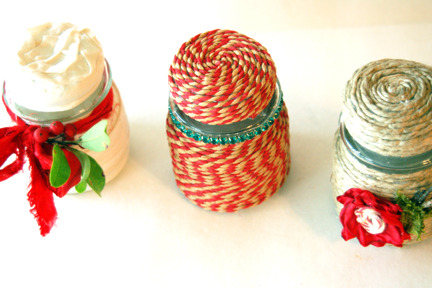
Vintage meets Cabin in these super easy TWIG JARS
I love to have candles burning all of the time - it isn't so much the scent that pulls me in as the homey feeling I get from seeing them glitter all about the house.
During the Holidays I thought it would be nice to have a few pretty jars to hold some of my staple and long burning basic pillar candles - and of course I wanted them to be re-purposed, so I used some old washed out candle jars.
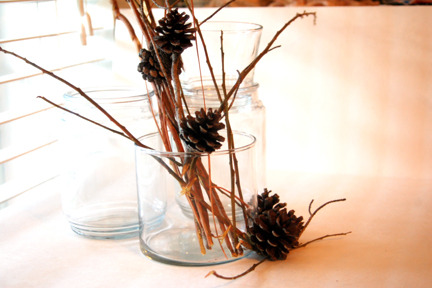
While gathering supplies for this project I decided I did not want a very modern look, and yet I didn't want "country Christmas" either...something more like "vintage meets cabin" is what I was hoping for.
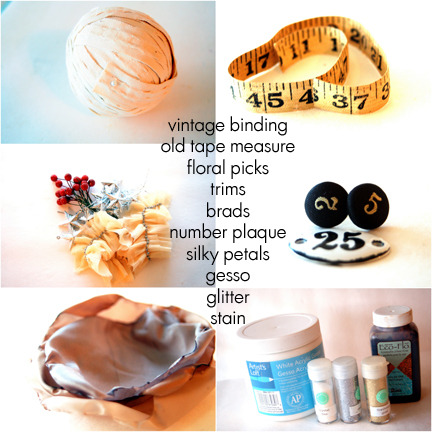
GATHERING SUPPLIES:
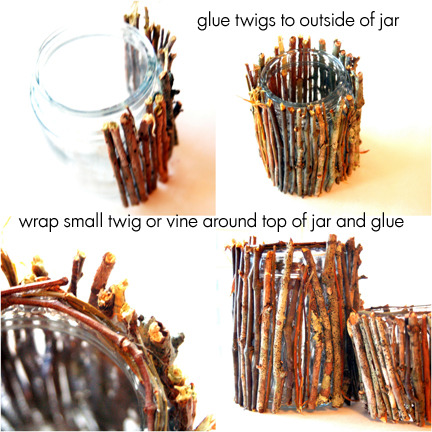
THIS IS WHAT I DID:
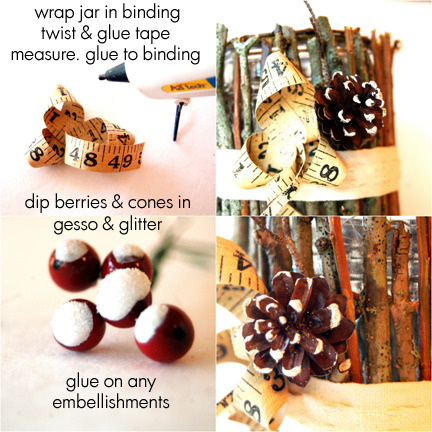
I used rhinestones, holiday stars, paper leaves, petals and number plaques to dress up my jars.
Worried about burning a candle in your pretty new jar? Just drop a battery operated tea light in the bottom and watch it sparkle!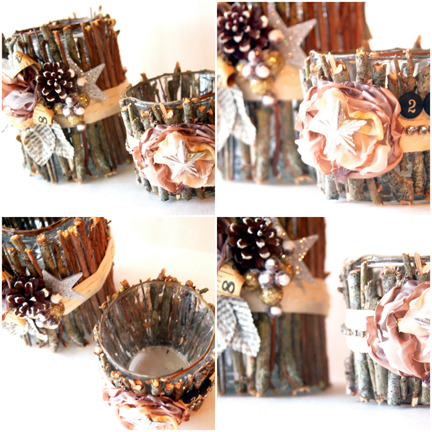 Need a gift for a teacher, neighbor, co-worker or secret pal? Fill your pretty twig jars with wrapped holiday candies,bath salts, potpourri or a bag of tea lights and pop in a pretty bag! (Stay tuned for an easy how to on gift bags!) Now you are ready for any Holiday Gift Exchange!
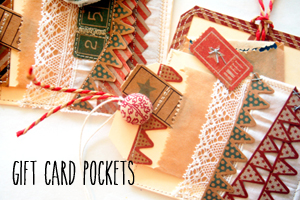
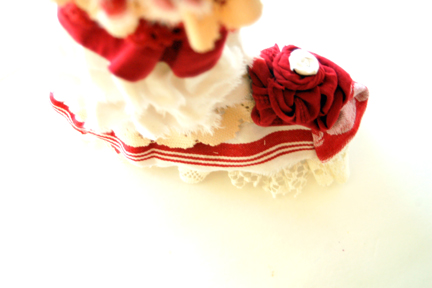
 I love to wrap gifts, so much in fact, that when my children started growing up and asking for gift cards I was crushed. Now how could I wrap those? Well it didn't take long for me to hunt down little boxes and bags. Soon I was wrapping the cards like miniature gifts and they were adorable.
This year I was looking for a budget friendly and re-purposed alternative to boxes and bows. In an ongoing effort to use up my memory making supplies I started digging through unused goodies and this is what I came up with -
A FEW SIMPLE SUPPLIES:
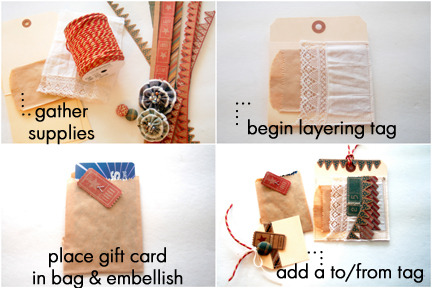
THIS IS WHAT I DID:
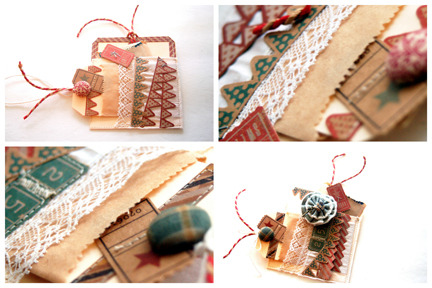
This is a super simple way to make a sweet Gift Card Holder at the Holidays AND an easy way to
start using up some of those stockpiled art supplies! Great for teachers, neighbors and co-workers!
I know it is early, but I am already getting excited, so - Happy Holidays!
Christmas, Christmas Wrap | Email Article | Permalink 
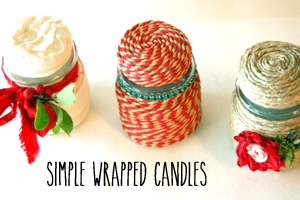
I love these little $1 candles from Wal-Mart. They burn nicely and have a pretty hardy scent so in my book that makes a great "party" candle. Something I can set out and let burn the entire night or hand out as a parting gift! Plus I love that when these candles have burned themselves out I can re-purpose them! They make wonderful storage containers. I use them in my studio for all sorts of bits and pieces.
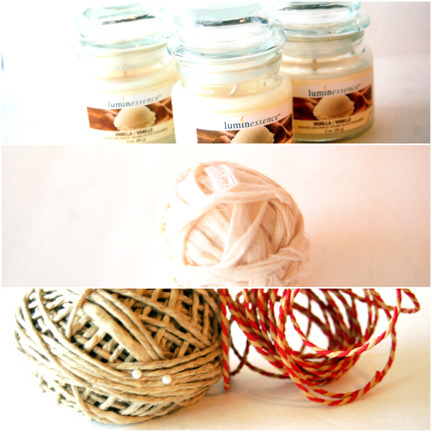
For the Holidays this year, I knew I wanted to dress up the jars a bit and use them for little gifts.In keeping with my goal for the year - to re-purpose as much as I can and spend as little as I can - I started brainstorming. I had tons of scrapbook paper that I could use up - and I love the little wraps that I have made in the past for jars, but I had been there, done that. I finally decided on TWINE! I love twine. I love, love, love it - for all things! So I dug out my jute twine.I had even picked up a roll that looked like baker's twine at IKEA recently for gift wrapping...so I dug that out too!
THIS IS WHAT I GATHERED FOR SUPPLIES:
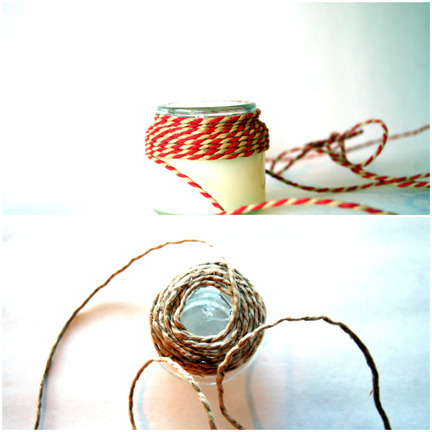
THIS IS WHAT I DID:
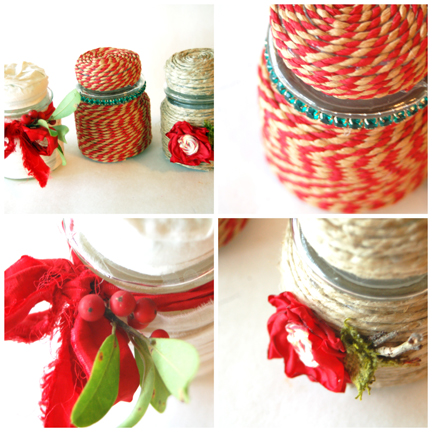
These make great party favors, as well as gifts for family and friends! Have fun!
Christmas, Christmas Decor, Home Made | Email Article | Permalink 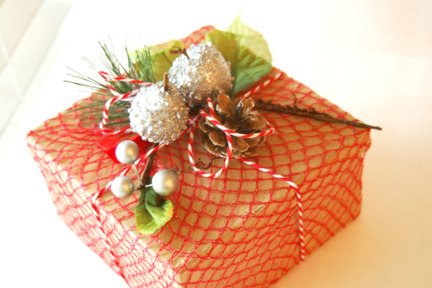
During the holidays, if you are like me, you go through a lot of apples! Apple Pie,
Caramel Apples, Apple Crisps and Cider - even big bowls of juicy red apples are
usual season favorites around here.
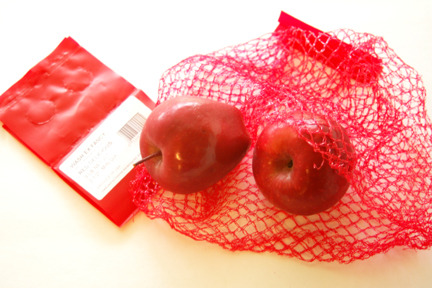
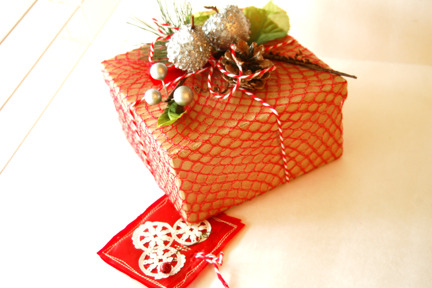
As I am always looking to re-purpose everything in sight, I thought it might be fun
to use all of these cool stretchy red apples bags as part of my holiday packaging.
Just carefully snip the top or bottom of your apple bag, preserving most of the bag.
Then snip off the tag, keeping as much of it as well.
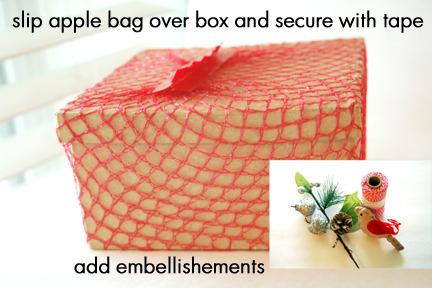
Adding holiday picks, baker's twine or a small keepsake ornament is an easy and
affordable way to dress up your package.
Use the plastic tag to make a coordinating gift tag or card. Now you have a beautiful
gift and you have recycled something as well! An Eco friendly way to surprise someone!
 Check back often as I will be sharing more cool packaging ideas for the Holidays!

No matter how many dips and curves { LIFE } sends our way, the { JOY } of Christmas spirit has a way of making itself known.
It has been a long and bumpy road these past few months but Christmas has arrived and with it, feelings of happiness and blessings.
...take a peek at the the festive decorations that surround us and make us smile...
...a collection of ornaments, old and new, adorn the tree...


Christmas, Christmas Decor | Email Article | Permalink 