Roben-Marie Smith

Roben-Marie Smith


THIS AND OTHER  PRODUCTS AVAILABLE AT

       IS A REGISTERED TRADEMARK


 sandi-keene

Roben-Marie Smith

Blog Index
The journal that this archive was targeting has been deleted. Please update your configuration.

Entries from September 1, 2011 - September 30, 2011

Friday
Sep302011

{a chance to be BRAVE}


There are a lot of different things I have called myself in life...

...one of them is {NOT BRAVE}...even through the great tragedy of losing and burying a child, I have considered myself little more than a {survivor}. NOT BRAVE. I have felt, at times, that I am strong. At other times, weak. I consider myself to be a giver, and a pleaser...a person who gets great satisfaction in making others happy. I would look as myself as a non-confrontational sort, avoiding a rift at all costs...so few things are worth a rift, large or small. I am a worrier and a planner, a sorter and an organizer. I am careful and protective, an optimist. But not {BRAVE}.

By the grace of God and the gift of great friendship, I am off to {BRAVE GIRL CAMP} next week. I know little more than I plan to be uplifted. I have been assured that I am worth it. I am ready to reach inside myself and gather all of my strength and leave McCall, Idaho a new person. A braver {SOUL}...

...and as if this wasn't enough, there is {ART}. A creative escape where I can release all my inhibitions onto a canvas, into a journal, through a creation. I want to be BRAVE. I hope to be BRAVE...


Tuesday
Sep272011

in my house: vintage bedroom


 ...ruffles, book paper and gesso...these are a few of my favorite things.


When an older sister made the move upstairs, a shared room becomes {Sophie's Room}. It is
 sweet and white and so, so Sophie. A strict budget meant a careful planning, and lots of creative decorating.

The new {OLD} chippy iron bed instantly became the focal point of the room. Adorned with recycled bedding from Camille's room, a few new vintage pillow cases and an old grain sack, it is absolutely charming.

I was able to find interesting and unique art through the less obvious...a castoff frame that had lost its' luster makes a simple and unobtrusive center piece....paired with a milk glass lamp and a simple lampshade frame it is the perfect duo....the old primitive angel dolls keep watch over Sophie, day and night.

 Remember I mentioned I was working on a french market sign...

well it is complete and I love it.


An old canvas gets a new facelift with vintage book paper and

some beautiful hand made silky rosettes.

An old woven green footstool gets a coat of soft white

paint and hand painted wording...a bit of muslin adds a touch of textile.


A tiny chair, a treasured and timeworn piece that belonged to my Angel son,

gets a facelift with new fabric.


An old ladder gets some white paint and a good sanding...

I love the {galvanized rungs}.
Nice of the lightbulb to burn out just in time for photographing this room...

which I must add at this point...indoor lighting stinks!

I DO have a big flash and tripod, but I was lazy and in a hurry,

so I did not take it out...the lighting is really much more

beautiful than these photos depict.


Old yellow dressers are repainted...I love the way the detailed grooving on the fronts have a silver patina...


A few simple props add to the old world charm of the room...

a vintage bassinet, an old picnic basket and a white enamel bucket,

a shabby linen apron, are all sweet and simple pieces....


...a set of simple tulle curtains will complete this picture. {Sweet and Simple}.

{This is Sophie}.


Monday
Sep192011

newsworthy: where i create - somerset life 

This is where I create...

 ...this room used to be a pretty shade of blue, but I wanted more light,more reflection, more white. This new room is much more {ME}.

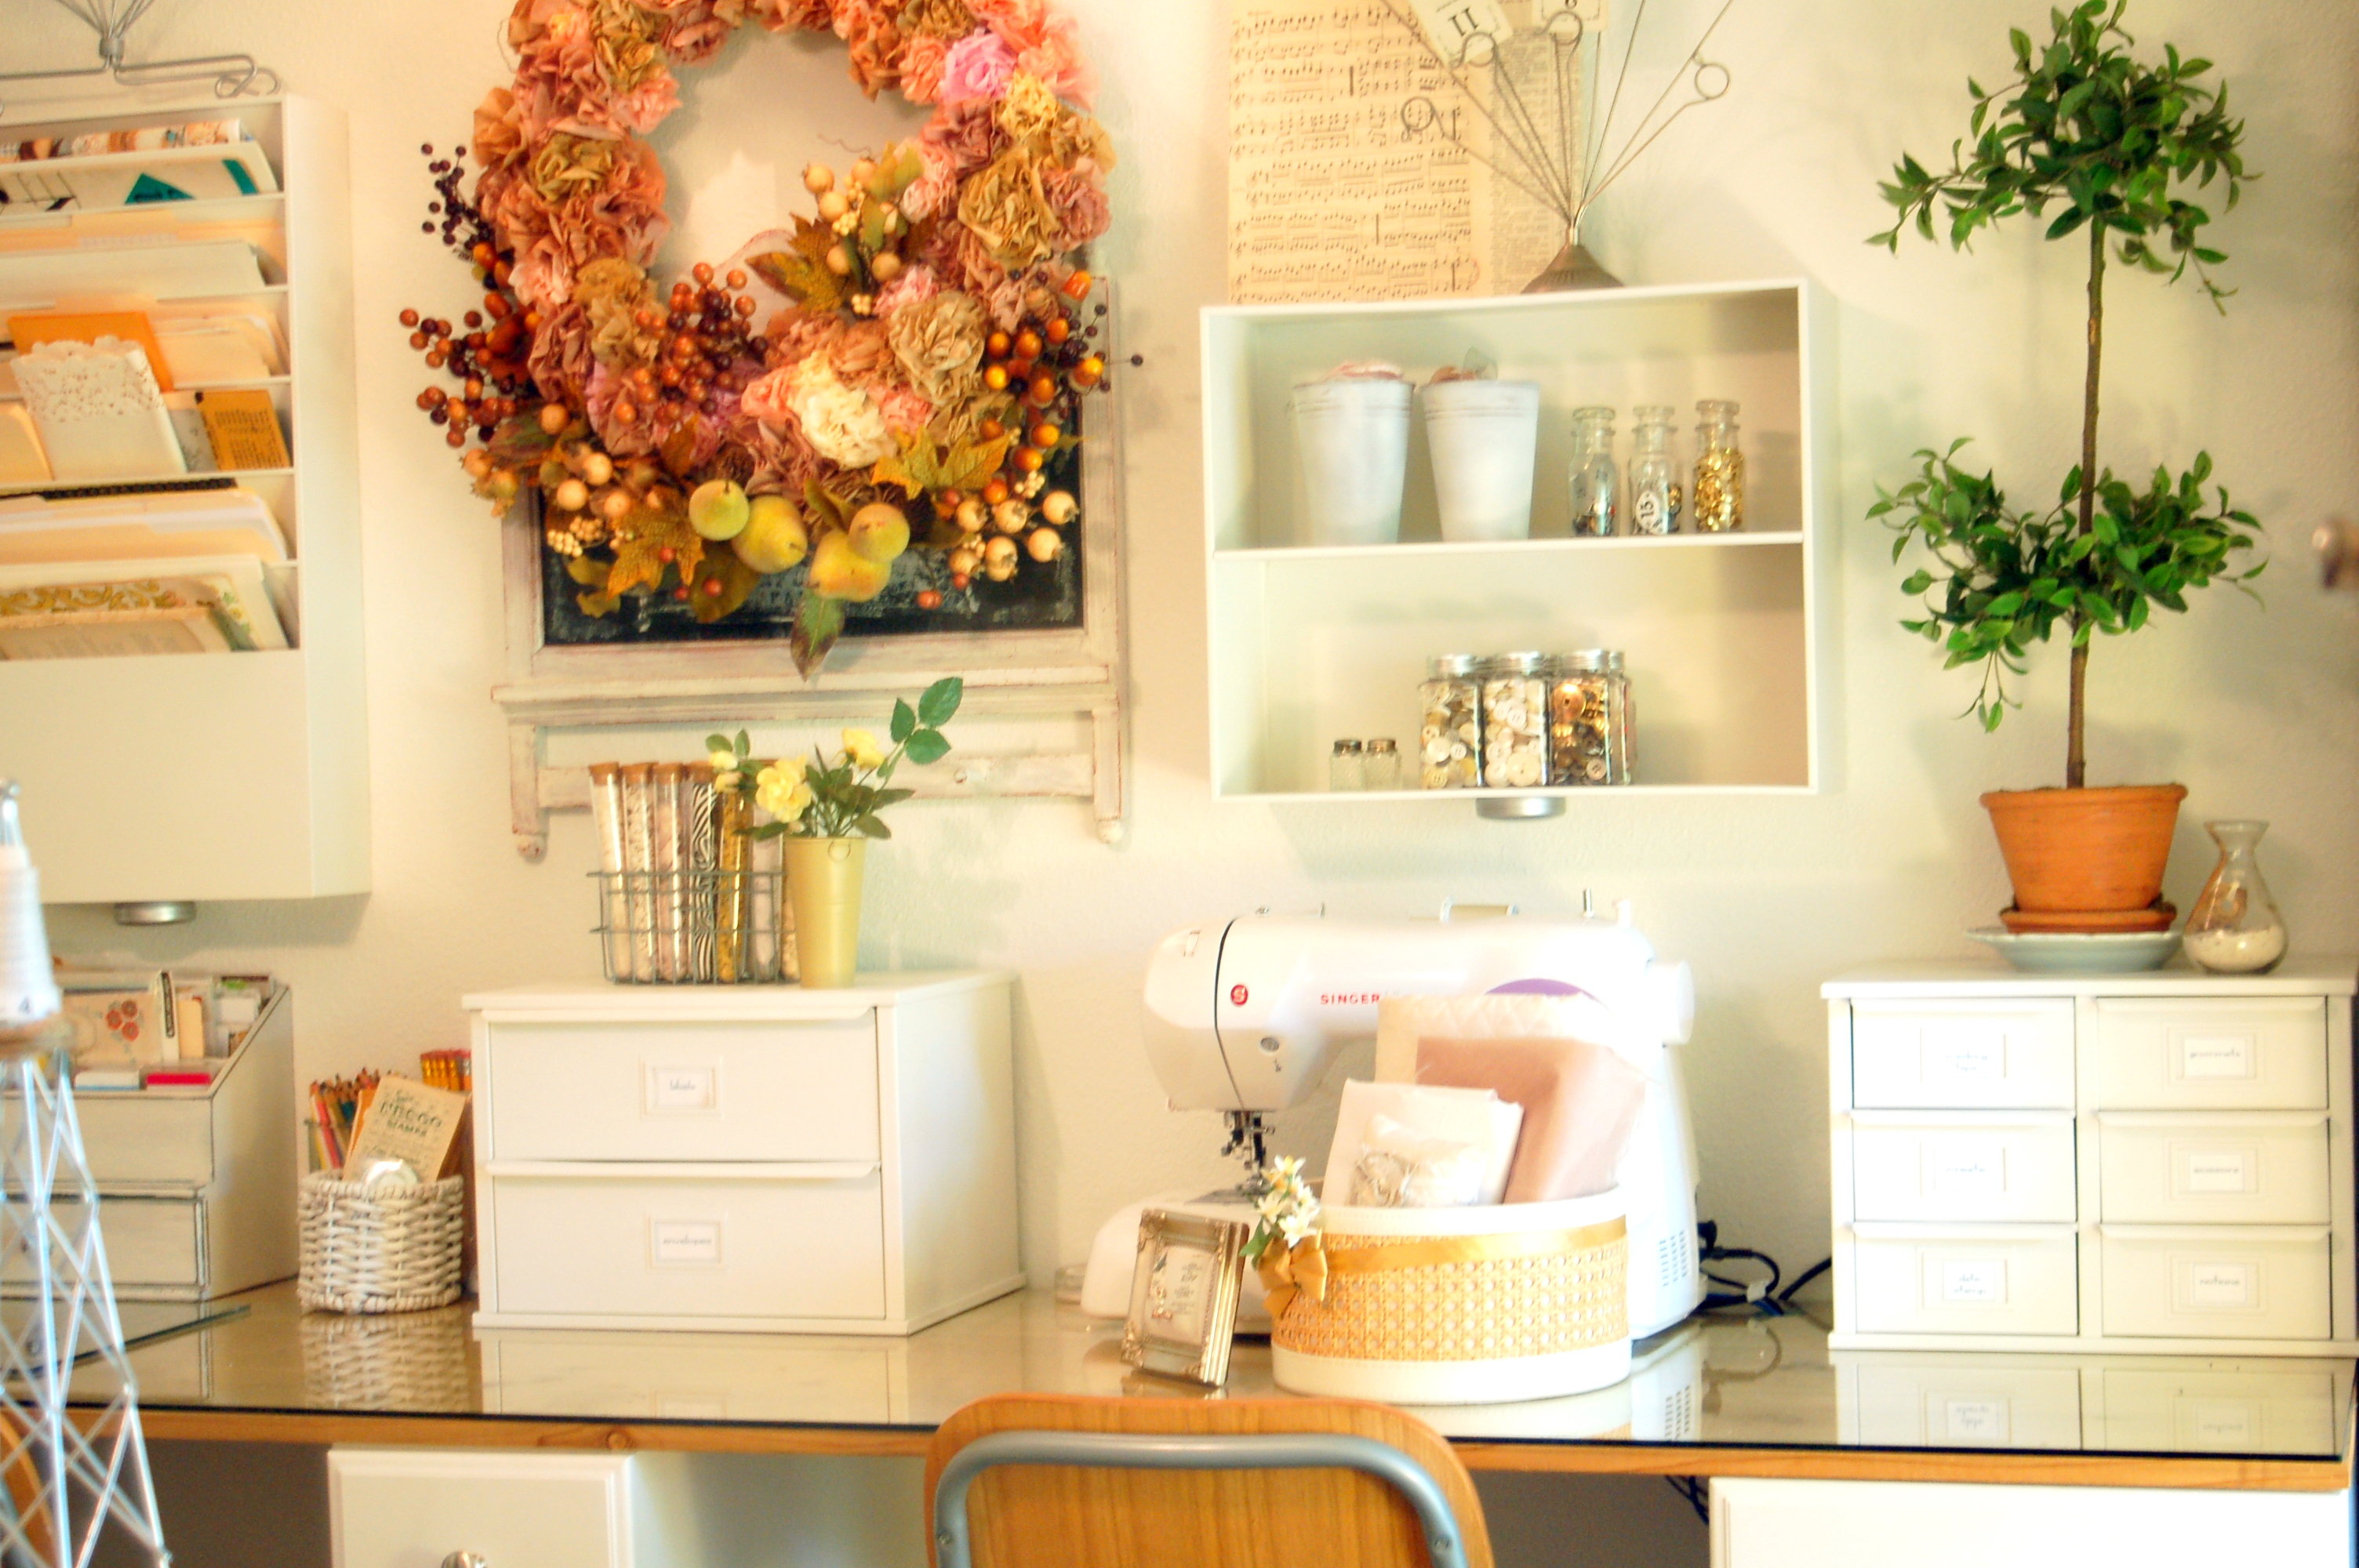
I keep almost all of my trinkets and fabric close at hand. I am a collector of containers and {LOVE} them in any shape, size or medium, especially metal. If it can hold something, I will find a use for it. My newest favorite container - that sweet old galvanized {MAILBOX}. I Love it!

I know there are a lot of photographs. It is so difficult to get all the angles of a room, and I tried to take advantage of the wonderful afternoon light. Enjoy!


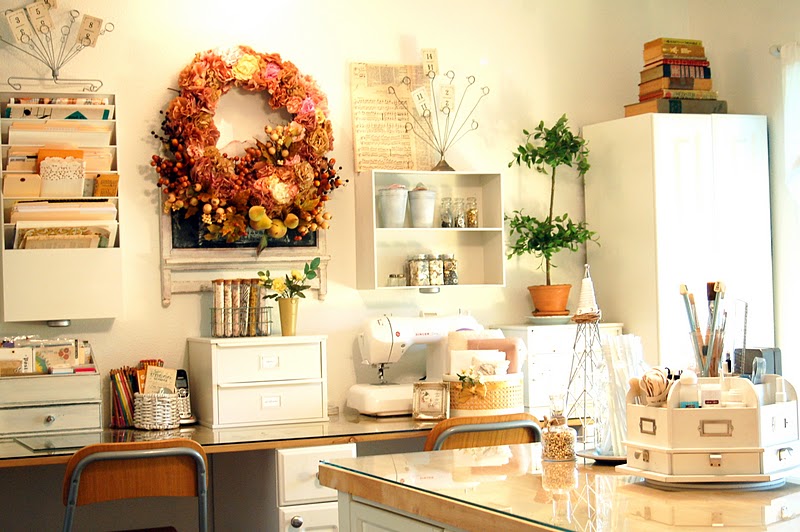
 The first piece of furniture I had for this room, years ago, was the island. I loved that it was white with a butcher block top. When we decided to add the rest of the built ins, my sweet husband offered to use planks of wood for the counter tops, so that it would mimic the butcher block of the island.


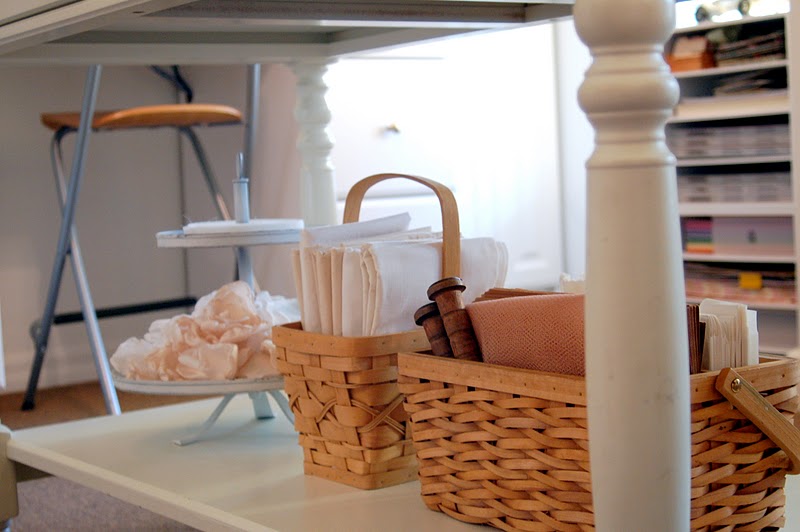
Everything goes with butcher block and white...especially baskets...so many great finds on old ones at the local thrift stores.

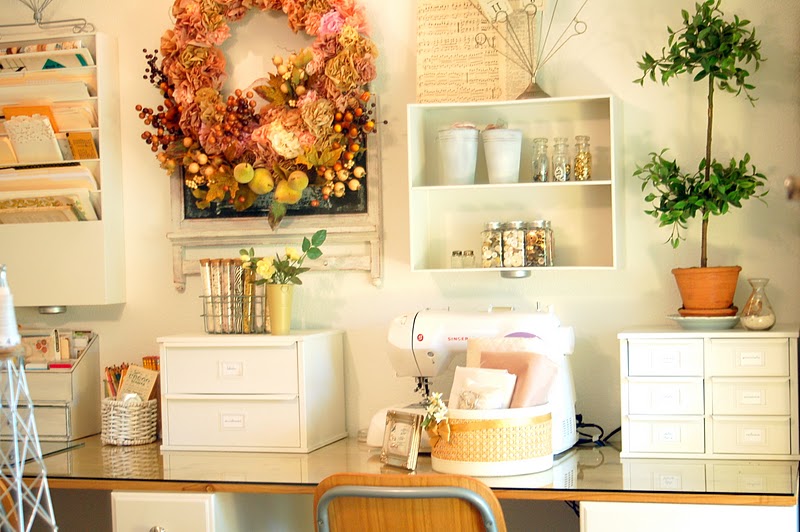
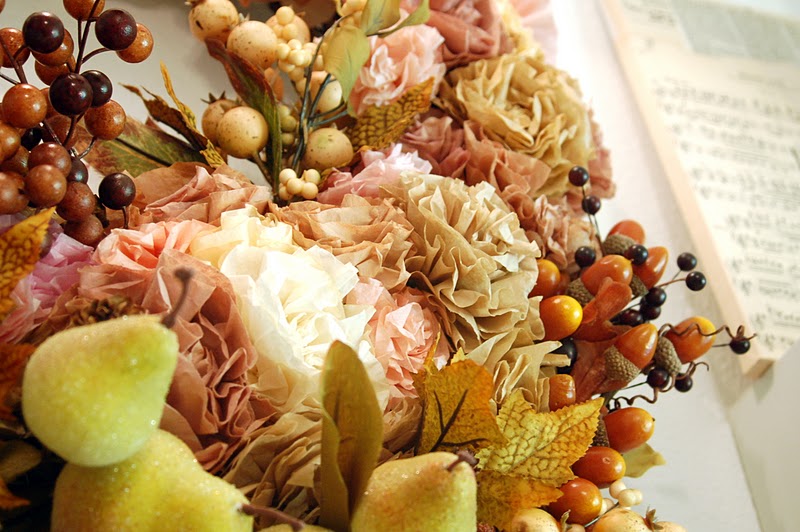
 Here is a photograph of my new wreathe. I fell in love with the one here and had to make one. Emily Jones Design and Aunt Peaches have the best tutorials, complete with lots of great images. Of course, mine has ten tons of berries and pears and other goodies added to it...oh yea, and about 125 coffee filter flowers...

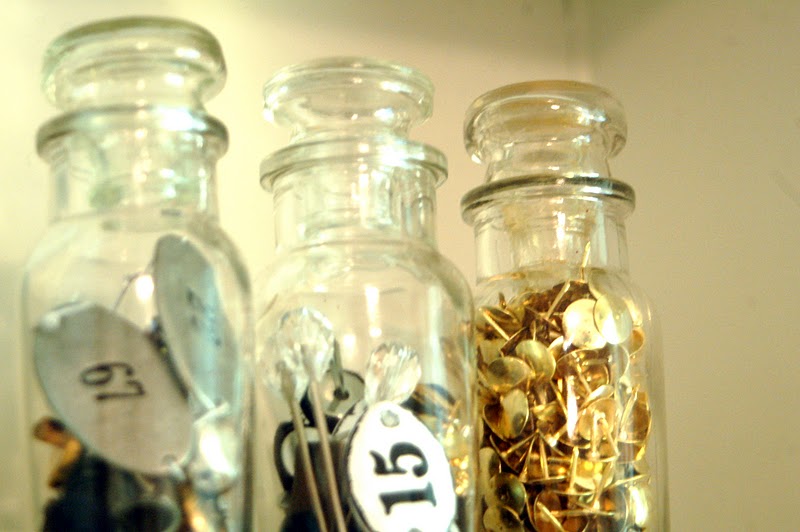
 ...I have a few of the vintage metal card holders. I use them for displaying my favorite vintage {NUMBER} playing cards.


The best part of this room is the two {BIG} windows. I can never have enough natural light. It really makes a difference for me when working with the dye lots colors.

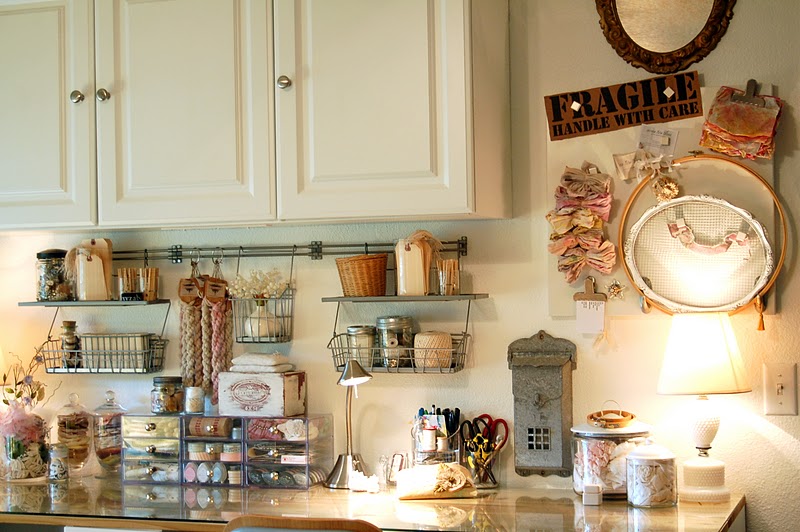
 My magnetic board is always loaded with the most recent dye lot...and anything that catches my eye. This week it was the {FRAGILE - HANDLE WITH CARE} impromptu sign that I cut off of a box.

 Several years ago, when I knew I was going to have my very own {creative space} I started hunting for the perfect storage bins. I found them on clearance at a company called {HOLD EVERYTHING}. They have been my tried and true staple pieces. The are most importantly {WHITE} and they are metal. I love them. They have been durable and neutral. I have a several different pieces in the collection and love them all.

 Good 'ole {IKEA} has great hanging storage. I like that it was also neutral and metal...and the best part is that all the pieces are interchangeable. If you are looking for something similar, I found them in the kitchen department of {IKEA}.


 Two more of my favorite things on display and ready to use at all times...{FABRIC} AND {NUMBERS}.
 I found this cool file organizer at my church thrift store. It was black. A little white spray paint, a turn on her side, and she makes a sweet fabric organizer. {LOVE}...and numbers are everywhere...can never have enough numbers.


So when my hubbie was finished creating the countertops, he asked me to take some time and figure out where I wanted my lamps, sewing machine, etc. This was so he could drill holes where the cords would go {he knows I hate cords showing}...the best part of all was the local {GLASS MAN} was able to drill the same hole in the glass I had made to cover the wood.

 The white frame is backed with rabbit wire. I love these and have several. I use them for portable design boards...plus they are {PRETTY}...


...and more white storage under the window for paper of all kinds...

 I haven't changed out the hanging lamp yet, but am planning on replacing it in the future. I had a sweet chandelier all picked out for that spot, but it never made it past Sophia's bedroom...now it adorns her ceiling. {NOT} sure how that happened...so I am on the hunt again. I need a pretty tiny one, for the space to look right, so for now I just made a sweet muslin {CORD COVER} for the {IKEA} lamp that resides here now.

 The old metal baskets are so sweet. They are almost like a miniature locker basket. Not sure what they were used for. I put a yard of two of my favorite and most used trims in oversized test tubes and placed them near my sewing area. This way they are always on hand when I need them...and flowers. They are lots of {FLOWERS} in this room. None of them are the same, because I love them all...also some of my favorite dyed wool yarn, in shades of white and pale pinks.

 A {PEONY'S FAVORITE FINISH CUSTOM BASKET} is home to part of my glass jar collection. The larger ones rest on top of the wall cabinet.

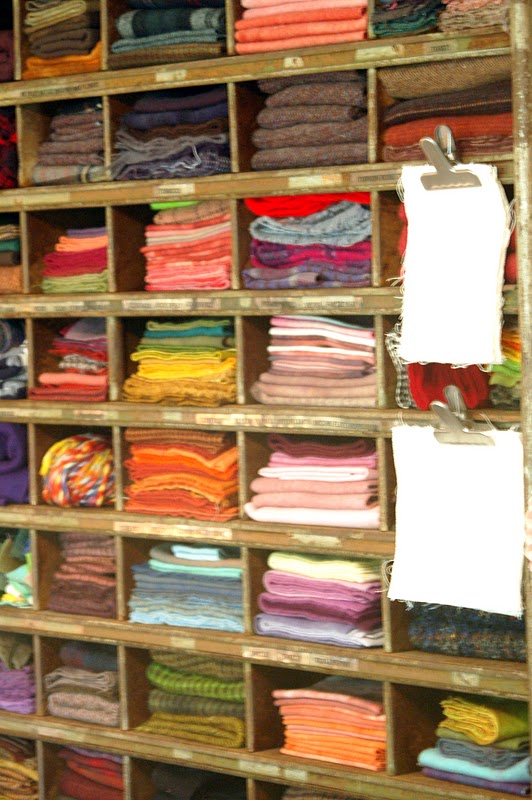
 I just love the way a chunk of hand dyed material looks...

 There is something very cheerful about looking at this...

 ...and this. That is why I keep them around at all times.

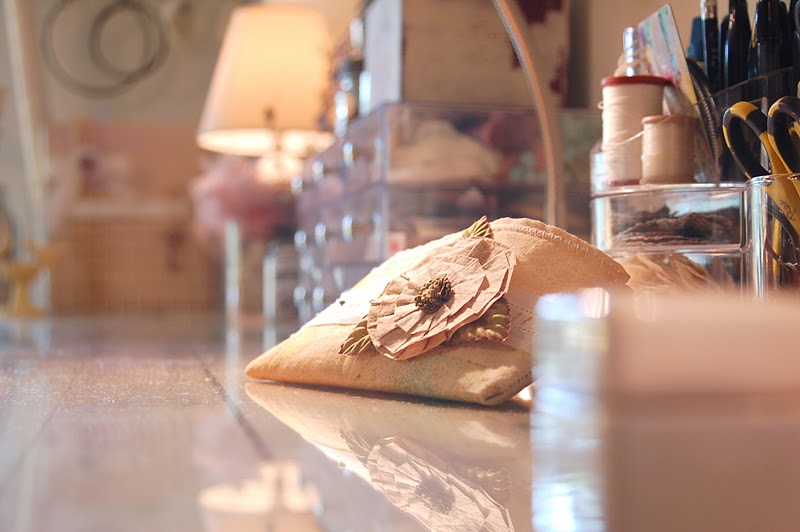
 The glass counter tops allow for the widest range of freedom when creating. I can use all types of mediums without a mat...dyes and hot glue, which are usually tough to get off of any surface, just wipe right off with a spot of windex or goo gone.

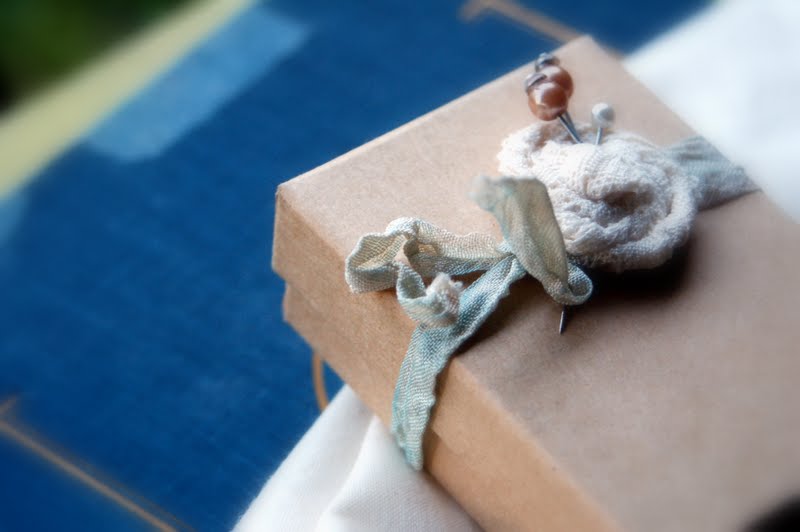
 Look at my sweet smelling lavender scented sachets. The tags are removable and say {INSPIRE} and {LIVE}. These were a lovely gift from Becky at Junk to Joy

...another old office supply basket that got a new coat of shabby white paint. The key was a most treasured gift from Michelle at Petite Michelle Louise. She knows my love of hearts, and in honor my Angel son created this precious key with a heart shaped stone on it...{i love it}

 Everyone has a {behind the door} spot. This is mine. It houses my threads, aprons, dye swatches, needle felting supplies, stickles and glue gun...all of these things hang on one of those awesome heavy duty metal clip style organizers from {HOLD EVERYTHING}.

 My coveted piece of all time. {THE WOOL CABINET}. This is a piece that I collected from the side of the road in my little town. A local mechanic was getting rid of it and it was mine if I hauled it away. It was orange in color it was so rusty and all the parts drawers were missing. It was over {7 feet tall} and almost {4 feet wide} and I had a vision of what is could be. I called {MR.723} and begged him to collect it...little did I know it weighed over a thousand pounds...{6} metal grill brushes and {17} hours later it was just the way I wanted it...{and of course also screwed to the wall}...


...and a shot of the baskets on the bottom shelf of the island...the two tiered metal stand was a not-so-pretty shade of gold when I found her. Some more white paint and she holds all my favorite vintage hankies and  hand made ruffled silk flowers ready to be put together...


 ...another wonderful container from {HOLD EVERYTHING}...it houses all of my vintage papers and images and paper findings...

 ..more shots of the this {YUMMY} wreathe...

 ...at first I was hesitant to cover up this sweet chalkboard...but then when I did it looked so great layered that I had to leave it...

 ...below is a sweet white candle sconce adorning the door to the room. This little sconce was not always so {SWEET}. It was the ugliest fake gold plastic 1970's sconce you ever did see...just goes to show you what some good white spray paint will do for an ugly little object!

 This little storage cubby came straight from the hardware isle at my local Wal-Mart. It is plastic. It was silver. You guessed it -  {MORE WHITE SPRAY PAINT}. I am so glad that they make it just for plastic now. It is so awesome! I have everything from vintage buttons to paper clips in this thing and it cost me about {{$6.00}.

 ...the stool are from {IKEA}. They are not my first choice, but fit the budget and went with the butcher block. Now that I am learning to use my new {SEWING MACHINE} I might try making some sweet ruffled slipcovers...if you have an easy tutorial I would love to hear about it!

 ...I bought all the cabinets and cupboards in boxes at {HOME DEPOT}. My Hero spent lots of hours with those 468 page long direction booklets putting all of these together for me. They are not frilly or even very {PRETTY} but they are white and clean lined and were super cheap. Perfect! Even the island and the beautiful glass doored cabinet came in boxes. They were purchased at {K-MART} a few years ago.

I LOVE WHERE I CREATE !


Thursday
Sep152011

{day 4 . a gauzy ruffled wool pouch}


Here I am with another project using this beautiful {inky vintage gauze trim}...


... and as adorable as I think it is, I must preclude this post with a confession. I love this little pouch because it's style closely resembles the beautiful little bags made by my friend, Roben-Marie over at Every Life Has A Story. She always creates the most beautiful bags and journals. I love everything she does...

...so while I did not start out this little bag thinking that it would look like one of hers, it just took a turn somewhere along the way because that is my favorite style.

 I was actually practicing a little sewing and one thing led to the next...
 ...I even remembered to line the bag - well half of the bag. Yes, you heard me right. I only made enough liner for one half of the bag...don't ask, because I just don't know!
 ...hence, the practice pouch.
 I used some hand dyed wool I had leftover from a recent pillow project, and added three yummy rows of that sweet and simple {vintage hand dyed trim} that I have been featuring in my etsy shoppe, all week long.
 I layered on a ruffled silk flower I made with a center that I created using leftover dyed muslin.
 I did a little free form stitching {love it} on the front panel of the wool...
 added some leaves, a vintage button, and some french knots tied with some vintage baker's twine I had in my stash...I used another piece of the {peony vintage dyed gauze trim}to create a tie. I use this to wrap around the button for a casual closure to the pouch.
 More {vintage gauze} in that delicious {peony color} was used as a lip on the pouch, for the finishing trim. While digging in my treasure trove of old thread, I found some pink silk that was actually in great condition...Love it!


 Lovely photograph showing the top panel of this little pouch lined...bottom panel NOT lined...
You can also see that my stitching is not perfect, but it is okay. I like the "timeworn" look.
{that is what I like to call it when I can't sew so great - "timeworn!"}
A hand dyed piece of muslin, in pale mustard adorns the bottom back panel. I hand stamped it with a stamp that I actually carved at a recent retreat with friends. I LOVE IT!
...so it is not a perfect pouch, but a practice pouch...and I think it is super sweet!
The look of it is just what I wanted...my daughter is already asking for it for her birthday!
That made me feel pretty good...half liner and all!


Wednesday
Sep142011

{day 3. pin cushion with vintage gauze trim}


So I know that I have been going crazy with this {inky vintage gauze trim} but I just can't get enough of it. Today I used it as a shabby ruffled trim on a pin cushion I fashioned from a few scraps of muslin.


That tiny cream colored flower is from my vintage findings collection. I use them sparingly as they are so hard to find anymore. This one was part of a tiny "boquet" that still had the stems in tact. I just sewed over the stem a few times to adhere to the front panel of my pin cushion.
 Remember that hand dyed vintage seam binding that I used on that tiny package?
That is the creamy blue trim used to make the tiny rosettes...
I love this paper flower...it was stamped with letters in a really cool circus style font.
 I have been really great about using up what I have on hand lately, so I filled my pin cushion with some leftover "beads" that we needed for a school project. They are most often used to stuff fabric dolls.
Since the muslin is a very think fabric, the beads worked better than the traditional "sand".
No leakage once you have a few pin holes in your fabric.
 Another perk to using the beads, is that the pin cushion will stand quite easily too...
 Of course, the vintage style pins don't hurt either!
 I love the look of the free form stitching, so I just zig zag back and forth over anything I am stitching numerous times...this way it looks random and sweet at the same time.
 See how I stitched the stem? Just a few lines back and forth to tack it down.
 The same with the paper flower...{isn't that dyed gauze trim just yummy?}
 I have made more than a few pin cushions and I like to leave one whole side unstitched to fill it...this way I can hand stitch the last side to look gathered, or ruffled. I love this look. Makes me think of a vintage sack filled with some yummy textile.
 This little project only took about 40 minutes, including gathering supplies. I always take a bit of time laying my design out, so it could go quicker depending on how involved you make your front panel.
If you decide to make a pin cushion with your vintage hand dyed trim I would love to see a photograph of it when it is complete!
Happy Sewing!


Monday
Sep122011

{day 2 vintage gauze trim equals super sweet packaging}


I love the packaging of gifts. I could wrap things all day...I get great {JOY} each time I make a special little something and then {WRAP} it all up beautifully! It is almost like getting {TWO PRESENTS IN ONE} when you receive a  gift in precious wrappings.
My new inky gauze vintage trim makes for such a lovely finishing touch on a package. I love the way it looks so time worn and loved.  
This simple brown kraft gift box looks sweet with a piece of dyed vintage seam binding (coming soon to the 723 etsy shoppe) and a vintage lace rosette. Add lovely vintage hat pin and it is a gift worth beholding.


Whether it is a gift, a beautiful piece of mail art, or a simple vase you want to dress up, this vintage style trim adds just the right touch. A double wrap of  this dreamy {CORNFLOWER BLUE} gauzy ribbon looks beautiful on a simple brown paper wrapped gift. Add a few vintage stick pins and a vintage tag and it is simply lovely.


Sometimes, we just need a little bit of lovely to perk up an old item.
I love the way this plain silver vase was transformed into a timeworn center piece with just a small length of vintage inky gauze trim. I added a simple crystal star stick pin to give it a finishing touch.
Wouldn't these be lovely little centerpieces for a garden tea party?


Sunday
Sep112011

tutorial: gauze rosette earrings


A yummy new batch of inky vintage gauze trim just hit the etsy shop shelves and I couldn't wait to share this {SWEET & SIMPLE} earring tutorial with you all.
These charming little rosette studs are easy and quick. You will want to make a dozen pairs! They only took me a half hour to complete, including gathering my supplies...so grab some {VINTAGE TRIM HERE} before it is all gone!
First, gather your supplies. Don't worry about having each item in the photograph...as long as you have the inky vintage trim you can use anything you love or have on hand to embellish your rosette...you will need:

 *scissors
 *glue gun or strong adhesive of your   choice
 *silicone pad for creating a circle of hot glue
  * two earring posts and two backs
  * something you would like to use to cut out your leaves from.(this can be cardstock, fabric, canvas, or anything else that will give you a good leafy texture) I used a leftover prima leaf I had on hand.
  *small hole punch (size will depend on how large you create your rosette)
 OPTIONAL: tweezers, string or yarn, rhinestones, buttons, etc.


For my rosette earrings, I cut two 6 inch lengths of {plum pudding inky vintage trim}
and tied a small knot in the end of each piece. Trim end of knots. 
 Next, using your silicone glue gun pad, create a small circle of hot glue. 
 Make sure it is pretty thick. Squeezing gently with constant light pressure works best. 
Place your knot in the center of the glue and let it set for 10-20 seconds. This just helps the glue gel a little bit.
Now start GENTLY twisting and wrapping your inky gauze trim around the center know, patting it in close to the trim it is wrapped around. You want a nice tight rosette when you are finished. Continue wrapping until your trim has covered your entire glue dot and then trim with scissors. Press flat gently and peel SLOWLY off of the mat. Tack end of trim to back side of rosette.
Now take your fabric or cardstock or leaf material and cut four small leaf shapes. These DO NOT have to be perfect. Flowers in the wild are not perfect and this gives your earrings character. 
Choose two leaves and layer them until you have your desired effect. Glue them together.
Set your leaves aside and go back to your rosette. Use whatever embellishment you like here (or none if you like...the pair I wear has NO BLING or anything, just SWEET AND SIMPLE!) and add it to your rosette's center. I used some inky dyed string for my center (coming soon to etsy shop) to give my center a little nesty look. Just twist and twirl the string until you have the shape you want and tack down with a dot of hot glue. Then I added a small rhinestone with a dot of hot glue.
Now take some old leftover cardstock or thin cardboard. ( I used some recycled packaging from my rhinestones ) Punch two circles and adhere one to the back of each earring. This will help disguise all of your layers of glue and leaves and flower.
Now take your earring post and clue that to the center of your cardstock. Let dry for a few minutes or until hot glue has completely cooled.
Your beautiful {INKY VINTAGE GAUZE TRIM} has been transformed into a darling pair of rosette earrings.


Wednesday
Sep072011

{yummy vintage gauze trim gets a dye bath}


 A peek at the yummy new colors I have been using in the {DYE LAB}!


I stumbled across a large roll of this beautiful {OLD} gauze trim in a local shop and fell in love with it. It was not a good deal, and while I often limit my purchases to just that, I could not leave without said trim.

After a bath in lavender water, I dyed each batch a beautiful bright shade of the rainbow. After a good scrunching and lot of drying it is now ready for the etsy shop.

I plan to use this trim { I hesitate to call it ribbon as it has the original unfinished edges of old world gauze trim} on a new hooked project in the coming weeks.

Enjoy looking at all the beautiful colors...they make me smile!

{And me a lover of white!}


Monday
Sep052011

{less than perfect, ODD and why they create HARMONY}


I am a detail person. I love the comfort I receive from having things in order. Every little item its' own rightful home...


...so when I find perfect order in the more random aspects of everyday life it uplifts me.

Of course to me this means numbers. Perfect would be odd. Odd would be perfect. Not {TWO} but {THREE}. I get such a soothing feeling from this odd inbalance, this less than perfect duo.

And so when I look to my left and I see this {PERFECT TRIO} looking out at what? it doesn't matter, because the beauty of the scene is them. {THREE} so absorbed, so intense. I feel all three hearts beating, sense all three minds reeling.

One mind intent and focused would be beautiful. Two minds quizzical and wondering would be amazing...but {THREE} minds...three minds, searching and inhaling the beauty around them is oddly perfect. It is {HARMONY}.