Roben-Marie Smith

Roben-Marie Smith


THIS AND OTHER  PRODUCTS AVAILABLE AT

       IS A REGISTERED TRADEMARK


 sandi-keene

Roben-Marie Smith

Blog Index
The journal that this archive was targeting has been deleted. Please update your configuration.

Entries in hand dyed (9)

Monday
Mar182013

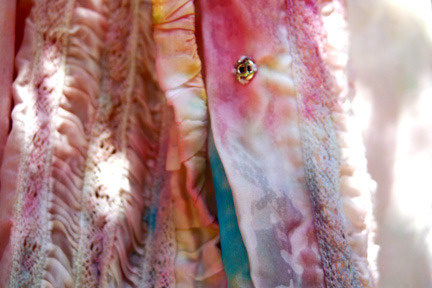
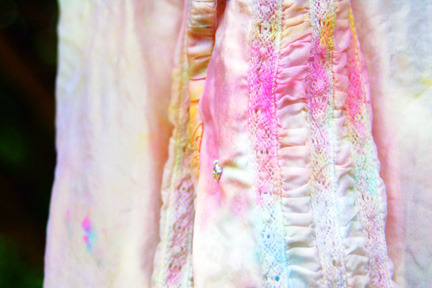
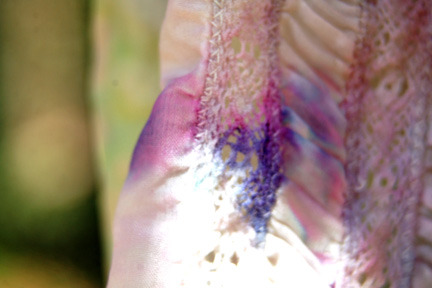
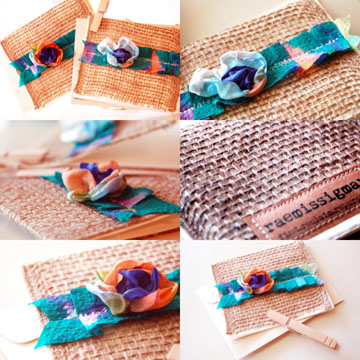
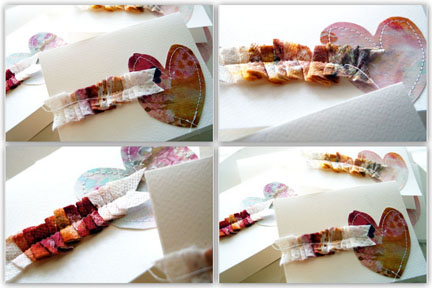
on the worktable: a good dye job

Sometimes when we are feeling a little less than pretty, we just need a good dye job!

I just love all that color! These pretty pieces will be stripped for a new project I am working on. Stay tuned for more photos on that upcoming project.

Monday
Oct222012

Live the Repurposed Life: Vintage Blouse

What do you do when your favorite vintage silk blouse has aged enough to tear?


How about some lovely dip dyeing ?

Maybe this scrumptious piece of fabric will find it's way onto a new apron???


Tuesday
Jun262012

live the repurposed life: paper towel ruffles

W H O  S A Y S  R E C Y C L E D  &  R E P U R P O S E D  C A N ' T  B E  P R E T T Y ?

These pretty blank note cards are my latest creation using repurposed burlap and yes! recycled  paper towels ... HAND DYED  and  LOVELY of course. A coordinating hand dyed silky posie is the perfect embellishment. These are available in sets of two HERE and HERE.                  

Sunday
May062012

live the repurposed life: pretty paper

Whenever I am working on a project that requires dyes or inks, or even paints, I always use a piece of newsprint or watercolor paper as "underpaper." A favorite tip I learned from my very talented friend, Roben-Marie. It saves cleaning up a big mess, but it also leaves me with a great piece of colorful paper to use for other projects. Last week I used some watercolor paper under a dye project. The week before I had used the same piece of paper to catch drips of paint and gesso. This week I cut sweet little hearts out of this paper and used them to make some notecards for Vintage Hip in Springfield, Alabama. Available in my Etsy Shoppe soon!

Monday
Feb202012

live the repuposed life: beautiful reinventions


{Creativity is allowing yourself tomake mistakes.  Art is knowingwhich ones to keep.  ~Scott Adams}


I have long since learned that this
is the beauty of {ART}. There is
no right or wrong. No proverbial
black or white. We, as creators
of art, are free to claim our
mistakes as much more. We are free to scoop them up, recycle them, re-purpose them,
reinvent them ... make them into something beautiful once more.
... but first let me take you back a bit ... 
I have long since been a lover of the primitive arts. Years ago I bought a simple set of
directions, a rug hooking frame and some scraps of wool. I was literally {hooked} if
you will! Armed with a new cutter and a notebook full of designs I began creating rugs. 

They took hours and hours and hours and hours to make, but they were {real}. They
were going to last a lifetime. A craft of the past. When someone ordered a custom
designed rug they were in fact getting an heirloom.

... fast forward ...

I recently started what was to be a miniature {rug} for a wall hanging. Somewhere
along the way it dissolved into something smaller than miniature. A mistake. {or so I
thought}. So I tucked it away for another day ... after all, the wool had been dyed,
stripped and partially hooked. I could abandon it, but I have never had to heart to
take a rug apart ... and so that day came. Last week, as I rooted through a cupboard
I stumbled across the partially finished {miniature rug}. The colors were wonderful
and since I have been a fanatic crazy woman making bags left and right, around here
I decided then and there it might not be a rug, but it could certainly be a bright and
cheery panel on a bag.

... and so it was ...

I remounted it on the frame and finished the hooking. It was satisfying to be holding
the hook again. Once it was complete I sewed it to one of the panels of a duck cloth
tote bag I was working on ...
... a fresh and funky design. Birds, hearts, arrows, scallops, flowers ...
 ... as I am huge into {re-purposing} these days as well, I gathered up some cool
vintage fabric my sweet, sweet neighbor gave me and used it as a liner for the
tote bag. Some canvas straps, a shabby muslin ruffle and of course, a {great big
huge ruffly silky flower}. I even threw in a hand dyed velvet center for the flower ...
 
...the reverse side of the tote is embellished with a tiny felted heart with wings ...
... and so there are no mistakes.

 Just {beautiful reinventions} ...
 ... and always a reason to {CREATE} !


Saturday
Dec312011

{grocery bag goodness}


No one ever said that {grocery bags} had to be green!

I fell in love with this utility fabric and decided to try my hand at creating a {reusable bag}.

It is nice and roomy and embellished with a pretty hand crafted peony, dyed velvet and canvas leaves.


Thursday
Sep152011

{day 4 . a gauzy ruffled wool pouch}


Here I am with another project using this beautiful {inky vintage gauze trim}...


... and as adorable as I think it is, I must preclude this post with a confession. I love this little pouch because it's style closely resembles the beautiful little bags made by my friend, Roben-Marie over at Every Life Has A Story. She always creates the most beautiful bags and journals. I love everything she does...

...so while I did not start out this little bag thinking that it would look like one of hers, it just took a turn somewhere along the way because that is my favorite style.

 I was actually practicing a little sewing and one thing led to the next...
 ...I even remembered to line the bag - well half of the bag. Yes, you heard me right. I only made enough liner for one half of the bag...don't ask, because I just don't know!
 ...hence, the practice pouch.
 I used some hand dyed wool I had leftover from a recent pillow project, and added three yummy rows of that sweet and simple {vintage hand dyed trim} that I have been featuring in my etsy shoppe, all week long.
 I layered on a ruffled silk flower I made with a center that I created using leftover dyed muslin.
 I did a little free form stitching {love it} on the front panel of the wool...
 added some leaves, a vintage button, and some french knots tied with some vintage baker's twine I had in my stash...I used another piece of the {peony vintage dyed gauze trim}to create a tie. I use this to wrap around the button for a casual closure to the pouch.
 More {vintage gauze} in that delicious {peony color} was used as a lip on the pouch, for the finishing trim. While digging in my treasure trove of old thread, I found some pink silk that was actually in great condition...Love it!


 Lovely photograph showing the top panel of this little pouch lined...bottom panel NOT lined...
You can also see that my stitching is not perfect, but it is okay. I like the "timeworn" look.
{that is what I like to call it when I can't sew so great - "timeworn!"}
A hand dyed piece of muslin, in pale mustard adorns the bottom back panel. I hand stamped it with a stamp that I actually carved at a recent retreat with friends. I LOVE IT!
...so it is not a perfect pouch, but a practice pouch...and I think it is super sweet!
The look of it is just what I wanted...my daughter is already asking for it for her birthday!
That made me feel pretty good...half liner and all!


Wednesday
Sep142011

{day 3. pin cushion with vintage gauze trim}


So I know that I have been going crazy with this {inky vintage gauze trim} but I just can't get enough of it. Today I used it as a shabby ruffled trim on a pin cushion I fashioned from a few scraps of muslin.


That tiny cream colored flower is from my vintage findings collection. I use them sparingly as they are so hard to find anymore. This one was part of a tiny "boquet" that still had the stems in tact. I just sewed over the stem a few times to adhere to the front panel of my pin cushion.
 Remember that hand dyed vintage seam binding that I used on that tiny package?
That is the creamy blue trim used to make the tiny rosettes...
I love this paper flower...it was stamped with letters in a really cool circus style font.
 I have been really great about using up what I have on hand lately, so I filled my pin cushion with some leftover "beads" that we needed for a school project. They are most often used to stuff fabric dolls.
Since the muslin is a very think fabric, the beads worked better than the traditional "sand".
No leakage once you have a few pin holes in your fabric.
 Another perk to using the beads, is that the pin cushion will stand quite easily too...
 Of course, the vintage style pins don't hurt either!
 I love the look of the free form stitching, so I just zig zag back and forth over anything I am stitching numerous times...this way it looks random and sweet at the same time.
 See how I stitched the stem? Just a few lines back and forth to tack it down.
 The same with the paper flower...{isn't that dyed gauze trim just yummy?}
 I have made more than a few pin cushions and I like to leave one whole side unstitched to fill it...this way I can hand stitch the last side to look gathered, or ruffled. I love this look. Makes me think of a vintage sack filled with some yummy textile.
 This little project only took about 40 minutes, including gathering supplies. I always take a bit of time laying my design out, so it could go quicker depending on how involved you make your front panel.
If you decide to make a pin cushion with your vintage hand dyed trim I would love to see a photograph of it when it is complete!
Happy Sewing!


Sunday
Sep112011

tutorial: gauze rosette earrings


A yummy new batch of inky vintage gauze trim just hit the etsy shop shelves and I couldn't wait to share this {SWEET & SIMPLE} earring tutorial with you all.
These charming little rosette studs are easy and quick. You will want to make a dozen pairs! They only took me a half hour to complete, including gathering my supplies...so grab some {VINTAGE TRIM HERE} before it is all gone!
First, gather your supplies. Don't worry about having each item in the photograph...as long as you have the inky vintage trim you can use anything you love or have on hand to embellish your rosette...you will need:

 *scissors
 *glue gun or strong adhesive of your   choice
 *silicone pad for creating a circle of hot glue
  * two earring posts and two backs
  * something you would like to use to cut out your leaves from.(this can be cardstock, fabric, canvas, or anything else that will give you a good leafy texture) I used a leftover prima leaf I had on hand.
  *small hole punch (size will depend on how large you create your rosette)
 OPTIONAL: tweezers, string or yarn, rhinestones, buttons, etc.


For my rosette earrings, I cut two 6 inch lengths of {plum pudding inky vintage trim}
and tied a small knot in the end of each piece. Trim end of knots. 
 Next, using your silicone glue gun pad, create a small circle of hot glue. 
 Make sure it is pretty thick. Squeezing gently with constant light pressure works best. 
Place your knot in the center of the glue and let it set for 10-20 seconds. This just helps the glue gel a little bit.
Now start GENTLY twisting and wrapping your inky gauze trim around the center know, patting it in close to the trim it is wrapped around. You want a nice tight rosette when you are finished. Continue wrapping until your trim has covered your entire glue dot and then trim with scissors. Press flat gently and peel SLOWLY off of the mat. Tack end of trim to back side of rosette.
Now take your fabric or cardstock or leaf material and cut four small leaf shapes. These DO NOT have to be perfect. Flowers in the wild are not perfect and this gives your earrings character. 
Choose two leaves and layer them until you have your desired effect. Glue them together.
Set your leaves aside and go back to your rosette. Use whatever embellishment you like here (or none if you like...the pair I wear has NO BLING or anything, just SWEET AND SIMPLE!) and add it to your rosette's center. I used some inky dyed string for my center (coming soon to etsy shop) to give my center a little nesty look. Just twist and twirl the string until you have the shape you want and tack down with a dot of hot glue. Then I added a small rhinestone with a dot of hot glue.
Now take some old leftover cardstock or thin cardboard. ( I used some recycled packaging from my rhinestones ) Punch two circles and adhere one to the back of each earring. This will help disguise all of your layers of glue and leaves and flower.
Now take your earring post and clue that to the center of your cardstock. Let dry for a few minutes or until hot glue has completely cooled.
Your beautiful {INKY VINTAGE GAUZE TRIM} has been transformed into a darling pair of rosette earrings.