Roben-Marie Smith

Roben-Marie Smith


THIS AND OTHER  PRODUCTS AVAILABLE AT

       IS A REGISTERED TRADEMARK


 sandi-keene

Roben-Marie Smith

Blog Index
The journal that this archive was targeting has been deleted. Please update your configuration.

Entries in home made (15)

Thursday
Mar132014

coffee filter wreathe

When I was moving recently I came across a handful of foam wreathes- leftover from a school project. Rather than find a place to store them I decided to make a few little wreathes for Spring.
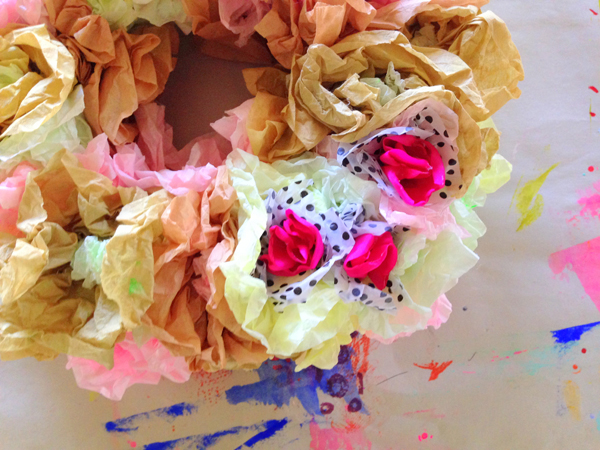
This project took just under an hour and requires only a few supplies - most of which you might have on hand.
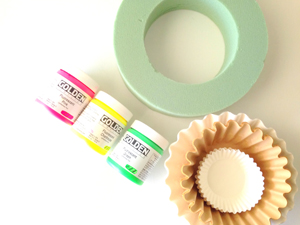
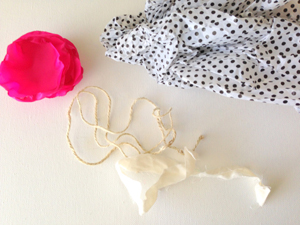
You will need: a foam wreathe (mine was 8" in diameter), assorted coffee filters, assorted paints, twine, scrap of muslin, tissue paper, and a floral embellishment. I cut up some polyester material I had on hand and shaped it into circular petals for mine. You will also need a glue gun and a glue stick or two.
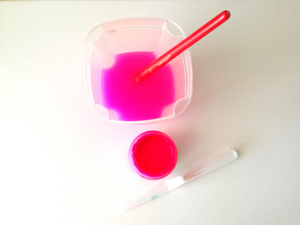
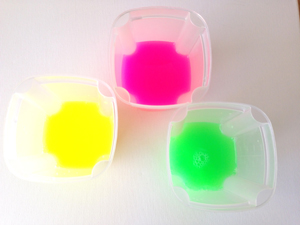
First I scooped a very small amount of Golden Heavy Body Acrylic Paint ( I used Fluorescent Pink, Fluorescent Chartreuse, and Fluorescent Green) into an old container. Next I added about two cups of water and mixed it up very well. If you are making a larger wreathe you will need to adjust the paint and water quantities accordingly.
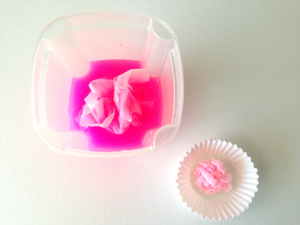
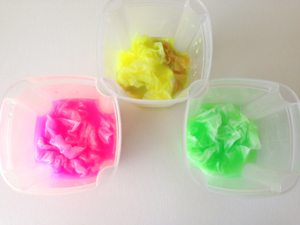
Once the paint & water were mixed well I began crumbling up the coffee filters and stuffing them into the mixture. I divided the filters up evenly and made sure they were well beneathe the surface of liquid. I let them soak for 30 minutes. For my miniature wreathe I used approximately 50 large filters, a combination of both natural and bleached, and 15 white cupcake wrappers. (Depending on how tight you crinkle them when adhereing them to the wreathe, you could use more or less)
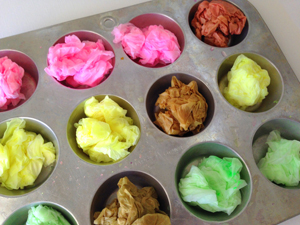
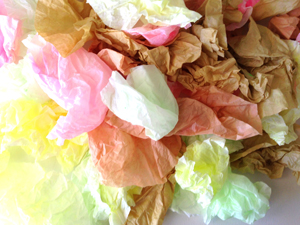
These colors apprear VERY bright while soaking, but they will be much, much lighter when dried. Adjust your color preferences accordingly. After 30 minutes I carefully (they will tear easily) wrung out each filter. You can do this with several at a time. Leaving them loosly balled up, I tossed them in the dryer on the coolest setting for about 6 minutes. Once dry I gently, and only partially, unfolded each filter.
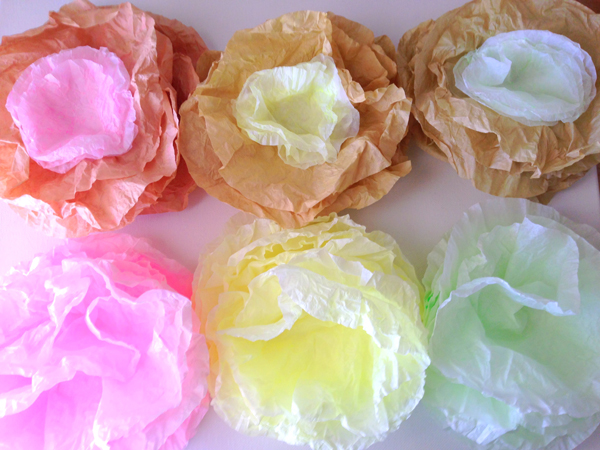
They look so yummy! ... like cotton candy peonies! I was tempted to just pin them to the wall at this point...but I went ahead and finished my wreathe. Maybe next time.
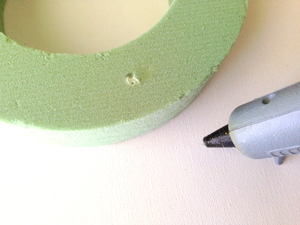
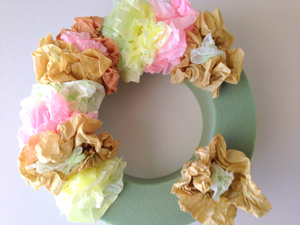
Next I began crunching and gluing my filters onto the foam wreathe. You could use straight pins too - but I wanted mine to be premanent. The glue will slightly melt the foam, but this is ok. It makes the depth different for each flower and I like it. I chose to add my filters randomly and layer the smaller cupcake liners with the larger natural ones.
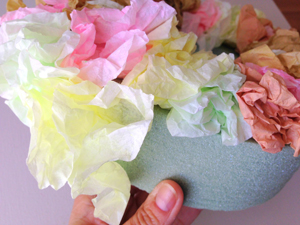
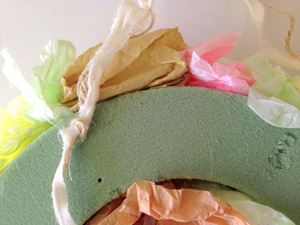
I continued to add filters on the outside of the wreathe, as well as on the inside center ring. I cut a length of twine and muslin, knotted each end and glued the ends to the back of the wreathe.
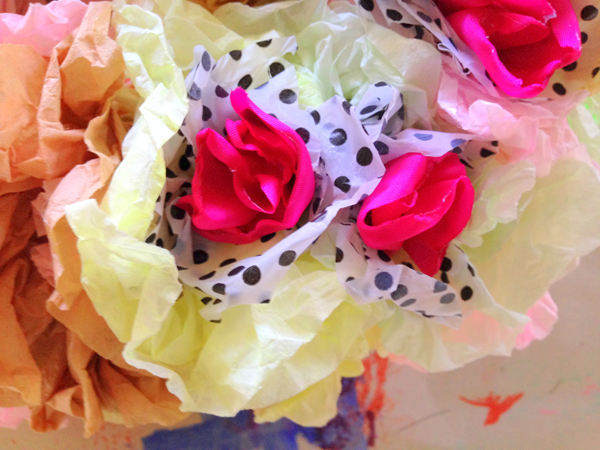
Next I added my pops of color. I am an not a big pastel person, so while I wanted my wreathe to resemble Springtime, I needed a little punch to call it mine. I began by cutting up circles of polka dot tissue paper, approximately 4 inches across. I scrunched them in the middle and glued them in a cluster on one side of my wreathe. I repeated this step with the pink silky centers.
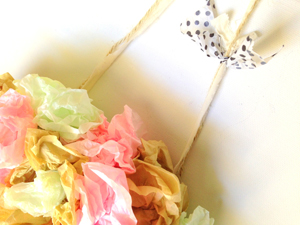
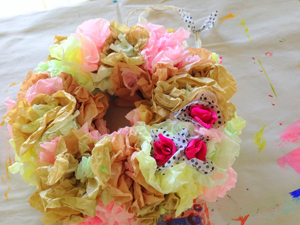
Lastly I added a piece of muslin and tissue paper to the handle. I love it. Springy and easy and fast. Perfect.
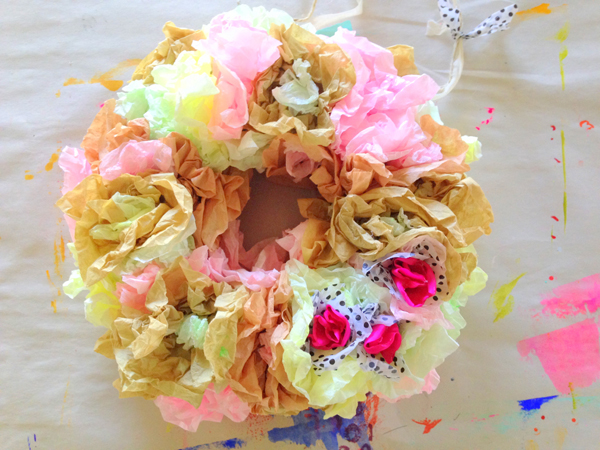
...now...where to hang it?


Enjoy the process!
Friday
Jan032014

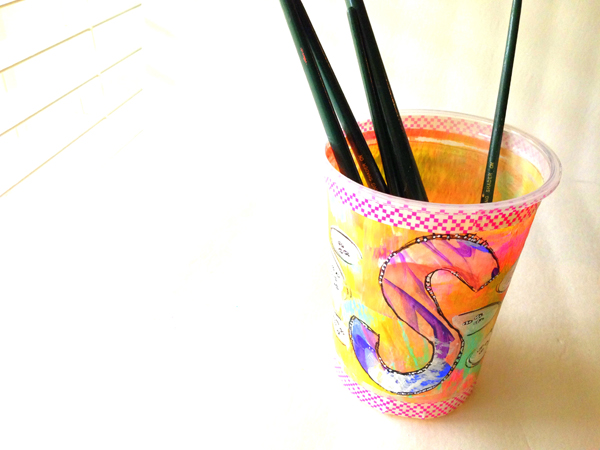
papered paint cup

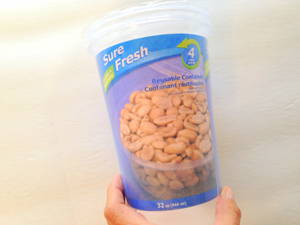
When my daughter wanted to have some friends over to paint, I ran to my local Dollar Tree and grabbed a few disposable plastic tubs to use for paint cups. That was supposed to be the end of it. Well, if you know me, you know I just couldn't leave those cups plain. Time was a factor, so I kept it really simple. Plus this way, no one's heart will be broken if you throw them away at the end of the day.

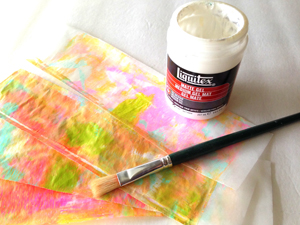
You only need a few supplies: *a disposable plastic cup or tupperware *deli paper *craft paint *paint pens *decorative tape *gel medium or adhesive OPTIONAL: *gelliplate *brayer

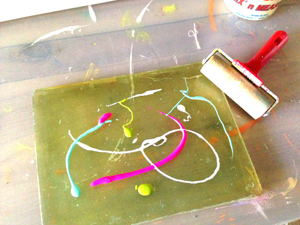
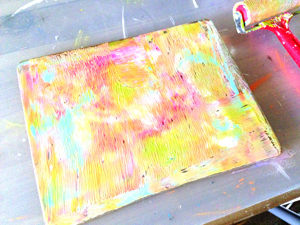
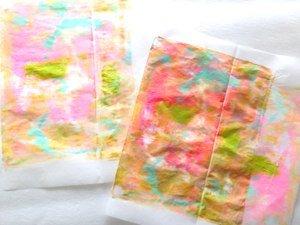
STEP 1. Choose your container and grab some deli paper. I chose to use the gelliplate to paint my deli paper, but you could paint your own design on it instead.

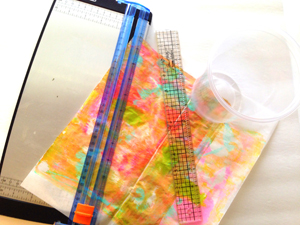
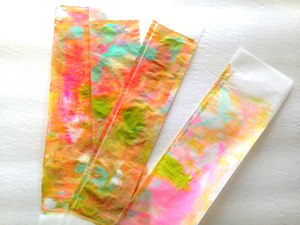
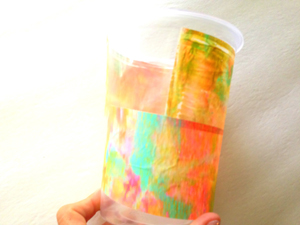
STEP 2. Once your paper is painted and completely dry, cut it in to strips. I measured the height of my cup then cut two strips just wide enough so they would overlap. I cut several more to fill in where my strips didn't meet and to use for shapes and monograms.

STEP 3. Adhere your strips to your container. Smooth out wrinkles as you go. Set aside to let dry completely.

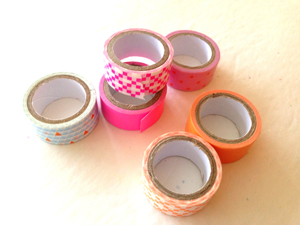
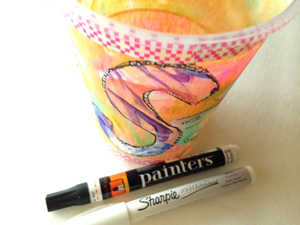
STEP 4. Once your cup is covered and dry, begin adding your layers. I started by adding some washi tape to the top and bottom borders. Then I cut a monogram from painted deli paper and glued that to the center of the cup. Once dry I added borders and pops of color with black and white paint pens.

These are easy, affordable and completely disposable. The girls were thrilled that their paint cups were pretty. I was thrilled that they were happy! Enjoy!

Friday
Sep132013

mini tutorial: homemade flower stencil

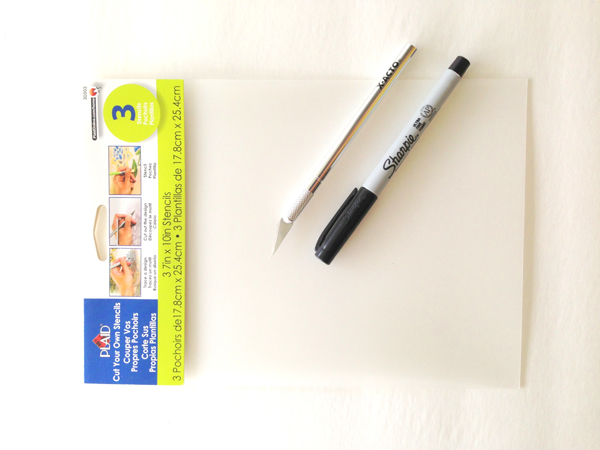
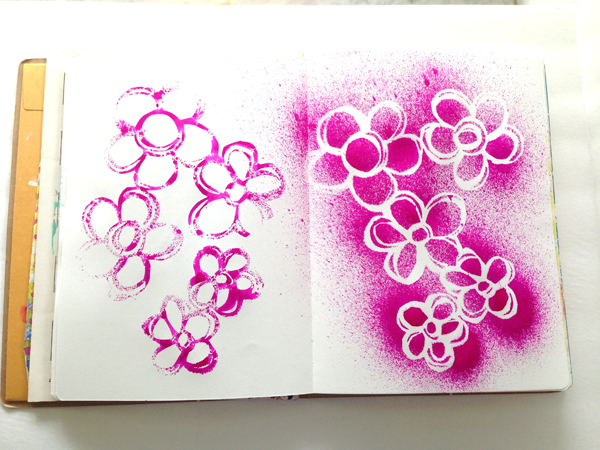
I have been wanting to try to make my own stencils for awhile now and when I stumbled across this plastic at my local Wal-Mart I had to give it a try. I also needed a sharp knife, a cutting mat and a permanent marker. This is what I did if you want to give it a try yourself.

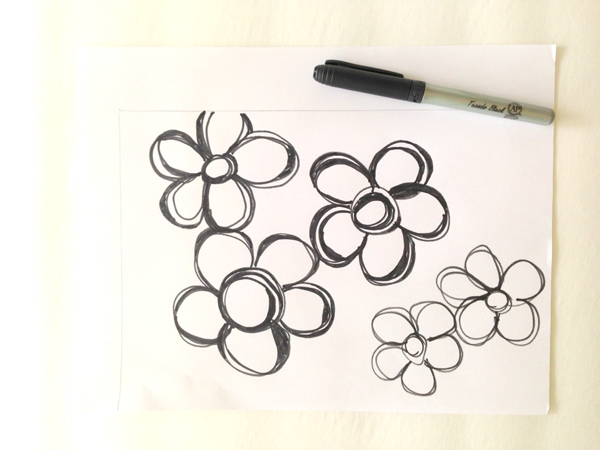
Step One: Draw a template with a permanent marker on cardstock. (you could use tracing paper too, but I had trouble with the pencil smearing as I was cutting) Place template under piece of stencil plastic and staple or tape the edges to hold in place.


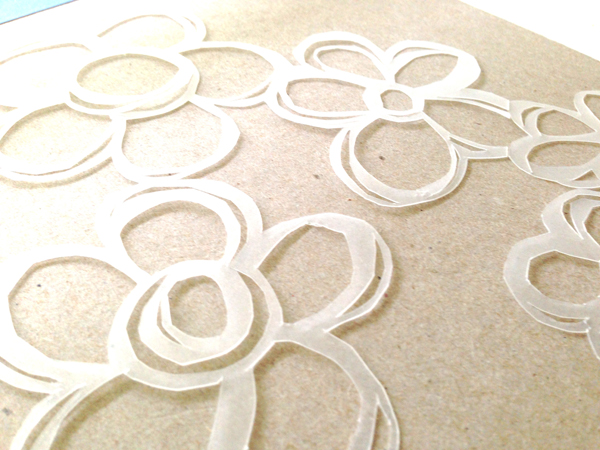
Step Two: Place on cutting mat and slowly and carefully cut away all the parts you wanted REMOVED from your stencil.

Keeping the flowers all connected was a bit tricky so I actually ended up with two seperate stencils. One with two flowers and one with three. I sprayed it heavily so you could see the detail better.

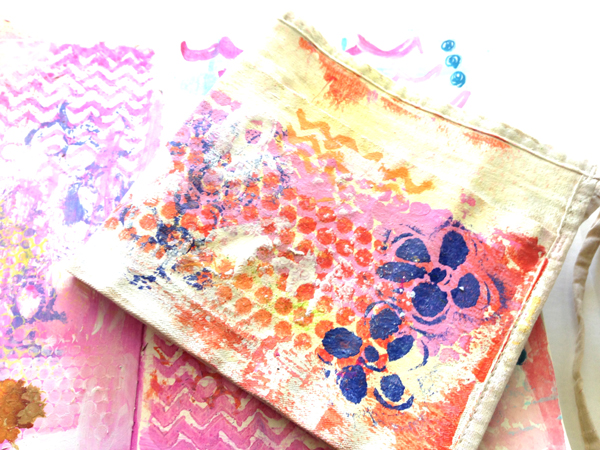
Here I used the same stencil, rubbing paint over it instead of spraying it with ink.

This really wasn't as difficult as I thought it would be. I think I might give it another go this week.

Saturday
Jun082013

on the worktable: crocheted baskets

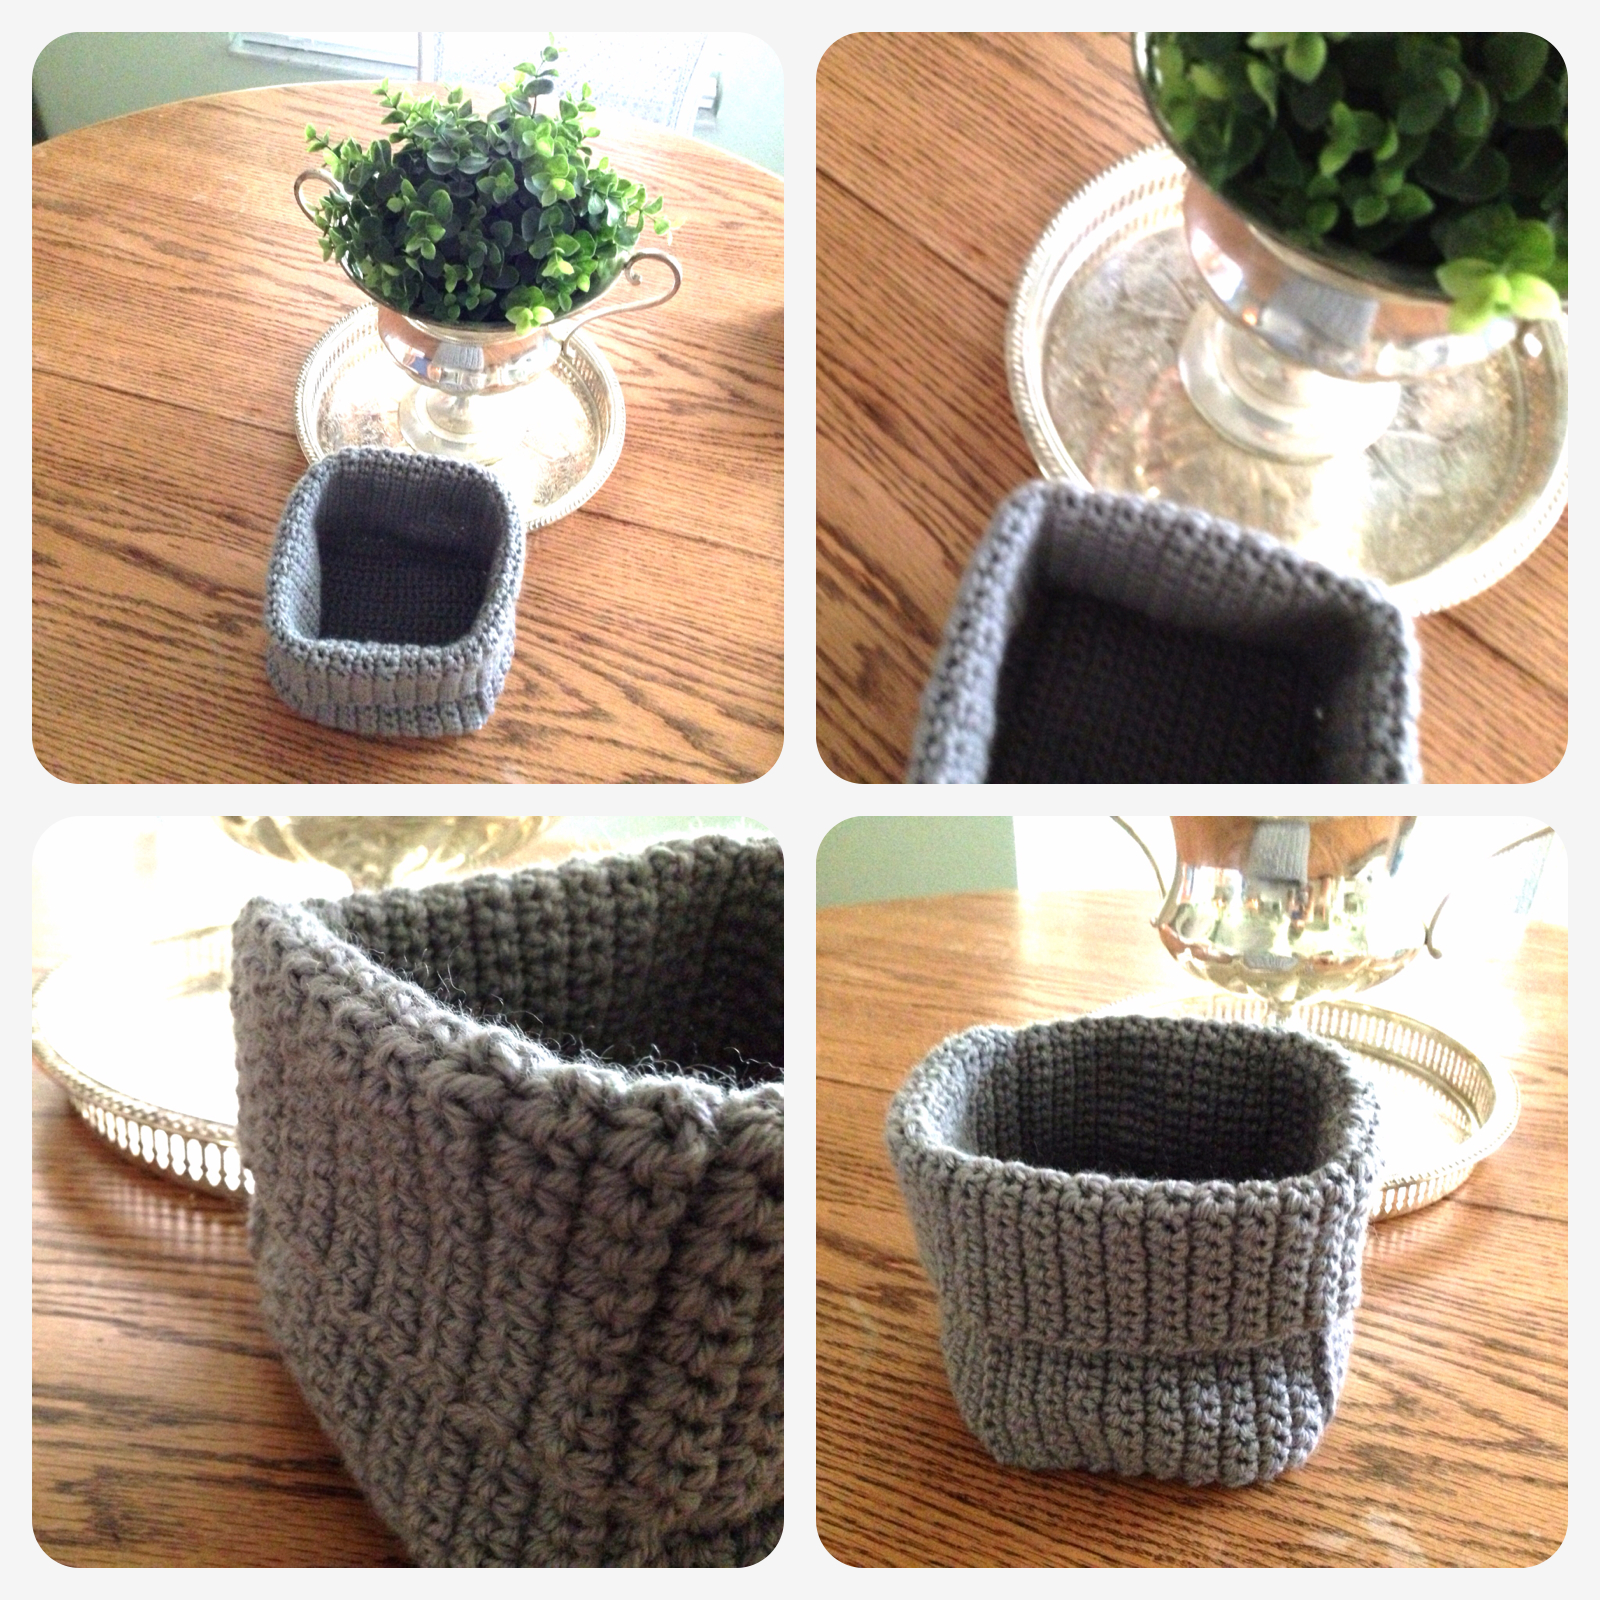
As part of my yearly goal to decorate on a dime I am trying to shop my home and create things that I would normally buy. I loved these pretty crocheted baskets but had to stick to budget on my bedroom makeover so I decided to google a pattern instead.

I feel I should mention I am not a seasoned crocheter! I am self taught and I can tell you practice makes perfect. This was a very simple to follow pattern and at no point frustrating. I haven't added the fabric stiffener yet per the instructions, but I still might. I really wanted this basket to remain soft looking and I am worried the stiffener will change that look. We'll see. Anyway- I love it and I think I will make a few more and cluster them together on a nightstand or desk to keep things clutter free!
 

Thursday
May232013

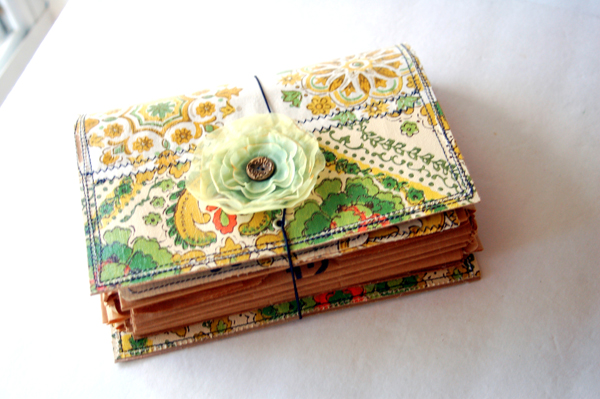
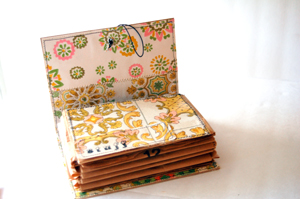
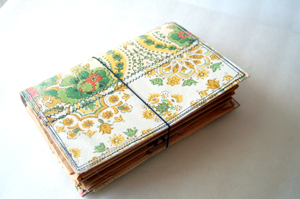
tutorials: recycled coupon organizer

I love coupon organizers. They are the lap dog of file storage and you can never have enough of them. I have been on a kick to organize my collage papers as of late and lo and behold all of my coupon orgaizers were being used for something already - what? I didn't have any extras on hand, but what I did have on hand was a stack of lunch bags. School will be out (YEAAAA) in a few weeks so I could afford to swipe a few for this project. Plus I could recycle some old papers too!

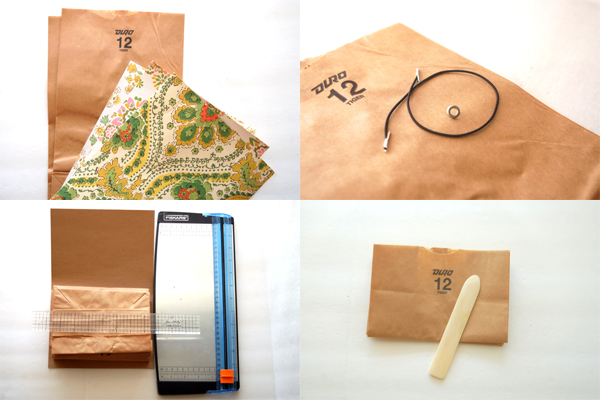
You also will need some pretty cardstock or paper- I used some vintage wallpaper I had in my stash, a piece of chipboard, a ruler, bone folder, paper trimmer, scissors, adhesive or hot glue, an eyelet and a barbed elastic loop or rubber band.

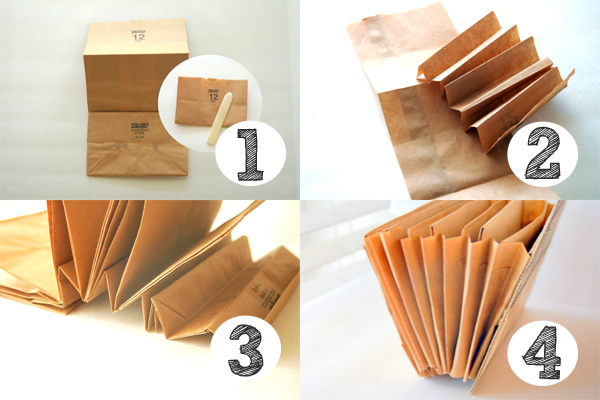
Step 1. Fold lunch bags into thirds, accordion style. Flatten each crease with bone folder for nice edges.

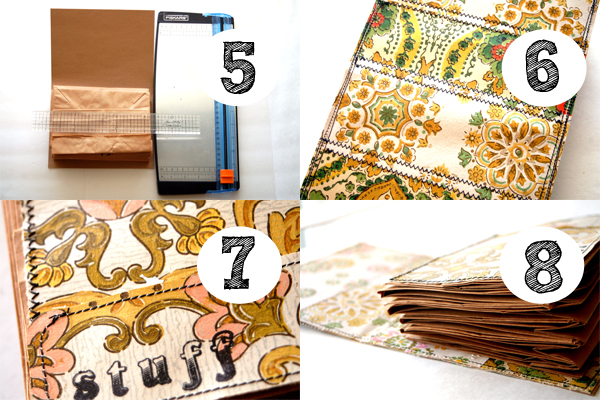
Step 2. Measure width of your folded bag and cut one thickness of bag to that width. Fold and crease, accordion style, until you have created enough "ditches" for each fold of your bag. This will be for the bottom of your coupon organizer. Measure the height of your bag and repeat, creating two folded pieces- one for each side of your coupon organizer.

Step 3. Apply a line of adhesive in crease of each "ditch" and carefully place each fold of your bag in the ditch.

Step 4. Repeat step three for each side of your organizer.

Step 5. Measure and cut your chipboard to make a cover for your coupon organizer. Allow a 1/4" on either side. You will want your cover to fold over the top of your organizer, covering it completely.

Step 6. Cut pretty papers to cover both sides of chipboard. Attach them using adhesive or you can stitch them on like I did.

Step 7. Add paper to the front facing bag of your organizer to pretty it up. You can stamp a word or add a small embellishment if you like.

Step 8. Adhere back facing bag of your organizer to the lower portion of your inside cover. Use a strong adhesive or hot glue.

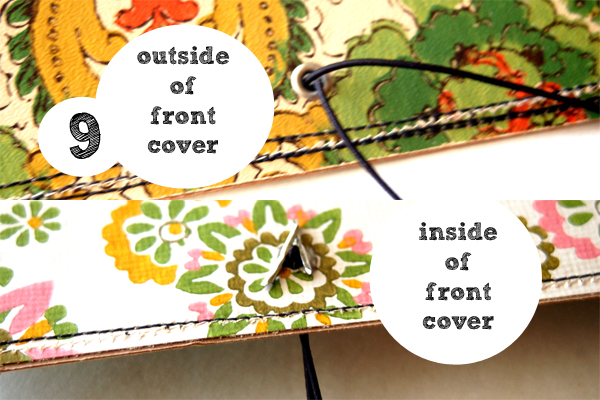
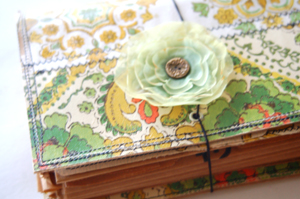
Step 9. Fold cover over and position mark near bottom center of front cover flap. Punch hole, add an eyelet and your elastic loop or rubber band. Add embellishment to front cover if desired.


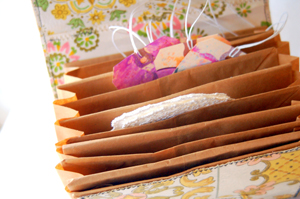
I think I will have fun filing my collage papers in this pretty and portable, recycled organizer!

Monday
Feb112013

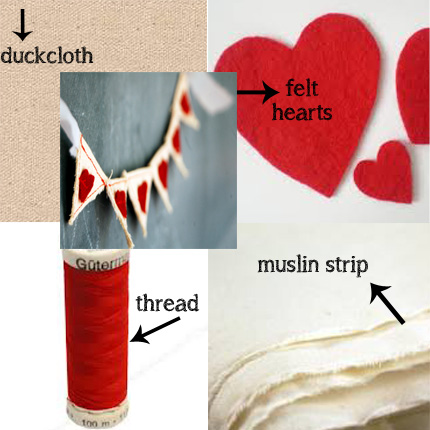
tutorial: valentine banner

Here is a super easy, last minute Valentine tutorial, that you can do in under 15!

These are lovely as big banners hangng from your favorite artwork or slateboard and just as sweet in a miniature version on notecards!

1. Cut duck cloth into pendant shapes 2. Cut hearts out of felt or wool and stitch to center of each pendant 3. Stitch pendants to long strip of muslin. EASY PEASY!

Wednesday
Jan232013

tutorials: Valentine Canvas Magnet

This year for Valentine's Day I was looking for a new twist on the old. I LOVE making and sending Valentine's, but wanted something a little different. I decided that a cute magnet might be a sweet and REUSABLE solution!

Gather Supplies:

You can find miniature sized canvases at your local craft store. I bought a bulk package of 6 at Michael's Craft Store. Chances are you have most of the other items somewhere in your creative area - if not, you can find all of these at your local craft and hobby store as well. I had a few old refrigerator magnets laying around that I cut up and used!

When it comes to making more than one of anything, I like to do it in assembly line fashion, so first I globbed some gesso on each canvas and smeared it around with an old gift card, leaving some lines and texture. I ripped a small piece of book paper and placed it in the corner of the canvas and gessoed over it.I let these sit until the surface was dry to the touch.

Next I dipped a small paint brush in red and pink paint and dabbed it in random areas on each canvas. Once again I smeared it around with the gift card, moving both the paint and some of the still damp gesso around. Once this was completely dry I added a little more gesso to the top because I like all my art stuff to be chunky.

Next I took a sheet of book paper and folded it several times creating some thickness. I drew small hearts on it with a pink pencil and then stitched around the lines with red thread and cut them out.

Next I cut small circles out of scraps of white muslin. I did not measure these and made them shabby on the edges by pulling loose threads from around the edges. I stacked two of these and stitched the center.

Print out a cute saying and adhere it to your canvas, adding more gesso to disguise the edges as needed. Let dry. Stack and layer your hearts, flowers, bling and any other embellishments! Now just glue your magnet to the back and there you have it! Super SWEET and super cheap!

I loved the STUCK ON YOU saying since these little beauties were magnets!


Friday
Oct122012

Halloween: recycled pillows

This is part of our Halloween BASH.  See a listing of all projects so far at the end of the post.

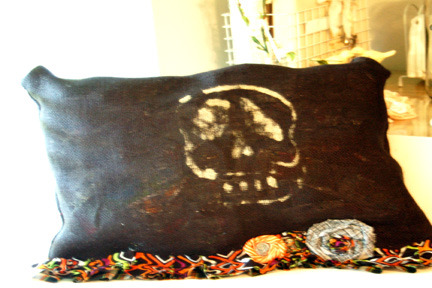
*RECYCLED PILLOW TO THROW ON YOUR HAYRIDE

During our annual halloween bash, we always need "pillows" for the hayride. This year I decided not risk taking the ones off of my living room sofa because last year they were covered in caramel corn by the end of the ride.

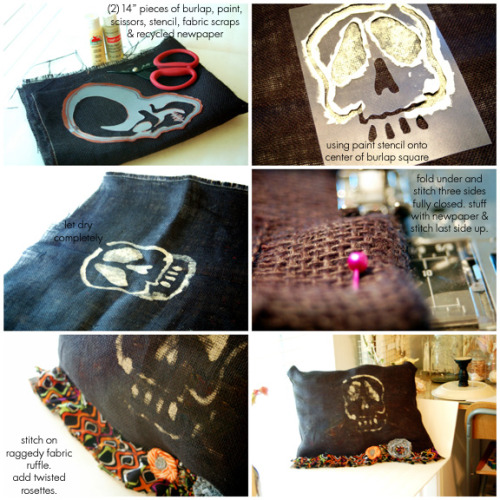
Instead I made disposable pillows stuffed with newpaper. I liked the reverse side of my burlap after painting it - it looked spookier, so I used that instead.

You can learn to make twisted rosettes here.

Are you making Spooky or Pretty? Either would be great!


Other Halloween BASH Projects:

Spooky Books

Halloween Sweet and Spooky $1 Mirrors

Halloween Tags

Halloween Wreath

Halloween Treat Stand

Halloween Treat Bags

Enjoy!

Wednesday
Oct032012

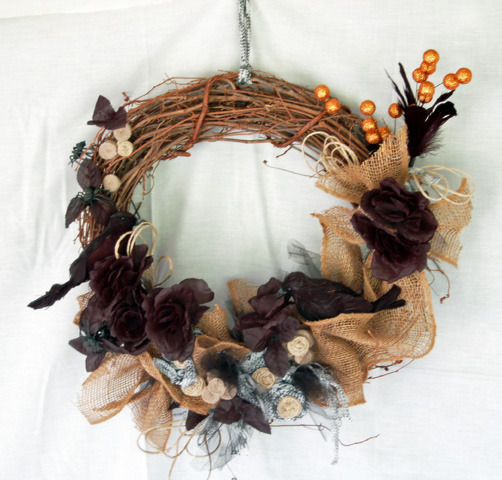
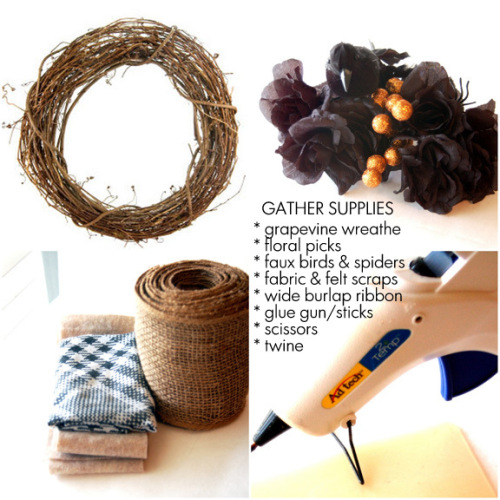
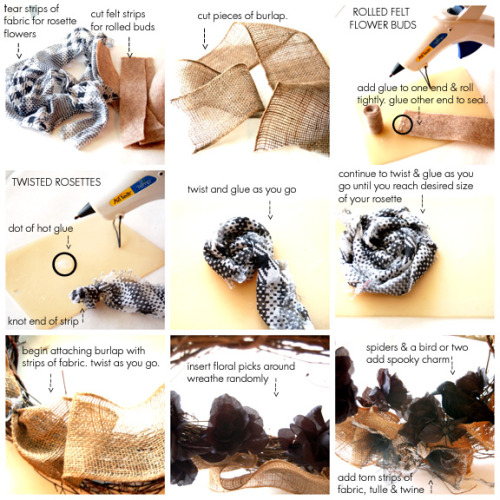
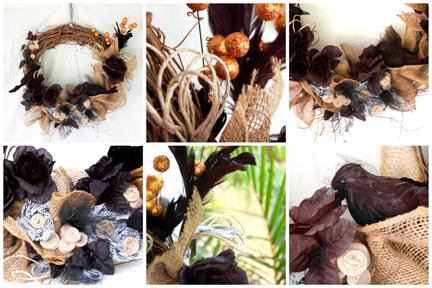
Halloween Bash: Halloween Wreath

Halloween is one of my favorite holidays. I thought it would be fun to have a Halloween BASH to make fun, festive, affordable projects to celebrate the season.

Welcome to Halloween Bash : PROJECT WREATH

How about a beautiful Halloween wreath for your front door?

Ready?

ENJOY!

Other Halloween BASH Projects:

Spooky Books

Halloween Sweet and Spooky $1 Mirrors

Halloween Tags


Wednesday
Sep192012

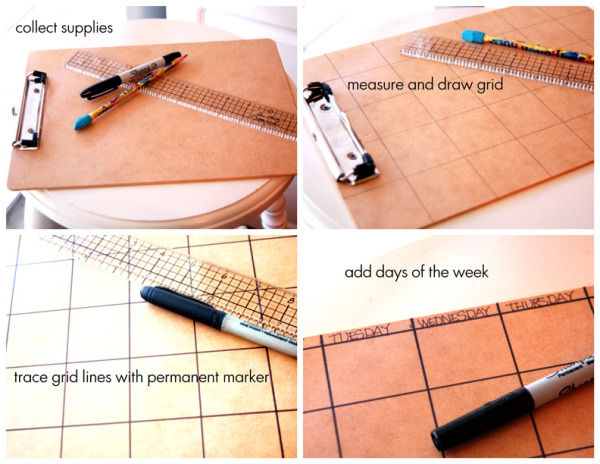
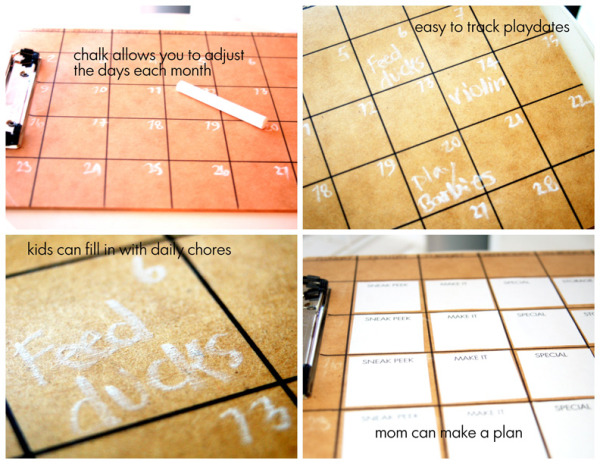
Home Made: Clipboard calendar

I needed a calendar to keep track of upcoming projects, submissions, deadlines and blog posts.  Elise Blaha's post on blog content organization was great inspiration.

A calendar that was flexible in design was perfect for me. Here's how I made it:


Perhaps this is just what you need to organize your month!