Roben-Marie Smith

Roben-Marie Smith


THIS AND OTHER  PRODUCTS AVAILABLE AT

       IS A REGISTERED TRADEMARK


 sandi-keene

Roben-Marie Smith

Blog Index
The journal that this archive was targeting has been deleted. Please update your configuration.

Entries in pillow (9)

Friday
Dec132013

sewing stuff: she loves pretty too

When my sweet friend, and other NO. 1 fan, Lorraine at Serendipity Studios wanted me to create a painted pillow for her I knew it had to be special. She is special. She laughed when she read this - so here you go Lo- because you loves pretty too!

Can't wait to visit her beautiful studio again- it is amazing! This will fit her bright and beautiful personality perfectly!

If you haven't stopped by here and met her - do it today! She is beautiful, kind and wickedly talented! AND SHE LOVES PRETTY TOO!

Sunday
Nov032013

sneak peek: more stamp love

Did I mention I am in LOVE with these new Mixed Media Essentials Stamps by Roben-Marie Smith?

Want to see all the awesome projects I created using this stamp set? Click here for loads of inspiration!

Saturday
Nov022013

newsworthy: my artwork at society6

HERE IS SOME REALLY EXCITING NEWS PEOPLE!

One of my favorite originals - DOCUMENTED, is now available  as a print and other great prodcuts like these!


Also available as: Pillows, totebags, stationary, stretched canvas, framed art prints and more! See all my inspiring work here at Society 6.

Friday
Nov012013

art stuff: playing with these--->mixed media essentials  


I confess. It has been a long time since I really USED rubber stamps.

That is not to say I don't have any - I do, but they never really jumped off the worktable and said "play with me please!" Recently a friend of mine, Roben-Marie Smith, asked me if I would be interested in working with her new line - MIXED MEDIA ESSENTIALS. Holy Moly is all I can say!

These stamps were calling my name! I knew the minute I laid my hands on these I would be stamping on more than just paper. I had to put these puppies to fabric. WOW! They rocked!

I absolutely fell in love with all of the combinations I could create with this set. I can't say whether it is the doodled nature of this line - I love to doodle, or the whimsical feel they lend to a piece of art that I love more.

It has been great to work with such a versatile set of stamps too - you can reach for anything from a funky alphabet to a scalloped edge to a doodled dot or circle!

I stamped on fabric, paper and board canvas- each and every project turned out so awesome!

I can't wait to experiment some more with these funky and modern, MIXED MEDIA ESSENTIALS stamps! Who knows what will come off the worktable next! Stay tuned! And don't forget to visit Roben-Marie Smith here for more inspiration and to see what other artists are creating with the great set of stamps!

Wednesday
Oct302013

sneak peek: stamp love

More soon - but I just had to share a peek at my new favorite stamps by Roben-Marie Smith - Mixed Media Essentials.

Monday
Jun172013

tutorial: sweater band pillow

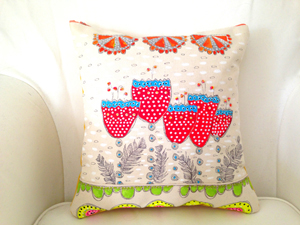
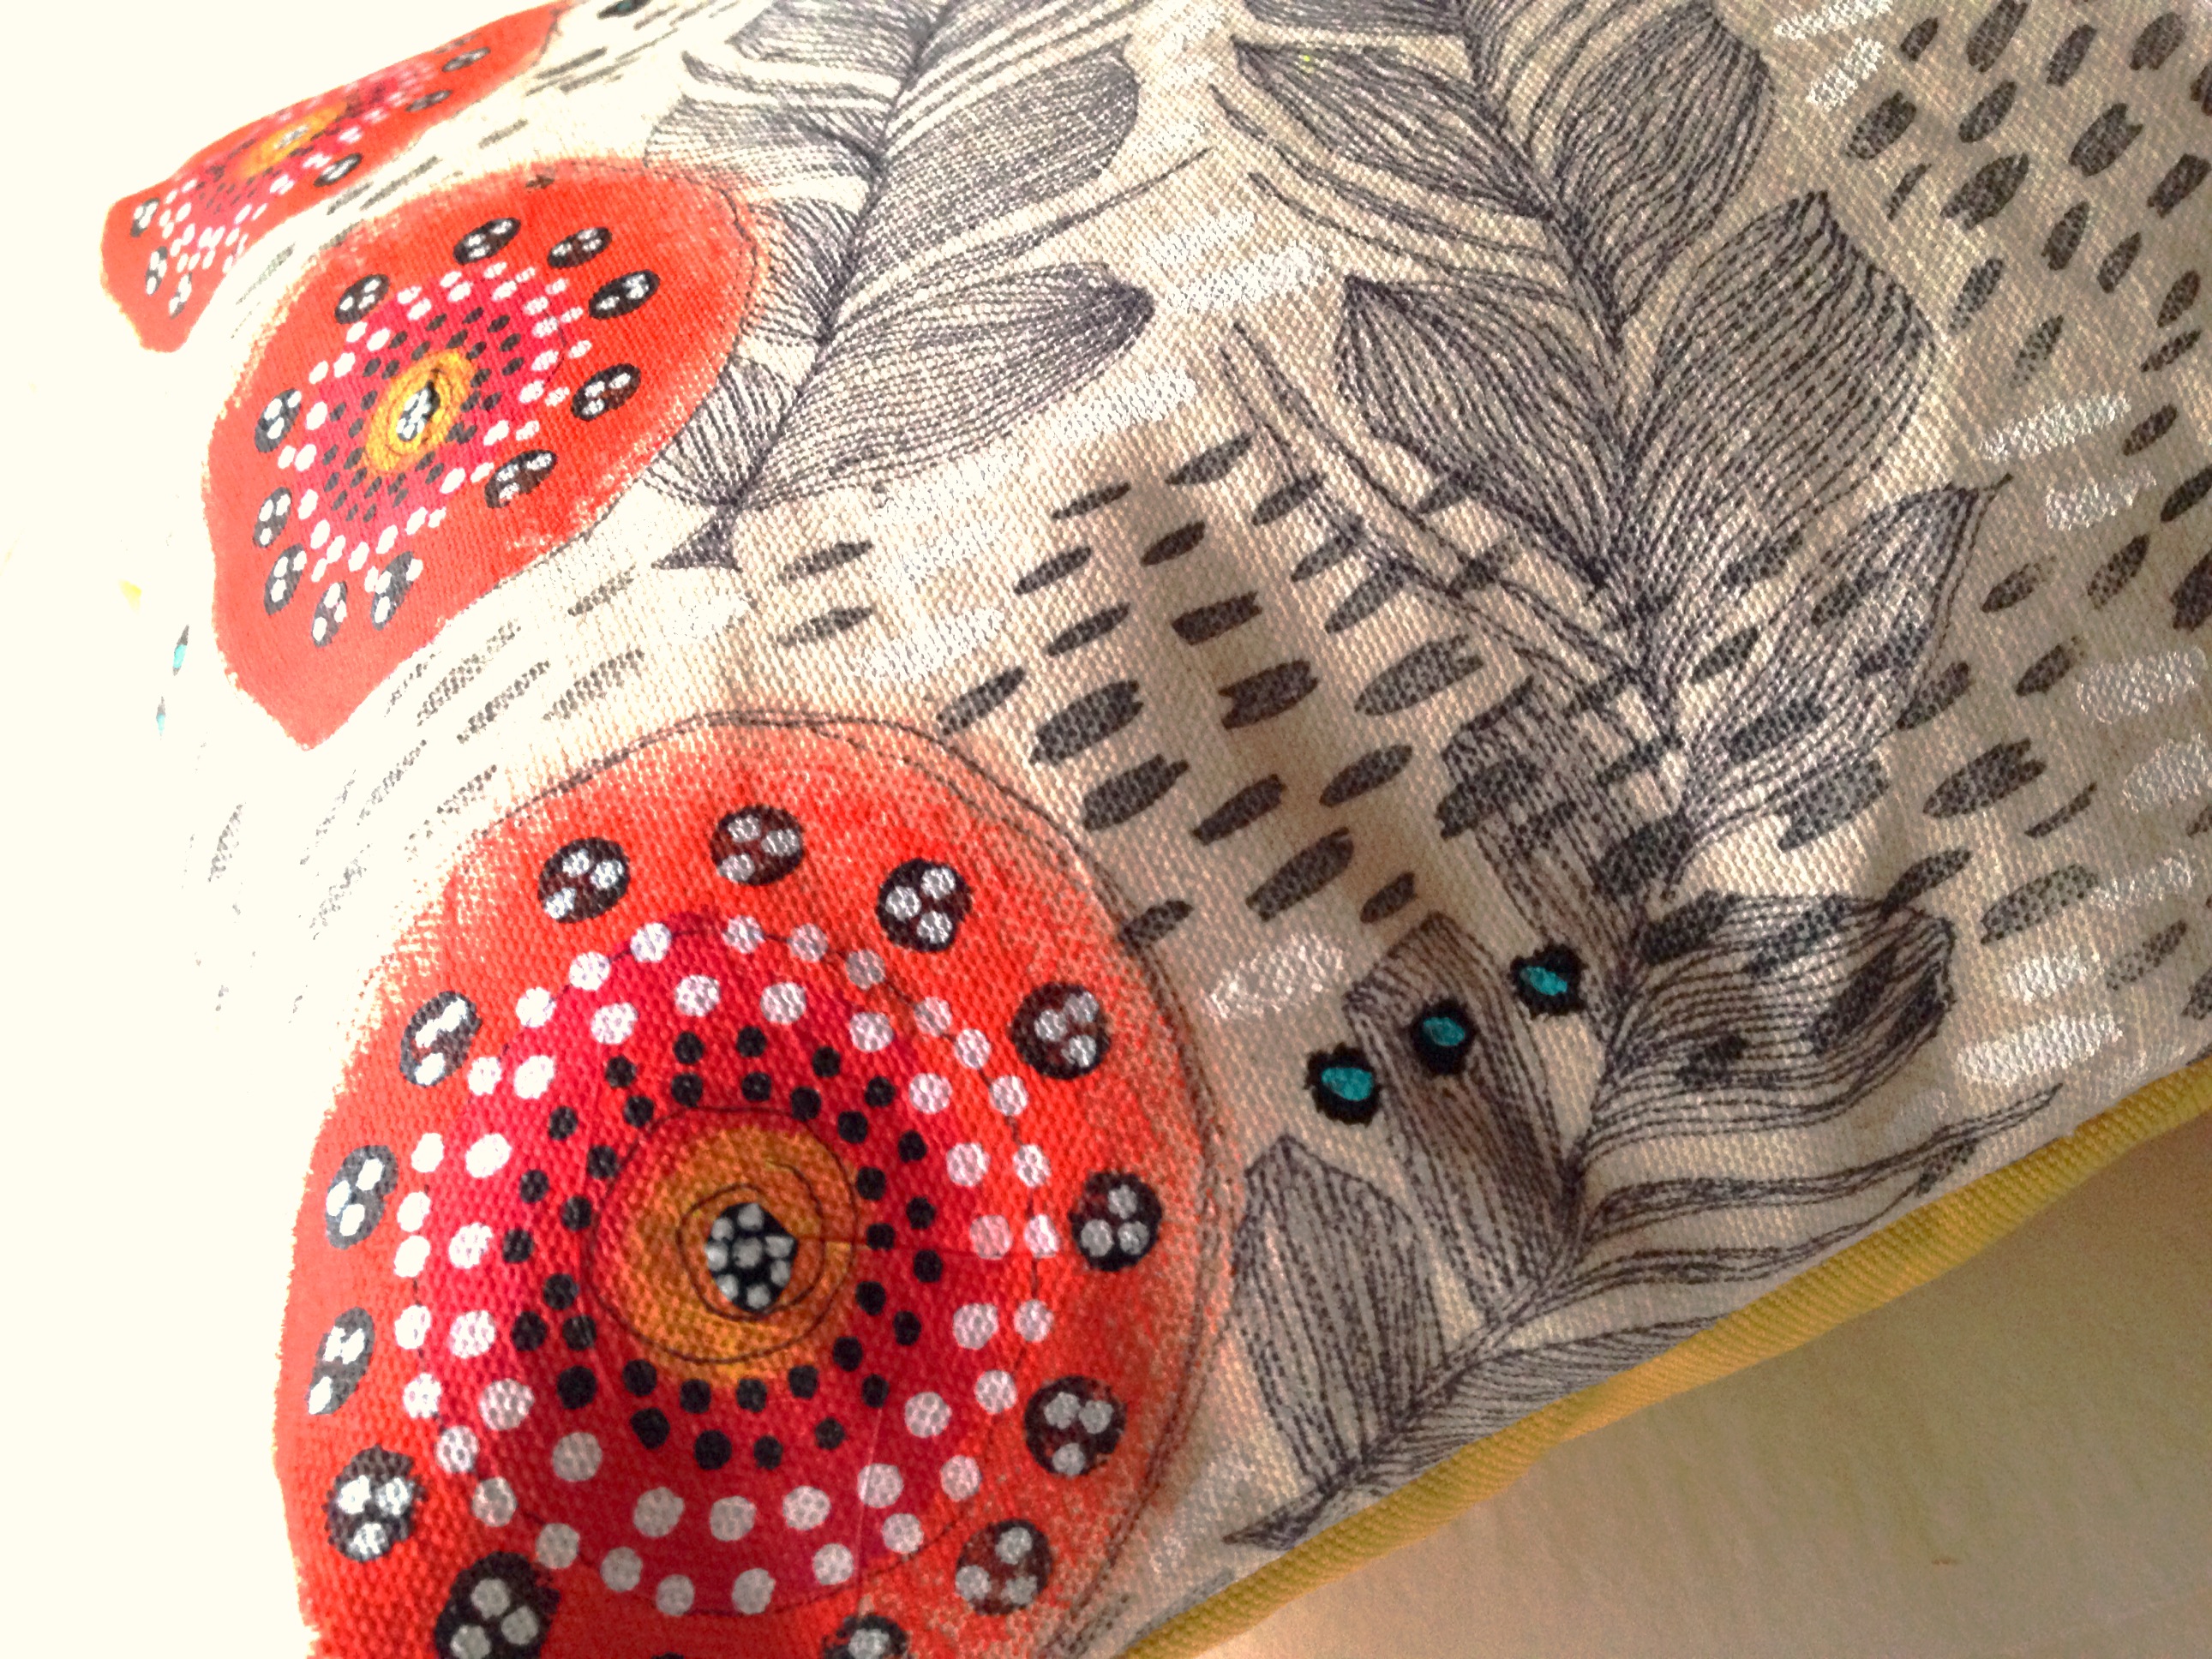
I know I have been absent lately, but summer is here and that means the kids are home and projects are in motion. You might have read here that I am in the middle of a bedroom makeover - part of decorating on a dime, shopping your home. In keeping with that I am making some new pillows for part of the redo. This one  is my favorite so far!

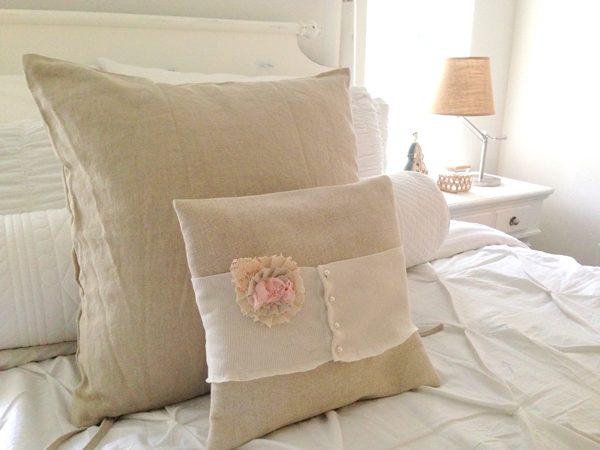
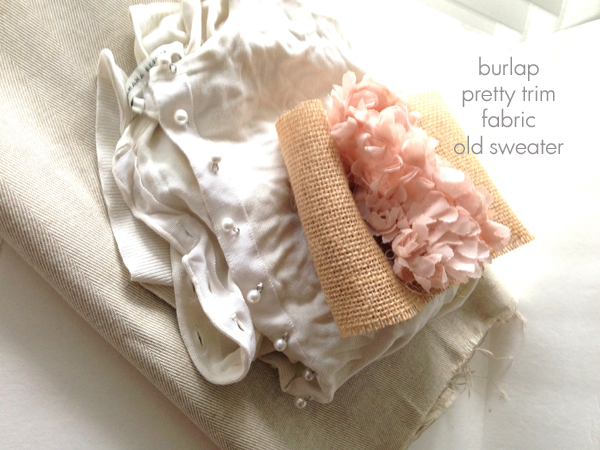
By the way - this is a sneak peek at part of the bedroom redo in progress...more to come soon. This pillow was super easy and fast. Here's how you can make one. Gather your supplies.

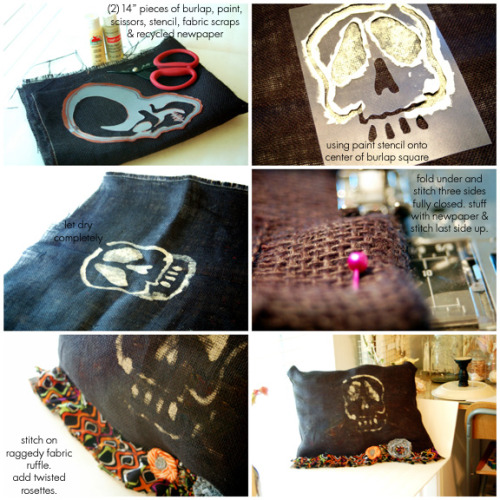
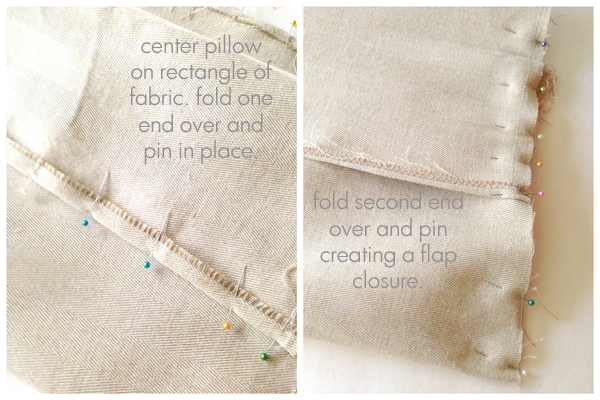
How much you need of each fabric will vary according to your pillow insert. Mine was 14" square. This was a quick and unorthodox way to make a pillow cover so tweak it to your needs as you see fit. You will need a long rectangle of fabric. One that will fold over and cover your pillow, twice. HEM SHORT ENDS OF FABRIC FIRST. Next, lay out your long rectangle of fabric and place your pillow just off center. Fold fabric over and line up sides and pin. Your pillow now looks as if you stuffed it into an envelope. Fold second end of fabric over, line up sides and pin almost all the way to the top, leaving just enough room to slip pillow out. This is an extra step to ensure our pillow flaps look good. Feel free to skip it if you have made one like this before.

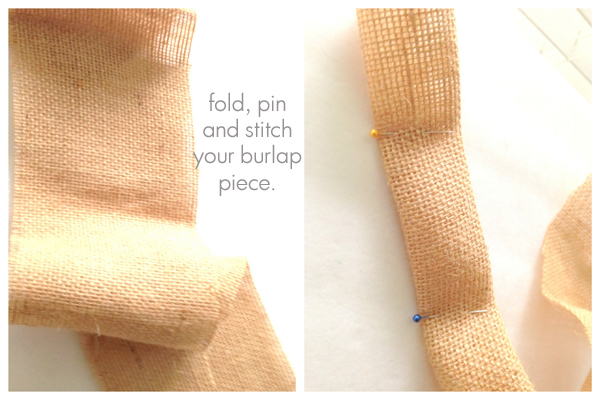
Don't sew yet. Next grab your burlap and fold a rectangular piece in half once and then again. This piece will need to be as long as your outside facing pillow flap. Pin and stitch down each side.

Carefully remove pins (you will have to repin later, but this ensures are flaps are positioned correctly) and pin your finished burlap strip to one short hemmed end of your fabric. Next reposition your pillow and repin with RIGHT SIDES FACING. It should look like this so far.

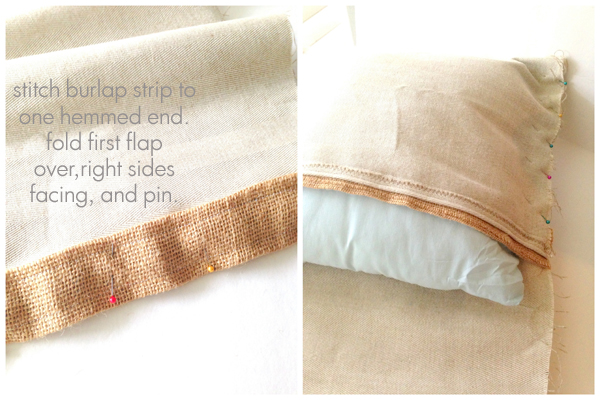
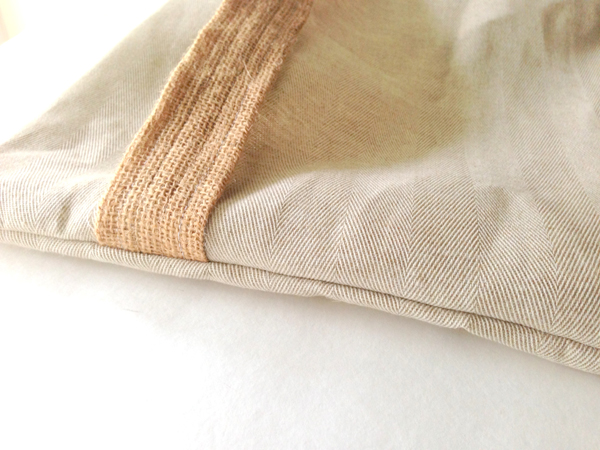
Fold second flap over (this one should have no burlap edge) and line edges up. Pin one side and carefully remove pillow insert. Pin second side and stitch up both sides, being careful to reinforce where your two flaps overlap.  Turn right side out. This is what you should have now.

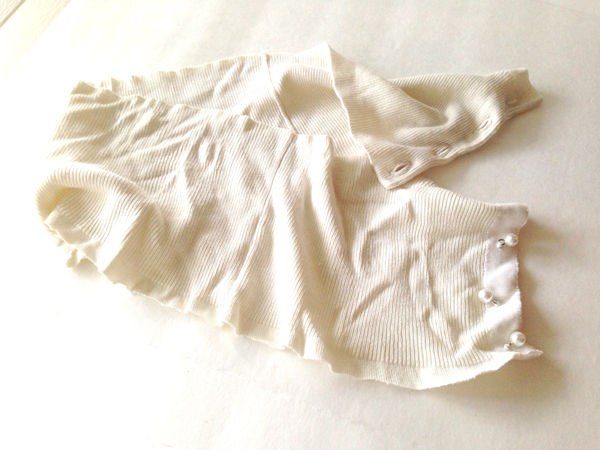
Next take your sweater and cut the bottom band off, keeping it as wide as you would like. My sweater had a ribbed band and so I had a nice guideline to follow, making it approximately 5 inches wide. Be careful when cutting to cut the exact amount of buttons and buttonholes that line up.

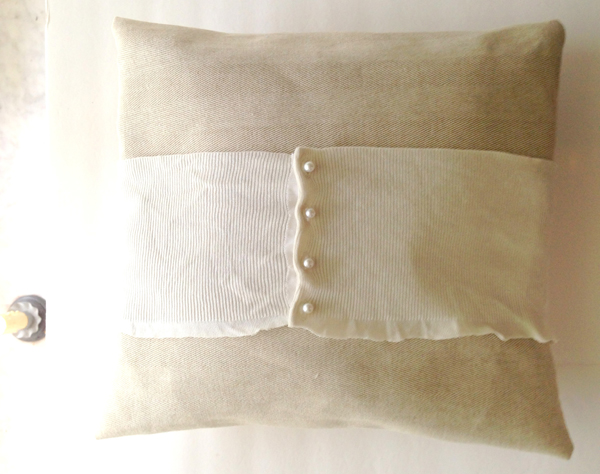
Now stuff your pillow insert into your new pillow cover and button your sweater band around it. I used the burlap as a guide, leaving that showing on the back for contrast.

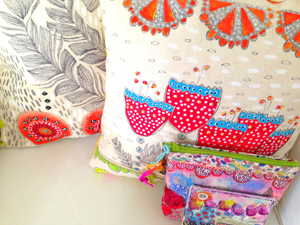
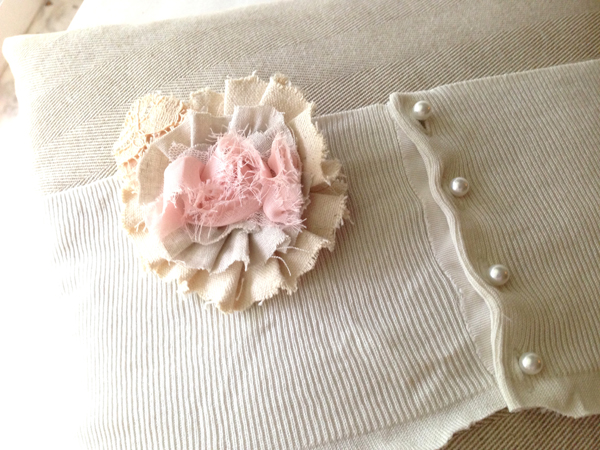
All done! You can add an embellishment if you like. I made a little brooch out of leftover scraps of duckcloth, linen and lace. Lovely!

Once again, a pretty re-purposed project. AND we are decorating on a dime! Yea! Oh! And if you want to make one of these sweet crocheted baskets you can find a pattern here!

Friday
Oct122012

Halloween: recycled pillows

This is part of our Halloween BASH.  See a listing of all projects so far at the end of the post.

*RECYCLED PILLOW TO THROW ON YOUR HAYRIDE

During our annual halloween bash, we always need "pillows" for the hayride. This year I decided not risk taking the ones off of my living room sofa because last year they were covered in caramel corn by the end of the ride.

Instead I made disposable pillows stuffed with newpaper. I liked the reverse side of my burlap after painting it - it looked spookier, so I used that instead.

You can learn to make twisted rosettes here.

Are you making Spooky or Pretty? Either would be great!


Other Halloween BASH Projects:

Spooky Books

Halloween Sweet and Spooky $1 Mirrors

Halloween Tags

Halloween Wreath

Halloween Treat Stand

Halloween Treat Bags

Enjoy!

Friday
Jul272012

newsworthy: somerset home

I T  I S  T O U G H  T O  P A R T  W I T H  E V E N  S M A L L  S C R A P S  O F  L O V E

Hundreds of tiny scraps of love. Scraps that were left over from each and every project that I had created in the years past. Outdated and too small to matter I was faced with tossing a jar full of memories. As I sifted through the proverbial refuse of project after project, I found myself smiling at the  flashbacks that these tiny bits of cloth held for me. In the end I could not put them in the trash. Instead, they found a new home that I could love. Unhemmed and scattered - a swirling ball of sweet recollections.

A pillow of reflection.

A N D   E V E R Y   M E M O R Y   W A S   W O R T H   K E E P I N G !


Sunday
May222011

Bedroom Beauty Continued

...Well I did hang the piece of ironworks this weekend, but it didn't quite fill the available space as I had hoped...I still like the simplicity of it though...The piece itself is just so pretty! I also made myself a shabby hooked heart pillow and replaced the rosette satin pillow for a time!