Roben-Marie Smith

Roben-Marie Smith


THIS AND OTHER  PRODUCTS AVAILABLE AT

       IS A REGISTERED TRADEMARK


 sandi-keene

Roben-Marie Smith

Blog Index
The journal that this archive was targeting has been deleted. Please update your configuration.

Entries in live the repurposed life (69)

Friday
Jul052013

tutorials: chalkboard wall art

I am sharing an easy tutorial today! Chalkboard Wall Art.

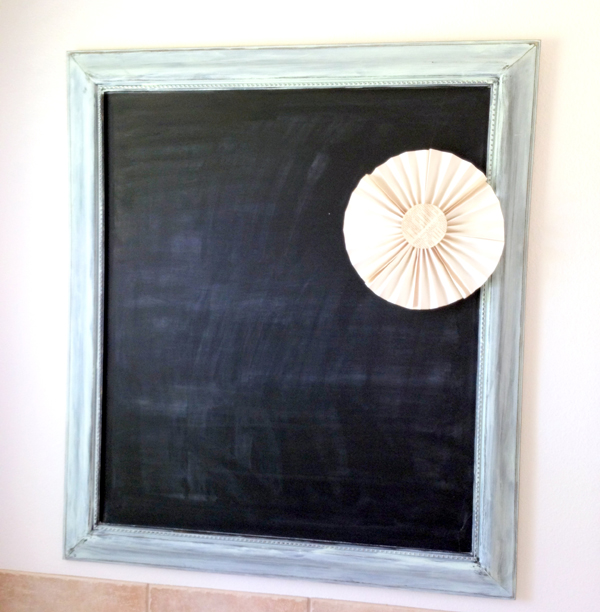
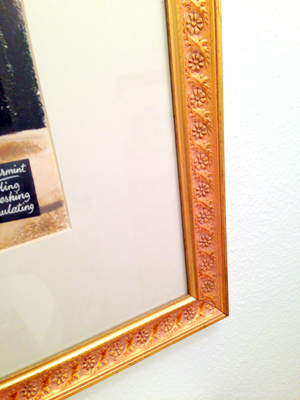
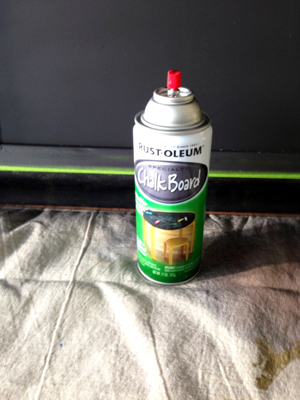
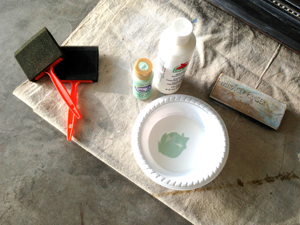
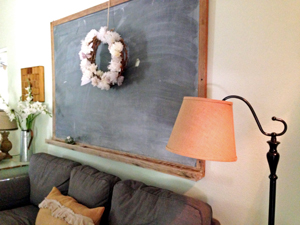
This pretty chalkboard is so easy you can make it in just a few hours. To start with, just shop your home for a piece of framed wall art that you are not using or are ready to change up. Tape off the frame and grab some chalkboard spray paint. I like to use Rust-Oleum because it covers so well and doesn't seem to drip.

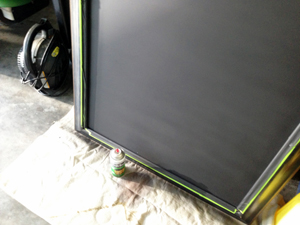
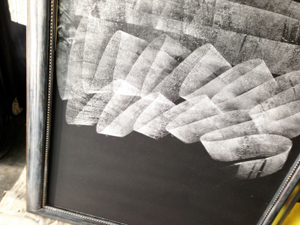
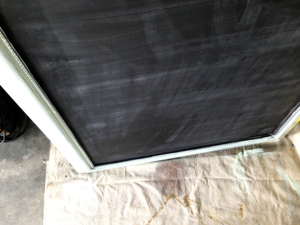
Next I spray the glass of the wall art according to the directions on the paint you are using. The hardest part for me was waiting in between coats, but it is important to follow this step. I sprayed two coats. Once your final coat is dry you will need to season your chalkboard. To do this you simply rub the entire surface with the a piece of chalk and then erase it.

After I seasoned my chalkboard I took the painters tape off and mixed up some craft paint to spruce up my frame. I mixed white and mint green to get a pretty coppery green color. After I finished painting, I immediately sanded the entire frame lightly.

Waaalaaa- you are done! This is a super easy way to change up your wall art while only spending a few pennies on supplies.

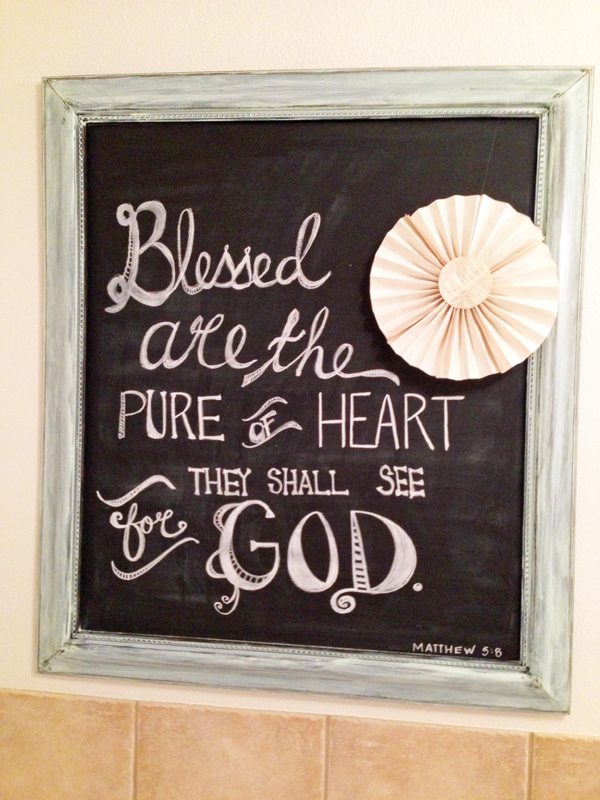
Easy, cheap and re-purposed!

Monday
Jul012013

21 secrets: christmas in july SALE!

Yea! Summer is in full swing! I hope that you all have been making time to learn and create! To make things fun and offer some freebies - 21 SECRETS is going to be on sale for just $49 this month! Please read all about this exciting and informative workshop, featuring myself and 20 other artists. A year long, self paced workshop, 21 Secrets is packed with new techniques, exciting projects and amazing instructors. READ ALL ABOUT IT HERE. WANT TO SIGN UP? YOU CAN DO THAT HERE!

Watch this sneak peek video to see what I am teaching! Have fun creating!


Tuesday
Jun252013

storage worth stealing: re-purposed photo carousel

I have started a little ongoing photo project, and with it a bit of organizing. Don't you just love this thing?! It's a photo carousel - intended for displaying your favorite photos, but I needed it for something else.

  Well, I am finally getting caught up on some memory keeping. That's right - good old fashioned scrapbooking. I am behind in this effort and with my budget for the year in full swing I am on a mission to get this project rolling- but more on that later. This is an image of what usually happens when I get on a "week-long-catch-up-on-this-project-roll."

This makes it tough to get things done efficiently because I am forever digging through the piles to find the perfect embellishment, letter or paper tag. So I started shopping my home for storage to organize these pretty little things. After a little digging, I found my old 7 gypsies Photo Carousel and emptied it of a summers worth of miniature layouts. After transferring these to an album I sorted all my favorite embellishments and organized them into the carousel. Now I can easily get to everything I need and waalaa! - storage worth stealing for my little things.

This is the perfect storage solution to my problem. It is small, portable, and easily revolves so I can find just what I am looking for in a matter of seconds. Now my work area looks like this - yea!

I love it - and more importantly, I re-purposed something I already owned, so I am staying on budget. Perfect!

Monday
Jun172013

tutorial: sweater band pillow

I know I have been absent lately, but summer is here and that means the kids are home and projects are in motion. You might have read here that I am in the middle of a bedroom makeover - part of decorating on a dime, shopping your home. In keeping with that I am making some new pillows for part of the redo. This one  is my favorite so far!

By the way - this is a sneak peek at part of the bedroom redo in progress...more to come soon. This pillow was super easy and fast. Here's how you can make one. Gather your supplies.

How much you need of each fabric will vary according to your pillow insert. Mine was 14" square. This was a quick and unorthodox way to make a pillow cover so tweak it to your needs as you see fit. You will need a long rectangle of fabric. One that will fold over and cover your pillow, twice. HEM SHORT ENDS OF FABRIC FIRST. Next, lay out your long rectangle of fabric and place your pillow just off center. Fold fabric over and line up sides and pin. Your pillow now looks as if you stuffed it into an envelope. Fold second end of fabric over, line up sides and pin almost all the way to the top, leaving just enough room to slip pillow out. This is an extra step to ensure our pillow flaps look good. Feel free to skip it if you have made one like this before.

Don't sew yet. Next grab your burlap and fold a rectangular piece in half once and then again. This piece will need to be as long as your outside facing pillow flap. Pin and stitch down each side.

Carefully remove pins (you will have to repin later, but this ensures are flaps are positioned correctly) and pin your finished burlap strip to one short hemmed end of your fabric. Next reposition your pillow and repin with RIGHT SIDES FACING. It should look like this so far.

Fold second flap over (this one should have no burlap edge) and line edges up. Pin one side and carefully remove pillow insert. Pin second side and stitch up both sides, being careful to reinforce where your two flaps overlap.  Turn right side out. This is what you should have now.

Next take your sweater and cut the bottom band off, keeping it as wide as you would like. My sweater had a ribbed band and so I had a nice guideline to follow, making it approximately 5 inches wide. Be careful when cutting to cut the exact amount of buttons and buttonholes that line up.

Now stuff your pillow insert into your new pillow cover and button your sweater band around it. I used the burlap as a guide, leaving that showing on the back for contrast.

All done! You can add an embellishment if you like. I made a little brooch out of leftover scraps of duckcloth, linen and lace. Lovely!

Once again, a pretty re-purposed project. AND we are decorating on a dime! Yea! Oh! And if you want to make one of these sweet crocheted baskets you can find a pattern here!

Thursday
Jun062013

In my house: bedroom redo

...I get a wild hair once in awhile. Okay, often. I get a wild hair often. What else can I say? Stay tuned...

Thursday
May302013

on the worktable: more scraps & new bags

Collected a bunch of new scraps and busy working on a whole lot'a sewing this week!


Thursday
May232013

tutorials: recycled coupon organizer

I love coupon organizers. They are the lap dog of file storage and you can never have enough of them. I have been on a kick to organize my collage papers as of late and lo and behold all of my coupon orgaizers were being used for something already - what? I didn't have any extras on hand, but what I did have on hand was a stack of lunch bags. School will be out (YEAAAA) in a few weeks so I could afford to swipe a few for this project. Plus I could recycle some old papers too!

You also will need some pretty cardstock or paper- I used some vintage wallpaper I had in my stash, a piece of chipboard, a ruler, bone folder, paper trimmer, scissors, adhesive or hot glue, an eyelet and a barbed elastic loop or rubber band.

Step 1. Fold lunch bags into thirds, accordion style. Flatten each crease with bone folder for nice edges.

Step 2. Measure width of your folded bag and cut one thickness of bag to that width. Fold and crease, accordion style, until you have created enough "ditches" for each fold of your bag. This will be for the bottom of your coupon organizer. Measure the height of your bag and repeat, creating two folded pieces- one for each side of your coupon organizer.

Step 3. Apply a line of adhesive in crease of each "ditch" and carefully place each fold of your bag in the ditch.

Step 4. Repeat step three for each side of your organizer.

Step 5. Measure and cut your chipboard to make a cover for your coupon organizer. Allow a 1/4" on either side. You will want your cover to fold over the top of your organizer, covering it completely.

Step 6. Cut pretty papers to cover both sides of chipboard. Attach them using adhesive or you can stitch them on like I did.

Step 7. Add paper to the front facing bag of your organizer to pretty it up. You can stamp a word or add a small embellishment if you like.

Step 8. Adhere back facing bag of your organizer to the lower portion of your inside cover. Use a strong adhesive or hot glue.

Step 9. Fold cover over and position mark near bottom center of front cover flap. Punch hole, add an eyelet and your elastic loop or rubber band. Add embellishment to front cover if desired.


I think I will have fun filing my collage papers in this pretty and portable, recycled organizer!

Tuesday
May212013

in my house: living room redo part 2

So - I am finally ready to share my Living Room with you. Back in February I posted part 1-  what prompted me to redo my living room. I know it took me two months to get back to this, but I wanted it to be complete when I shared it with you again and with the exception of the finish on my coffee table it is all done!

Two items on my BUDGET BOARD were my intended focal point and grounded the room perfectly - this furniture and my antique chalkboard. I gave my old toss pillows a face lift with burlap & duckcloth shams, adding linen ruffles and medallions. The wreathe is one I made with recycled materials.

I tackled the dark laminate tv cabinet with one coat of this primer and two coats of this awesome paint which I had tinted to Natural White. Once dry, I sanded the cabinet roughly with an electric palm sander, creating deep grooves and rounded edges.

I loved the gray with the hard wood floors, so I opted to tie in a few antique pieces. I gave an old dresser a new coat of my favorite wax in Natural, and it now serves as added storage for games, coasters, and blankets. An oversized library table gets the same treatment and houses school and kids arts and crafts supplies.

I don't like things to be "matchy matchy" so I tied in a few old chippy painted pieces as well. I am in total love with this green side table. It just so happened to match my walls perfectly - which are painted a very pale shade by Ralph Lauren called Killington Traverse. This little round beauty still shows signs of the original floral tromp de l'oeil design visible on the table top surface.

I went ahead and bought the wooden lamp base at Target but found my burlap shade at Wal-Mart. The floor lamp also came from Wal-Mart. I just swapped out the original shade for this one.

 Because my Kitchen and Living Room are basically one giant room, it was mandatory that they tie together seamlessly, without being exactly alike. I was able to achieve that with color. The kitchen cabinets are a coordinating shade of white and the antique gold curtains picked up the warm hues of the wood and burlap. I like the cohesion this rug from Ikea gives the entire room and since my kids love to hang out on the floor I made two oversized floor pillows using duck cloth and left over linen and ribbon scraps from Christmas projects.

The small things on my BUDGET BOARD were easy. Metal trays and vintage ice buckets were picked up for pennies in local shops and at goodwill. Grainsack material covers a recycled oversized pillow. I had fun embellshing it with burlap and a hand crocheted flower with a vintage bling center. Books and more vintage trophies filled with flowers line the cubbies on the tv cabinet and giant metal stars I lugged back from PA years ago got a new coat of silver paint and hang on the walls.

I love it. That is a surefire way of saying I will tweak it down the road, no doubt, but I do love it.

Sunday
May192013

my style: sparkle mod podge

I just have to start by saying what hundreds of other artists are saying out there - "mod podge rocks." Seriously. There is even an entire blog devoted to mod podge called just that - MOD PODGE ROCKS. It is filled with ideas for crafters of all levels using mod podge as a medium. I know that here in Florida it gets a bad name because of the humidity - but trying it on a different base may be all it takes to change your mind.

I admit - I have struggled with using it on chipboard and paper at times - but the more I work with it, the better I get a feel for it. I am really in love with it lately and have learned that I can use it on anything. Like this beautiful art journal I created for a friends birthday.

I created the base out of canvas. In the process I began painting on the canvas. I really liked the way it was looking, but it was lacking something. It needed a pop of something, that in this case, color wasn't giving me. I decided to try smearing on a coat of SPARKLE MOD PODGE. The recipient of this gift likes bling and so I knew she would love the glittery look. You could use matte or gloss finish as well.

When I was creating the cover of this journal I did all of my painting and stitching first, then I added a single coat of SPARKLE MOD PODGE over the top of all the exposed canvas areas, covering the paint and stitching alike.

I love the feel of this journal now. And it is not sticky. NOT. ONE. BIT. -and I love the pliable stability it gave to the canvas. The added sparkle gave it a pretty zing too! So - if you haven't played around with mod podge lately, I would give it another go. The perk for me? The price tag!

I created this project on my own and the makers of MOD PODGE, PLAID CRAFTS are not paying me to advertise their product. I just love it, so I thought I would give them a shout out!

Friday
May172013

on the worktable: hooked on scraps

I know I have posted several times on the love of using scraps of fabric but here I am again. I just can't bear to part with them. Just because they are small doesn't mean they aren't beautiful or useful - right? This time I paired that love with another favorite of mine. Rug hooking. What I got was an unexpected surprise.

Using a blend of fibers, hand dyed cottons, wool, tulle and more this bag turned out to be a textile lover's dream come true. Chunky, lofty, and just plain yummy. In rug hooking I take special care to vary the loft of the project, giving it added depth. I did the same here and this created the added bonus of shading- bringing out the vibrant color of the bag.

A reclaimed quilt block and vintage style spray made a perfect closure for the bag. I love the charm of the floral and tulle - a throwback addition to the funkiness of the modern hooked look. Touching this bag is wonderful!

Now can you see why I can't throw all those scraps away?

Page 1 ... 2 3 4 5 6 ... 7 Next 10 Entries »