Roben-Marie Smith

Roben-Marie Smith


THIS AND OTHER  PRODUCTS AVAILABLE AT

       IS A REGISTERED TRADEMARK


 sandi-keene

Roben-Marie Smith

Blog Index
The journal that this archive was targeting has been deleted. Please update your configuration.
Thursday
Jan232014

sari ribbon place marker

If you are participating in The Documented Life Project and are anything like me, you may be having a hard time leaving your planner or journal alone!

As I was creating challenges over the past few weeks, it occurred to me that I needed a longer place marker. Because my book is so chunky I knew my sewing options were limited. Here is what I came up with ----->

I grabbed some beautiful recycled sari ribbon a pal gifted to me, and some colorful thread.

Next I moved the detachable arm piece of my sewing machine out far enough that I could rest my planner on it. I opened my planner to the center and rested it on the arm, stretching the original place marker out as far as I could.

I opened the sari ribbon up and wrapped it around the end of the original place marker, getting as close to the book as possible. I secured it with a straight pin until I had it under the foot of the machine. Once under the foot (it will move a little) I lowered the foot and removed the pin. I stitched back and forth a few times to secure the two markers together. Moving downward from my stitching,  I opened the sari ribbon and wrapped it around the original marker.

Once secured, I stitched the sari ribbon, rotating from horizontal to vertical stitching every few inches.

Lastly, I trimmed the ribbon and threads. I added a pretty bead,  knotting the ribbon just below it a few times until secured. If I need more length as the year goes on, I can undo one or two of the knots and easily make my marker longer.

Now my planner has a pretty place marker that can handle the bulk of my book! I love it!

Want to make your place marker longer or prettier? This was an easy and FREE project. Just dig through your stash and grab a piece of ribbon or colorful twine and stitch away. Don't sew? Use a tacky fabric glue and set aside to dry overnight!

READ HERE -----> to see how I added a removable zipper pouch (in about five minutes) to my planner here!

READ HERE TO LEARN MORE AND JOIN ME IN DOCUMENTING YOUR DAILY LIFE! Enjoy!

Tuesday
Jan212014

15 minutes of mixed media

This week's 15 minutes of mixed media challenge turned out even better than I had hoped. I love the colors.

This week I started with a ghost print of a gelli print. This was a print that was already in my art journal. It gave me a slight edge, as starting with a back ground will do. I like it. Sometimes it is a great springboard for color and definition on a page.

Having backgrounds at the ready in your journal is a simple way to add layers to your 15 minute challenge as well as perserve supplies. I never wipe my gelli plate to clean it. I always keep printing until all the paint is depleted. This makes beautiful ghost (or light) prints. I also like to take extra paint off of the palette and swipe it on the page, smearing it out from the center as I go. To do this I like to use an old credit card or a scraper.

Here is the short list of supplies that I had on hand before I started the timer. Remember, having just a few supplies at the ready saves valuable time when the clock is ticking! *5 paint colors (just run of the mill cheap craft paints. I would list the colors, but most of them are so old the labels are worn off) *sticky note tabs *permanent marker *black and white paint pens *glue stick *scraps of painted deli paper *stamp *stamp pad *embosser (to speed up the drying process in between layers) *dylusions blue spray ink

Setting the timer is certainly a challenge on most days, but it gets my creative mind racing. I usually begin a bit harried, but by the time the buzzer rings I am in a flow. Remember- if you are joining in on this challenge and setting the timer- THIS IS YOUR ART JOURNAL. Depending on your schedule and what goals you have set for yourself, YOU DON'T HAVE TO STOP THERE. Keep creating. If nothing else, you will have spent 15 minutes setting up a base for your layout. I choose to stick to the 15 minutes so that I can post honest to goodness 15 MINUTES OF MIXED MEDIA ART JOURNAL PAGES.

If you have started playing along I would love to hear about it. Love how your art is turning out when you set the timer? Send me a few photos via the contact page- I would love to see them! Enjoy!

Monday
Jan202014

currently: ten things

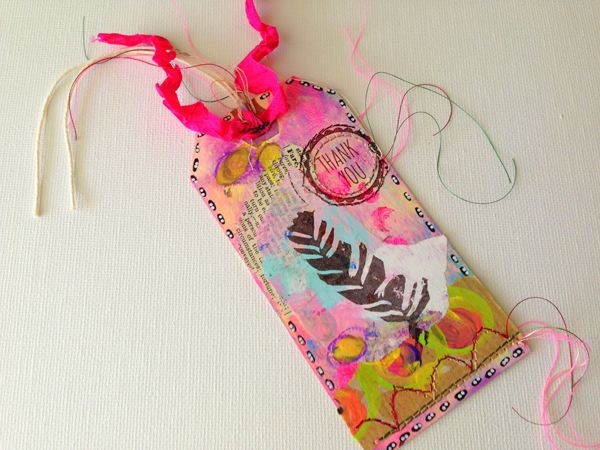
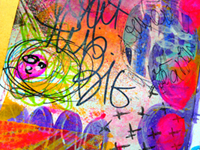
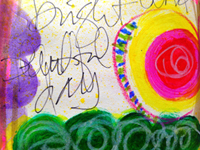
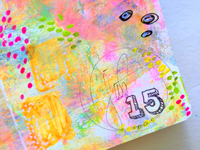
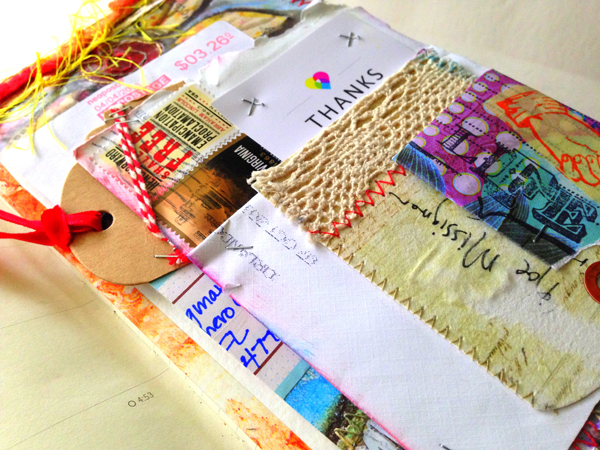
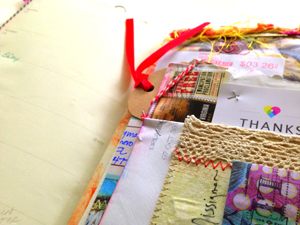
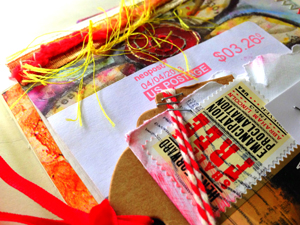
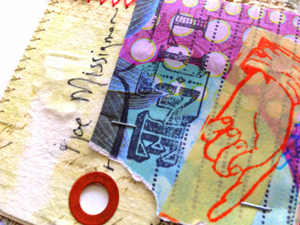
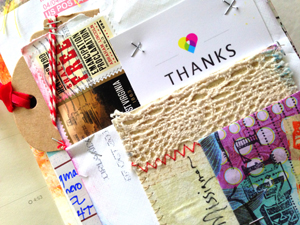
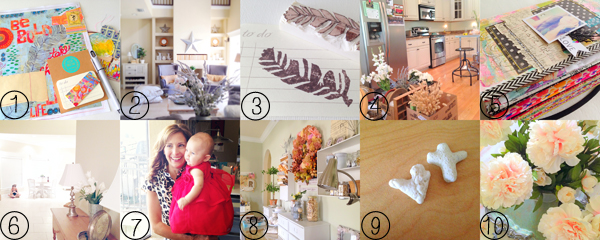
1. Making mail art. I have been using some prints of my favorite canvas BE BOLD.  "Be Bold. Take a chance. Live life right!" It reminds me to hold my head up and take a chance on life. I like spreading that message and what better way than through pretty mail art. I have also been adding in some yummy vintage grocery stamps from the sweet and talented Michelle and some cool retro postage stamps from my fellow Art to the 5th pal, Barbara.

2. Trying to make a new house our home. I am trying to make a list as I go. For every negative I try to list a positive. NEGATIVE: My laundry room went from the size of a small bedroom to the size of a small closet. I lost five cupboards, two countertops and room for three drying racks and an ironing board. POSITIVE: My new laudry room has a window. A beautiful, bright, sunny window. I can see the tree line of the lake from that window. I can see the sky and thank God for all His blessings from that window. I am making progress.

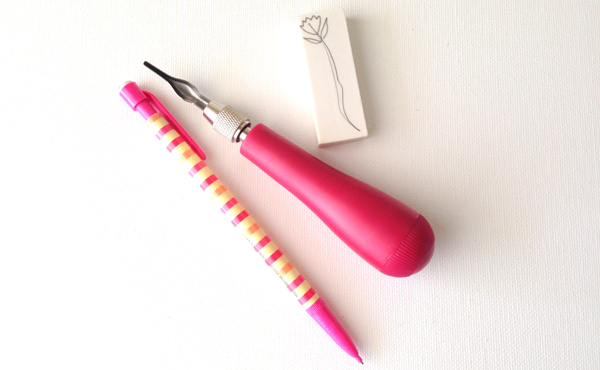
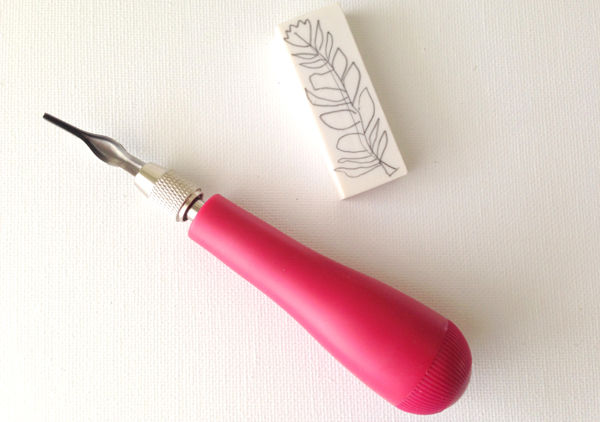
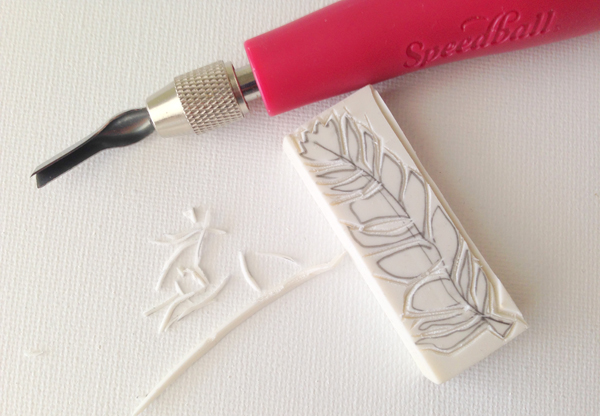
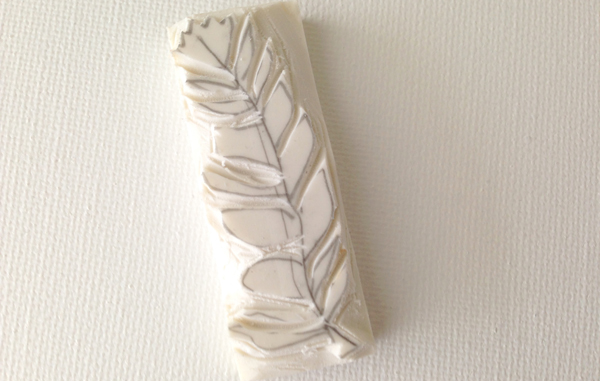
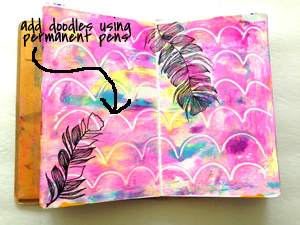
3. Carving some stamps. I love feathers and wanted a feather stamp. I had some erasers and the tool. What I ended up with is something more akin to a leaf or branch, but I like it. I haven't had much time in the studio, so ten minutes of carving filled a void. I can't wait to carve some more. I need the practice.

4. Packing up the last few loads.  A person really never knows just how much they have accumulated over the years until they go to pack it all up. I did a more than thorough job of purging and still had more than I could imagine. I gave it all a second look with this thought in mind. "Is this just a THING I have collected or is it something that has meaning in my life. Does this object have a purpose or does it add value to who I am as a person?" I was able to donate several more boxes of perfectly good "stuff" to the church this way. And then I had a thought. If I could get rid of so much excess physical baggage in my life, then I could do the same for mental luggage I have been carrying around as well. I choose to leave those thoughts and feelings that weigh heavy on my heart behind this year, hopefully lightening the load on my mind as well.

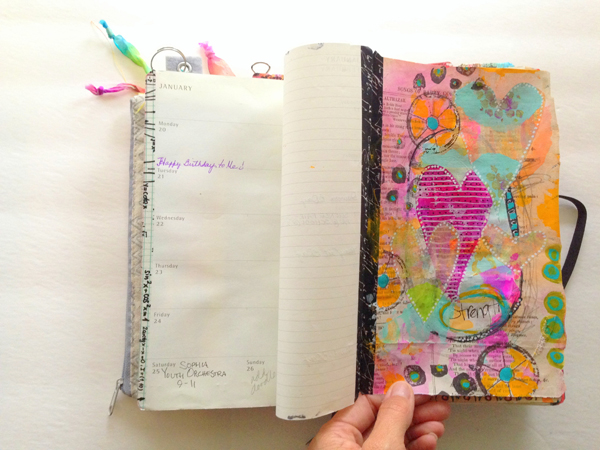
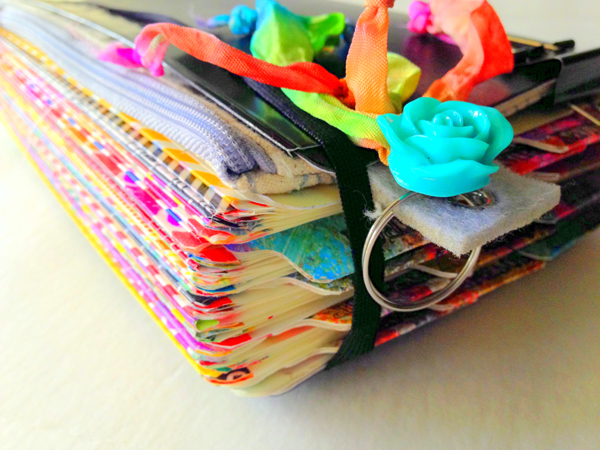
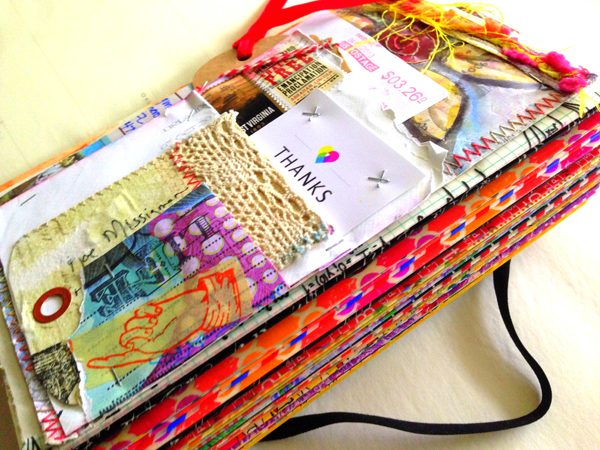
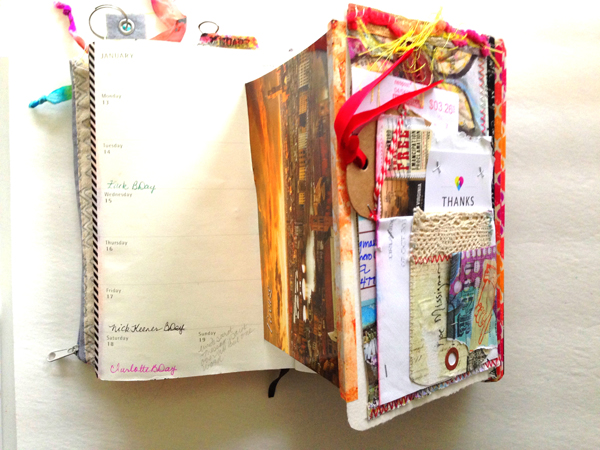
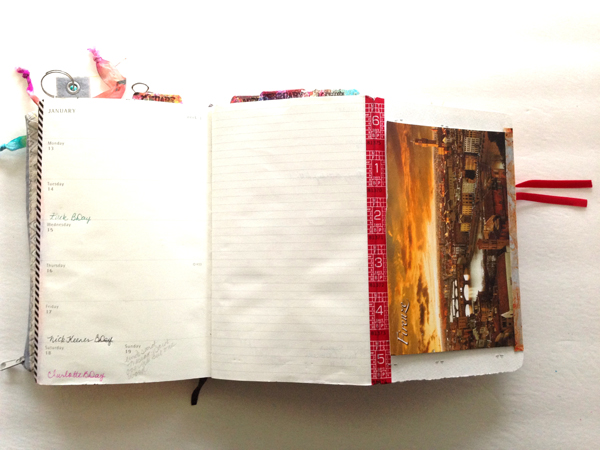
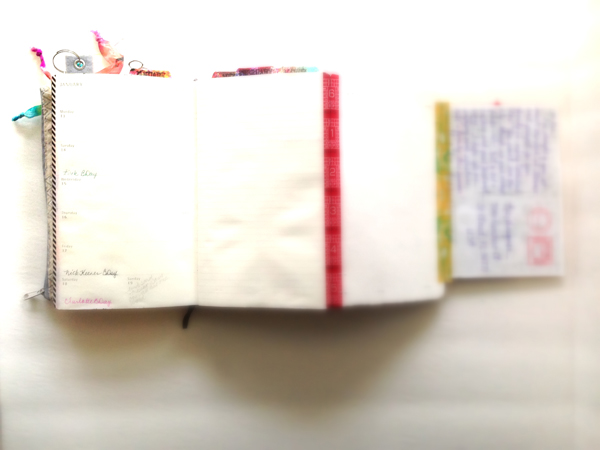
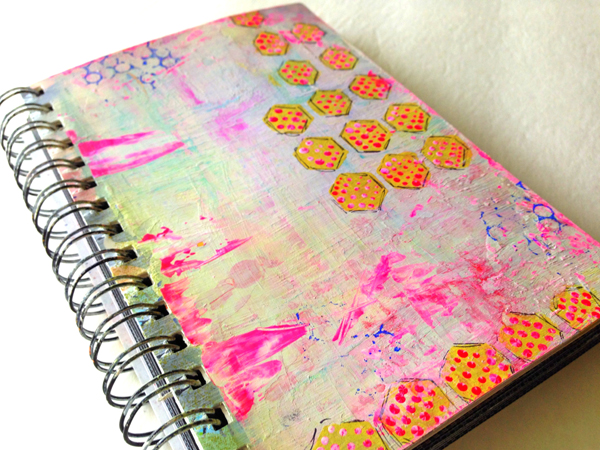
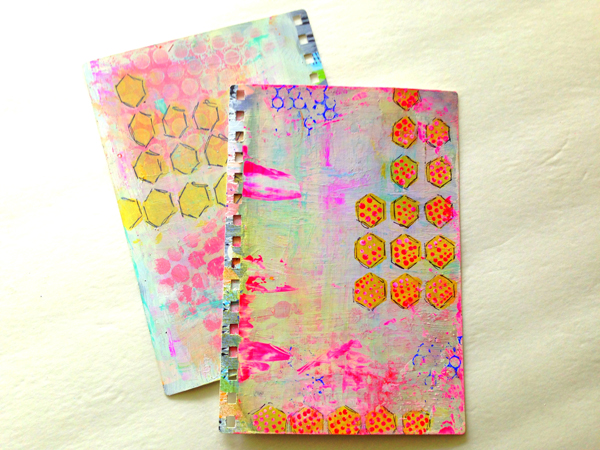
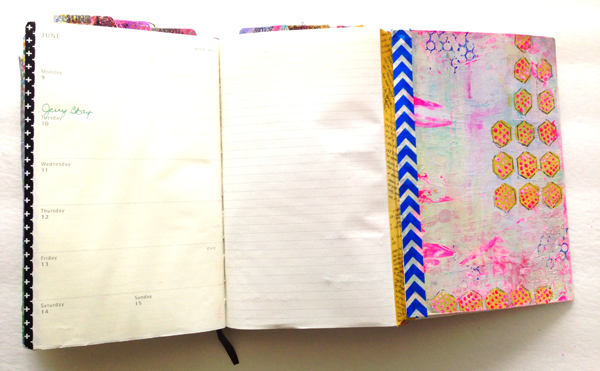
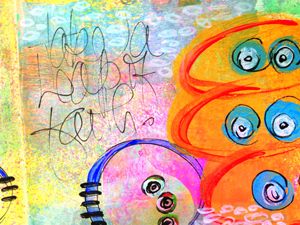
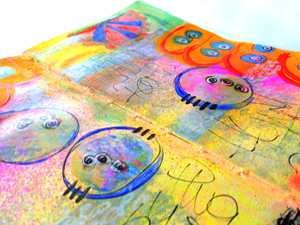
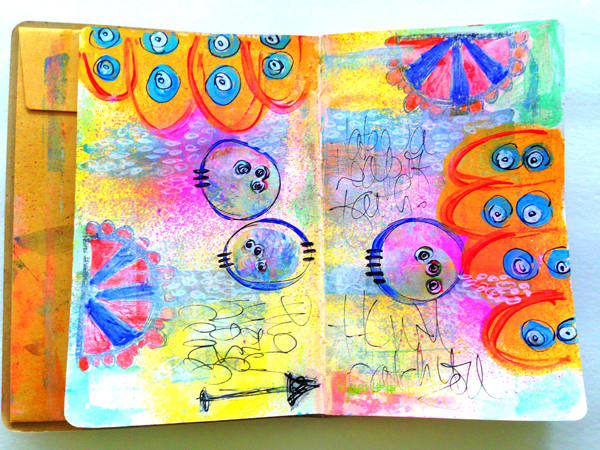
5. Creating challenges for The Documented Life Project. I have found this to be a fantastic way to keep track of all the little things in my life, as well as for making time to add a little art to the daily grind. You can read more about the project here. This months' challenges introduced us to the New Year as well as to each other. February is fast approaching, and with it, a whole new set of fun challenges! I hope that you will take the time to check it out and document alongside of me and the rest of the Art to the 5th.

6. Playing with light. I have been taking a few moments lately to play with natural light in photography. I love the way it can tell the story of a photograph. This new home of ours is filled with windows. The selling point for me. Windows galore. No longer will an indoor photo be off the table.

7. Appreciating family. For every single thing that you think is going wrong, something good comes out of it in the end. I lost sight of what real family was for awhile. I was so caught up in worrying about what everyone else would think about me, us, that I forgot that I was not in control of the big picture. God was. He leads my family. And while I may not always have the tightest grip on what that plan is I know that I trust Him. My family might not be picture perfect in alot of peoples eyes, but it is the most beautiful thing in my possession and I will not lose sight of that again.

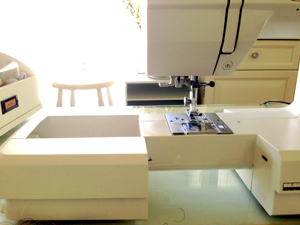
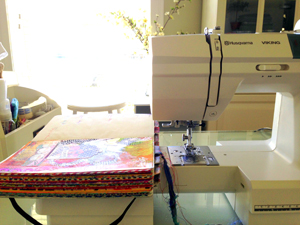
8. Putting my studio back together again. Like most of the other rooms in this house I lost a lot of space in the studio. In addition I lost a walk in closet and two full walls of space. I did gain two more beautiful windows and a view of the front porch. The lighting is beautiful and the layout works. I am learning that by trying to follow the layout of the old studio I make the most progress. With a few small revisions and a truckload more of purging I think it will work.

9. Amazed at how God continues to speak to me. I have had so many prayers answered lately that I can not find the words to describe my thankfulness. Loud and clear His answers come. Most recently He gave me two tangible reminders in addition to my anwered prayers- a beautiful heart rock to add to my collection and this lovely coral cross. Sometimes we just need a little reminder to look up. For me, all it took was a quick look down.

10. Wishing I could have a real live peony bush. I love these flowers. To me they are just so lovely. I have this pretty "silk" version, and they make me happy just to look at them- but I long for the real thing. I wonder if they would even survive the brutal temperatures of the Florida sun? Is there an indoor version? Do they like the shade? I guess I have some research to do.

Sunday
Jan192014

go to paint and ink colors

This little post is in response to the dozens of requests I have had about my favorite paint colors. I have so many - but these are the few I seem to go most often!

In order from top to bottom, left to right ------>

LIQUITEX INKS - pyrrole red. quinacridon magenta. cadium yellow light hue.

GOLDEN ACRYLIC PAINTS- teal. quinacridone red. diarylide yellow.

ASSORTED ACRYLIC CRAFT PAINTS - I like the glossy colors too!

FolkArt- neon orange. Craft Smart- ocean breeze. Craft Smart- neon pink. Apple Barrel (gloss)- dandelion yellow. Craft Smart- neon yellow. Craft Essentials- apple tart. Craft Essentials- neon purple. Plaid Shiny- ultramarine blue.

GOLDEN HEAVY BODY NEON ACRYLICS - Fluorescent Green, Fluorescent Chartreuse, Fluorescent Orange, Fluorescent Red, Fluorescent Pink.

I hope this helps. As I choose new favorites I will post them here to share with you! Happy Creating!

Saturday
Jan182014

the documented life project- weekly challenge 4

Welcome to Week 4 of The Documented Life Project!

January 19 Challenge - Write a Secret Message. Paint over all but one key word.

This was a great challenge for me this week. I have had a lot of feelings running through my head that needed to be written down, but not necessarily rehashed every day. Somehow the process of painting over it all helped put it to rest.

Leaving just one encouraging word peeking through turned a discouraging thought encouraging. My key word for this challenge is STRENGTH. A perfect word to pair up with my One Little Word for the year, LOVE. These two words are a written reminder of where I need my focus to be in the coming months. If I remain strong in all things, and love what I do and who I am with, I will have a wonderful year.

I used a book paper collage I created on a trip with my Art to the 5th pals in Grand Cayman last September as the base of my tip in page for this week's challenge. I have been saving it for something special. Since the whole idea for THE DOCUMENTED LIFE PROJECT began to form on that trip, thanks to the ever talented Lorraine Bell, it seemed fitting to add it into my planner for the year.

I added my secret message to the backside of this tip-in collage, stitching on a stamped message telling you where to look on the front of the page.

The bold colors seemed to go hand in hand with my word STRENGTH. I added lots of deli paper shapes, adding pops of color through black washi tape and paint pens. A wheel shaped stamp is the latest addition to my favorite recycled tools in the studio, and is an empty thread spool!

I plan on doing some extra special stuff to the date side of the page this week. I had a pal tell me today that I needed to celebrate myself, (with a big birthday coming up) and so I think I will paint and doodle and ink and stitch away to my hearts content. Maybe I will make everyday a special day this week!

Looking forward to your interpretations of this week's challenge and can't wait to meet you back here next week!

 
You can find us:
*Our Blogs


Post your challenge response to your favorite social media and upload it to our Flickr group or Facebook group to share in the community of Life Documentors!

Thursday
Jan162014

i wanted to carve a feather stamp

Sometimes we don't always get what we want, but we might get lucky and like what we end up with.

So I wanted to carve a feather stamp. Feathers are my favorite thing right now, but...but it turns out that if you don't use your stamp carving tools for months you lose your touch. What I ended up with looks more like a leaf or branch of some kind, but I like it. I like the imperfections in each feather/leaf - not unlike in nature. If you want to have your own little imperfect feather leaf here is what I did ----->

1. Grab an eraser. I like the cheap ones from The Dollar Tree if you are just starting out. They aren't the best quality, but they come in a 3 or 4 pack for a dollar and are great for beginners.  I also like how they stay rigid when you go to stamp with them. You will also need a stamp carving tool. I use this SPEEDBALL set and love it. And you will need a pencil to draw your word or design on the eraser.

2. Draw your design. Don't forget to use tracing paper if you are writing a word or special design that will need to be drawn in reverse.

3. Start carving. Slow is key for me. This particular tool came with several cutting heads in the base of the handle. I used the smallest one for outlining my design first, then went back and carved out more with a larger, deeper cutting tool.

4. Finish off with the flat blade to smooth things out. My homemade stamps don't always look pretty when I am finished, but they stamp great!

Obviously I need to brush up on my stamp carving skills some more, but I think I will keep it. I like it's quirky shape and style. Here is what it looks like on a tag card project I did. Enjoy!

TAG CARD: gelli printed tag. painted deli paper scraps. book paper scraps. oil pastels. paint pens. machine stitching. thank you stamp from dollar bin at Target. my hand carved feather leaf stamp. recycled seam binding.

Tuesday
Jan142014

15 minutes of mixed media

Usually I post a finished art journal layout for my weekly 15 MINUTES OF MIXED MEDIA, but this week I wanted to share something a little different. If you are setting the timer at home, this will help give you an edge when creating while the clock is ticking. The end result could be something like this --->

Many times when I sit down and set the clock, I start with a blank page. Other days I give myself a creative springboard in the form of a premade background. This can be as simple as a single color border or as complex as a gelli print covering the entire span of the page.

Starting with a background allows you to start building layers as soon as the clock starts ticking. Your 15 MINUTES OF MIXED MEDIA  will be more detailed when beginning this way. Here are a few backgrounds that are simple to create and will make a great starting point.

I like to have a handful of backgrounds completed in my art journal at all times. This way I can choose one that speaks to me when I sit down to create. Having premade backgrounds is also great for creating on the go! Here are some more 15 MINUTES OF MIXED MEDIA art journal pages--->


Sunday
Jan122014

the documented life project- weekly challenge 3

Welcome to Week 3 of The Documented Life Project!
January 12 Challenge - Add an envelope from your mailbox.
I am a collector of mail. I can't part with all of the beautiful mail art that I have been blessed with in the past. This was a perfect challenge for me!
I layered up a few of the most colorful, artsy samples I could find and stitched them to the page, in layers, creating little pockets.
I like being able to see some of my dear friend's handwriting when I open up to this page. It reminds me of happy times. I had a very special postcard that a pal sent to me from overseas that I wanted to incorporate.
I used some washi tape to add it in, so it could fold out- I can read my pretty sentiment this way.
I love the details, the color and the special meaning that this challenge offered. I loved this challenge!
Pretty little details!
Looking forward to your interpretations of this week's challenge and can't wait to meet you back here next week!
 
You can find us:
*Our Blogs


Post your challenge response to your favorite social media and upload it to our Flickr group or Facebook group to share in the community of Life Documentors!
Thursday
Jan092014

recycled tip in pages

Have you read about the crazy fun DOCUMENTED LIFE PROJECT ? Chances are, if you are joining in, you have a planner or journal from last year. This is a great way to upcycle part of that agenda or book and incorporate it into this years project. Here is the planner I used in 2013.

I love the painted covers and did not want to just throw this away. I decided to remove the covers and use them as tip in pages in my planner this year for the THE DOCUMENTED LIFE PROJECT. Just remove the front and back covers and trim to fit your new planne or journal.

I plan on adding these as a tip in page, meaning they will fold out. I use washi tape to attach them to an existing page in my planner.

Because these will fold out, I can use the opposite side for list making, journaling, doodling, painting and more. Yea!

See more ideas and read all the details on this FREE  year long project here and here! Enjoy!

Tuesday
Jan072014

15 minutes of mixed media

So this week my 15 MINUTES OF MIXED MEDIA challenge resembles a carnival ride. Not what I intended, but bright and colorful all the same.

I struggled this week. My base had no background, which always proves harder when the clock is ticking. I hurried and ended up with a bit muddier collection of colors than I wanted, so I overcompensated with bold stamps and bright colors in my second layer. Definitely a week I needed the embosser.

I did, however, remind myself to add some journaling this week. This is my weak spot. I like to keep the words inside, so writing them on a page of art is tough for me, and something I am working on.

I took a leap of faith on this page. I wanted to TURN the page on this one and I didn't. I let the clock tick and I kept working. I like the happy colors and bold shapes.

Here is my supply list for the week- things that were on the table when I started the timer. *yellow and pink dylusions spray inks *4 paint colors (the little acrylic craft paints) *black and white paint pens *permanent marker *scraps of deli paper *glue stick *scraper *embosser (to dry the layers) *paintbrush *stamp *stamp pad.

Sometimes we find in a challenge that even though it is not what we wanted or expected, we like it. Kind of like going to a carnival and getting on that scary ride. Sometimes it was worth the leap of faith.

Here are some more 15 minutes of mixed media art journal pages--->


Page 1 ... 3 4 5 6 7 ... 43 Next 10 Entries »