Roben-Marie Smith

Roben-Marie Smith


THIS AND OTHER  PRODUCTS AVAILABLE AT

       IS A REGISTERED TRADEMARK


 sandi-keene

Roben-Marie Smith

Blog Index
The journal that this archive was targeting has been deleted. Please update your configuration.

Entries in tutorials (34)

Monday
Jul012013

21 secrets: christmas in july SALE!

Yea! Summer is in full swing! I hope that you all have been making time to learn and create! To make things fun and offer some freebies - 21 SECRETS is going to be on sale for just $49 this month! Please read all about this exciting and informative workshop, featuring myself and 20 other artists. A year long, self paced workshop, 21 Secrets is packed with new techniques, exciting projects and amazing instructors. READ ALL ABOUT IT HERE. WANT TO SIGN UP? YOU CAN DO THAT HERE!

Watch this sneak peek video to see what I am teaching! Have fun creating!


Monday
Jun172013

tutorial: sweater band pillow

I know I have been absent lately, but summer is here and that means the kids are home and projects are in motion. You might have read here that I am in the middle of a bedroom makeover - part of decorating on a dime, shopping your home. In keeping with that I am making some new pillows for part of the redo. This one  is my favorite so far!

By the way - this is a sneak peek at part of the bedroom redo in progress...more to come soon. This pillow was super easy and fast. Here's how you can make one. Gather your supplies.

How much you need of each fabric will vary according to your pillow insert. Mine was 14" square. This was a quick and unorthodox way to make a pillow cover so tweak it to your needs as you see fit. You will need a long rectangle of fabric. One that will fold over and cover your pillow, twice. HEM SHORT ENDS OF FABRIC FIRST. Next, lay out your long rectangle of fabric and place your pillow just off center. Fold fabric over and line up sides and pin. Your pillow now looks as if you stuffed it into an envelope. Fold second end of fabric over, line up sides and pin almost all the way to the top, leaving just enough room to slip pillow out. This is an extra step to ensure our pillow flaps look good. Feel free to skip it if you have made one like this before.

Don't sew yet. Next grab your burlap and fold a rectangular piece in half once and then again. This piece will need to be as long as your outside facing pillow flap. Pin and stitch down each side.

Carefully remove pins (you will have to repin later, but this ensures are flaps are positioned correctly) and pin your finished burlap strip to one short hemmed end of your fabric. Next reposition your pillow and repin with RIGHT SIDES FACING. It should look like this so far.

Fold second flap over (this one should have no burlap edge) and line edges up. Pin one side and carefully remove pillow insert. Pin second side and stitch up both sides, being careful to reinforce where your two flaps overlap.  Turn right side out. This is what you should have now.

Next take your sweater and cut the bottom band off, keeping it as wide as you would like. My sweater had a ribbed band and so I had a nice guideline to follow, making it approximately 5 inches wide. Be careful when cutting to cut the exact amount of buttons and buttonholes that line up.

Now stuff your pillow insert into your new pillow cover and button your sweater band around it. I used the burlap as a guide, leaving that showing on the back for contrast.

All done! You can add an embellishment if you like. I made a little brooch out of leftover scraps of duckcloth, linen and lace. Lovely!

Once again, a pretty re-purposed project. AND we are decorating on a dime! Yea! Oh! And if you want to make one of these sweet crocheted baskets you can find a pattern here!

Thursday
May232013

tutorials: recycled coupon organizer

I love coupon organizers. They are the lap dog of file storage and you can never have enough of them. I have been on a kick to organize my collage papers as of late and lo and behold all of my coupon orgaizers were being used for something already - what? I didn't have any extras on hand, but what I did have on hand was a stack of lunch bags. School will be out (YEAAAA) in a few weeks so I could afford to swipe a few for this project. Plus I could recycle some old papers too!

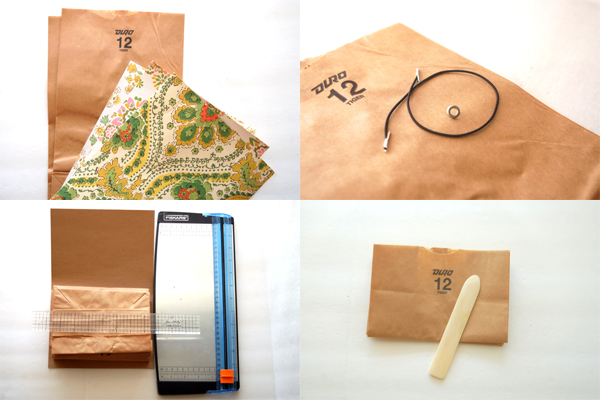
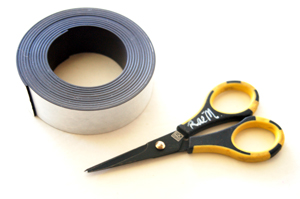
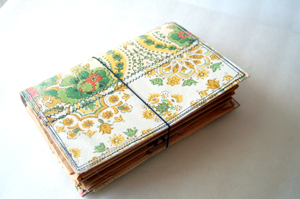
You also will need some pretty cardstock or paper- I used some vintage wallpaper I had in my stash, a piece of chipboard, a ruler, bone folder, paper trimmer, scissors, adhesive or hot glue, an eyelet and a barbed elastic loop or rubber band.

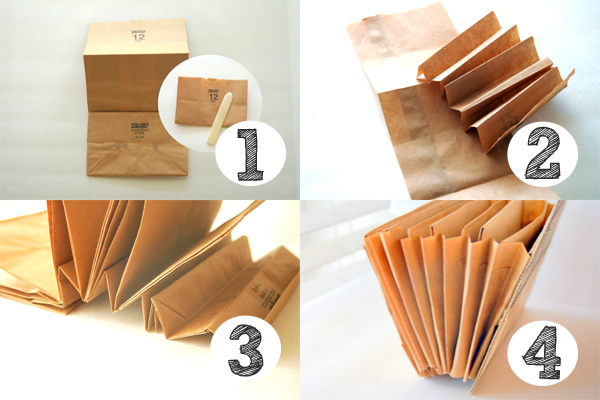
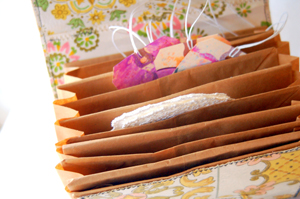
Step 1. Fold lunch bags into thirds, accordion style. Flatten each crease with bone folder for nice edges.

Step 2. Measure width of your folded bag and cut one thickness of bag to that width. Fold and crease, accordion style, until you have created enough "ditches" for each fold of your bag. This will be for the bottom of your coupon organizer. Measure the height of your bag and repeat, creating two folded pieces- one for each side of your coupon organizer.

Step 3. Apply a line of adhesive in crease of each "ditch" and carefully place each fold of your bag in the ditch.

Step 4. Repeat step three for each side of your organizer.

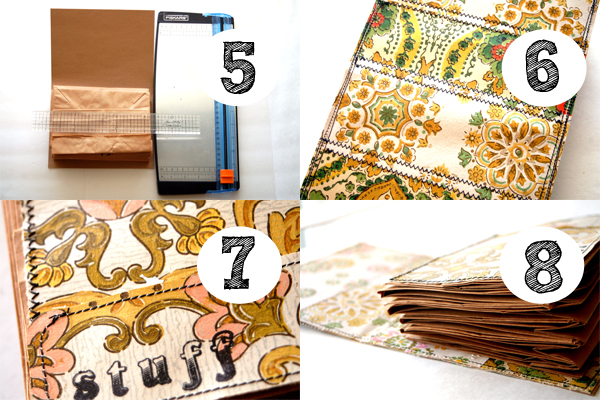
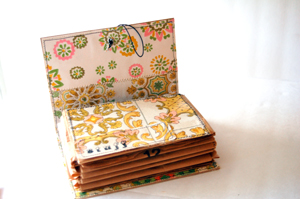
Step 5. Measure and cut your chipboard to make a cover for your coupon organizer. Allow a 1/4" on either side. You will want your cover to fold over the top of your organizer, covering it completely.

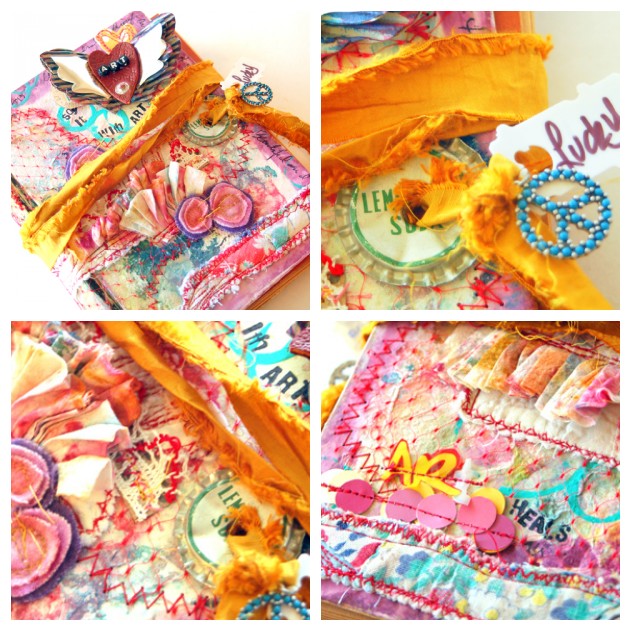
Step 6. Cut pretty papers to cover both sides of chipboard. Attach them using adhesive or you can stitch them on like I did.

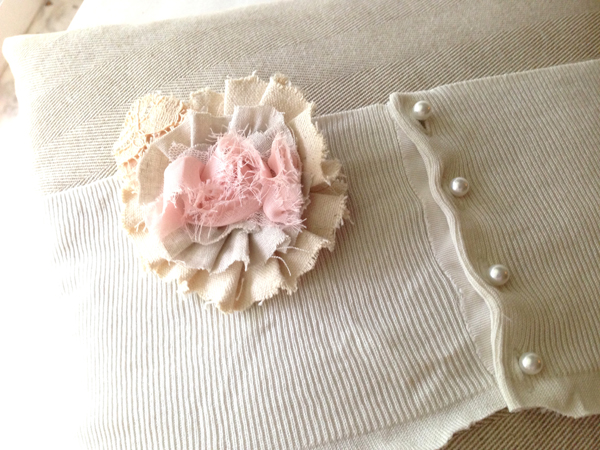
Step 7. Add paper to the front facing bag of your organizer to pretty it up. You can stamp a word or add a small embellishment if you like.

Step 8. Adhere back facing bag of your organizer to the lower portion of your inside cover. Use a strong adhesive or hot glue.

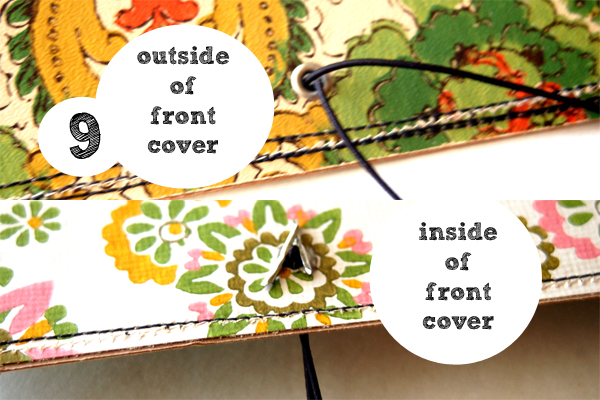
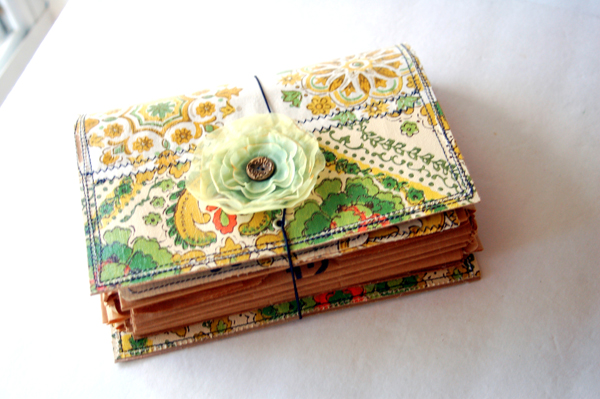
Step 9. Fold cover over and position mark near bottom center of front cover flap. Punch hole, add an eyelet and your elastic loop or rubber band. Add embellishment to front cover if desired.


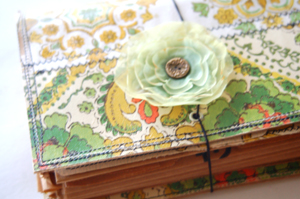
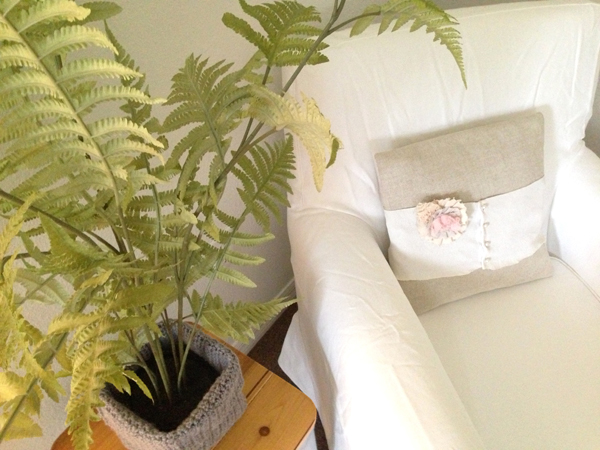
I think I will have fun filing my collage papers in this pretty and portable, recycled organizer!

Wednesday
May152013

something special: i appreciate you 

Teachers are the bomb. I know this first hand because I substitute teach and so I try to be one. A good teacher that is. It is a lot harder than it looks. They have to know and learn so much themselves, constantly updating their personal knowledge bank to keep our youngsters at the head of the line when it comes to education. And, more importantly, they love our children.

Even the tiniest of thank you's is appreciated by these hard working men and women. This year I was intent on sticking with my goal to use what you have so I came up with something simple that would allow me to use leftover papers and chipboard from a scrapbooking project the kids worked on last year.

FIRST: Gather your supplies.  FOR THE CARD: Buy some cute cheap thank you cards or create your own. I grabbed mine out of the dollar bin at Target or Michael's. You will also need some adhesive. I like to use EK SUCCESS 3D Dots but you can use anything. I also used some cute little vintage style party bag games. I bought these at my local Dollar Tree. And you will need some magnets or magnetic tape. I picked up some Kids Craft Magnetic Tape at Wal-Mart for super cheap. I also used a sheet of school themed scrapbook paper and some Crystal Clear Bags. I love these and use them for everything!

NEXT: Grab some numbers. I used recycled chipboard pieces from an old scrapbooking kit. You can use anything with a number on it, or you could print some out on the computer. Once you have your numbers, cut some magentic tape to fit and peel and stick to the back of each number, creating a miniature magnet. Next cut your scrapbook paper to fit your clear bag and slide it in, adding the number magnet on top. Seal the bag. Now adhere the party game to the front of your thank you card. Add a sentiment inside. Mine said-" Thank you for making learning so much fun!"

AND LAST: Let your child add a personal note to the card before stuffing it with a cute magnet. To your child, a teacher is a mentor and a hero. For the most part they love these people with all of their being. Let them say it in their own words. I promise you, teachers keep this stuff forever- I DO!

This is a really easy project that the kids can help with. And the best part? Your teachers will REALLY APPRECIATE your thanks!

Already have your Teacher Appreciation Gifts planned? This makes a great end of the year thank you as well!

A teacher affects eternity; he can never tell where his influence stops." ~ Henry Brooks Adams

Monday
Feb112013

tutorial: valentine banner

Here is a super easy, last minute Valentine tutorial, that you can do in under 15!

These are lovely as big banners hangng from your favorite artwork or slateboard and just as sweet in a miniature version on notecards!

1. Cut duck cloth into pendant shapes 2. Cut hearts out of felt or wool and stitch to center of each pendant 3. Stitch pendants to long strip of muslin. EASY PEASY!

Wednesday
Jan232013

tutorials: Valentine Canvas Magnet

This year for Valentine's Day I was looking for a new twist on the old. I LOVE making and sending Valentine's, but wanted something a little different. I decided that a cute magnet might be a sweet and REUSABLE solution!

Gather Supplies:

You can find miniature sized canvases at your local craft store. I bought a bulk package of 6 at Michael's Craft Store. Chances are you have most of the other items somewhere in your creative area - if not, you can find all of these at your local craft and hobby store as well. I had a few old refrigerator magnets laying around that I cut up and used!

When it comes to making more than one of anything, I like to do it in assembly line fashion, so first I globbed some gesso on each canvas and smeared it around with an old gift card, leaving some lines and texture. I ripped a small piece of book paper and placed it in the corner of the canvas and gessoed over it.I let these sit until the surface was dry to the touch.

Next I dipped a small paint brush in red and pink paint and dabbed it in random areas on each canvas. Once again I smeared it around with the gift card, moving both the paint and some of the still damp gesso around. Once this was completely dry I added a little more gesso to the top because I like all my art stuff to be chunky.

Next I took a sheet of book paper and folded it several times creating some thickness. I drew small hearts on it with a pink pencil and then stitched around the lines with red thread and cut them out.

Next I cut small circles out of scraps of white muslin. I did not measure these and made them shabby on the edges by pulling loose threads from around the edges. I stacked two of these and stitched the center.

Print out a cute saying and adhere it to your canvas, adding more gesso to disguise the edges as needed. Let dry. Stack and layer your hearts, flowers, bling and any other embellishments! Now just glue your magnet to the back and there you have it! Super SWEET and super cheap!

I loved the STUCK ON YOU saying since these little beauties were magnets!


Wednesday
Sep192012

Home Made: Clipboard calendar

I needed a calendar to keep track of upcoming projects, submissions, deadlines and blog posts.  Elise Blaha's post on blog content organization was great inspiration.

A calendar that was flexible in design was perfect for me. Here's how I made it:


Perhaps this is just what you need to organize your month!

Wednesday
Jun272012

tutorial: vintage look alike cakestand

                { I  L O V E  T H E S E  V I N T A G E  C A K E  S T A N D S }

...so I made my own.  F O R  $ 2 ! I went to my local Dollar Store and picked

up a glass dinner plate for $1 and a glass candlestick for $1. I already had

some great adhesive in the drawer so in just 3 minutes I had my beautiful

         {  V I N T A G E     L O O K     A L I K E     C A K E S T A N D  }

Make your own Vintage Look Alike Cakestand HERE!


Tuesday
Jun192012

tutorial: mirrored perfume tray

{  M A K E   T H I S   S W E E T  M I R R O R E D  T R A Y  F O R  $ 1  }

Hang this framed mirror for a touch of pretty anywhere, or use it as a

perfume tray, jewelry collector, or catch all for your vintage lovelies...

Tuesday
Jun052012

live the repurposed life: paper ruffled clutch

My Reclaimed Fabric Ruffled Bags have been such a hit on Etsy and in my Blog Shop, that I decided to share a quick tutorial on how to make a similar recycled version with you! Perfect for a quick gift or sweet as a party favor sack, my "go green" bags are quick, easy and a great way to use up that old newspaper, instead of throwing it away!

You can also find my Reclaimed Fabric Bags at the oh-so-beautiful House of Envy Boutique in Florida and the perfectly Vintage Hip Boutique in Alabama!